Pruning
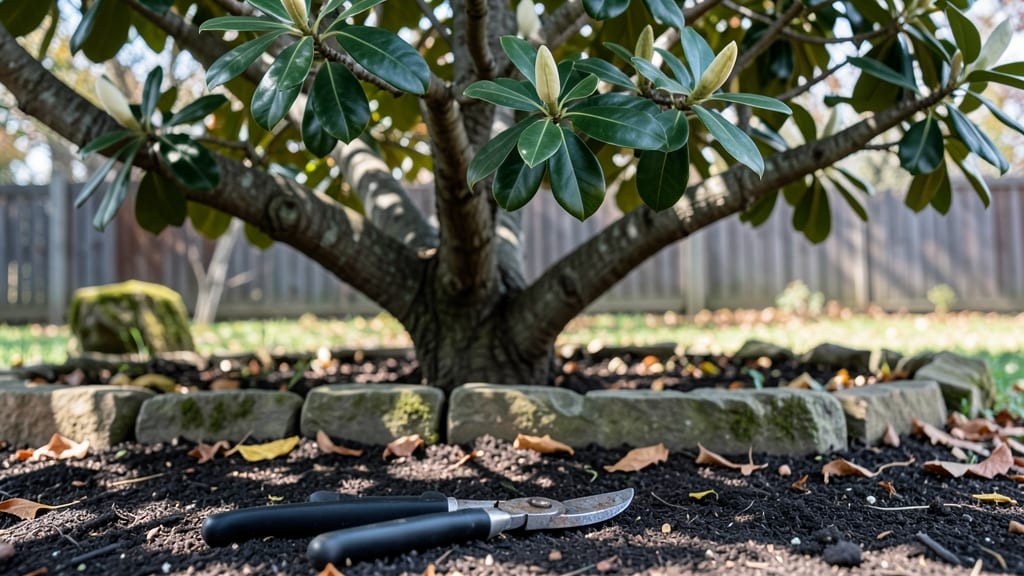
Magnolia tree cuttings can root successfully with the right timing and technique—here’s how to do it without the guesswork. 🌱 I’ve rooted dozens of magnolias this way, and the secret lies in selecting semi-hardwood cuttings in late summer when the tree is still active but slowing down.
Most gardeners assume magnolias are impossible to propagate from cuttings, but with the right approach, you’ll see roots forming in just 6-8 weeks.
The tools you’ll need are simple: sharp pruners, rooting hormone, a clear plastic bag, and a well-draining mix of perlite and peat moss. Take 4-6 inch cuttings from non-flowering branches, strip the lower leaves, and dip the cut end in hormone before planting.
Patience is key—these cuttings don’t root overnight, but they’re worth the wait for that signature magnolia bloom.
Once rooted, your cuttings will transform into sturdy young trees with glossy leaves and that unmistakable magnolia fragrance. Keep them in bright, indirect light and maintain consistent moisture until they’re ready to transplant.
You’ll end up with a new magnolia tree that grows true to the parent plant, complete with the same disease resistance and stunning flowers.
This method works best in zones 6-9, but with adjustments like using a heat mat for cooler climates, you can try it almost anywhere. The biggest mistake? Overwatering or using cuttings that are too woody—stick to semi-hardwood and you’ll be golden. Ready to grow your own magnolia?
📚 In This Guide
- What you need
- Instructions
- Tips and common mistakes
- Wrapping up and next steps
What you need
- ● Healthy magnolia cuttings: 4–6 semi-hardwood cuttings (4–6 inches long, pencil-thick, taken from new growth in late spring or early summer).
- ● Sharp pruning shears or bypass pruners: Clean, sterilized tools to make precise cuts and avoid damaging the plant.
- ○ Rooting hormone (optional but recommended): A powder or gel (like Rootone) to boost rooting success.
- ● Well-draining potting mix: A blend of perlite, vermiculite, or sand (50%) + peat moss or coco coir (50%).
- ● Small pots or containers: 4–6-inch diameter pots with drainage holes (or a seed tray with cells).
- ● Plastic bags or clear domes: To create a humid environment (e.g., ziplock bags with holes or a propagator lid).
- ● Misting bottle: For keeping cuttings hydrated without overwatering.
- ● Spray bottle with water: To maintain humidity around the cuttings.
- ● Clear plastic wrap: As an alternative to bags for humidity retention.
- ● Label markers & tags: To track cutting varieties and dates.
- ● Bottom heat mat: Set to 70–75°F (21–24°C) to speed up rooting (especially for slower varieties).
- ● Fungicide (like neem oil or hydrogen peroxide): To prevent rot if your workspace isn’t sterile.
- ● Grow lights or bright indirect light: If propagating indoors without natural sunlight.
- ● Twine or rubber bands: To secure plastic wrap tightly around pots.
- ● Notebook or app: To log progress (e.g., Gardenate or a simple spreadsheet).
Step-by-step guide to propagating magnolia tree cuttings
Here’s my foolproof method for coaxing magnolia roots from cuttings—tested across seasons.
🌱 Step 1: Select and Prepare the Perfect Cuttings
Choose semi-hardwood cuttings in late spring or early summer when new growth has matured but isn’t yet woody. Look for 4-6 inch stems with 3-4 leaf nodes—these are your growth points. Use clean, sharp pruners to make a 45-degree angle cut just below a node, ensuring you capture a small section of the previous year’s growth.
Remove all but the top 2-3 leaves to reduce moisture loss. Dip the cut end in rooting hormone (I use a powder formulation) to encourage cellular division. Here’s the thing—magnolias are finicky, so don’t rush this step. The right cutting is your foundation for success.
💧 Step 2: Plant Cuttings in Moisture-Retentive Medium
Fill a 4-inch pot with a sterile propagation mix (equal parts perlite and peat moss). Moisten it until damp but not soggy—you want it to hold water without pooling. Insert the cuttings 2 inches deep, angling the base slightly downward to prevent water from pooling at the node.
Gently firm the mix around the stems to eliminate air pockets. Place a clear plastic bag over the pot to create a humid microclimate, securing it loosely with a rubber band. Magnolias need 70-80% humidity to root, and this setup mimics their natural understory environment. Check daily for condensation—if the bag fogs up, your humidity levels are perfect.
☀️ Step 3: Provide Indirect Light and Warmth
Position the pot in bright, indirect light—think dappled shade under a tree, not harsh afternoon sun. A grow light on a timer (12-14 hours daily) works well if natural light is limited. Keep the temperature between 70-75°F—magnolias root best in warmth but won’t tolerate heat above 85°F. I place mine on a seedling heat mat for an extra boost.
Water when the top ½ inch of mix feels dry, using room-temperature water to avoid shocking the cuttings. Mist the leaves weekly to maintain humidity. You’ll know it’s working when tiny roots appear at the nodes after 8-12 weeks. Patience here is key—magnolias take their time, but they’re worth it.
✂️ Step 4: Transplant and Transition to Soil
Once roots reach 2-3 inches long, gently remove the cutting from the pot to check. Healthy roots will be white or light tan, not mushy or black. Plant in a 6-inch pot with well-draining potting mix, burying the stem up to the first node. Water thoroughly to settle the soil and encourage root spread.
Acclimate the new plant to outdoor conditions over 2-3 weeks by gradually increasing sunlight exposure. Avoid full sun until the cutting shows new growth—this prevents transplant shock. Magnolias are slow to mature, but with this method, you’ll have rooted cuttings ready for permanent planting in 12-18 months. Real talk: the first few leaves might look ragged, but that’s normal.
Tips & tricks for perfect magnolia tree cuttings
Magnolias reward patience, but these small adjustments can make all the difference between success and frustration.
Timing is Everything: Late spring or early summer is non-negotiable for semi-hardwood cuttings. Look for new growth that's matured but hasn't hardened into full wood—this stage gives you the best balance of flexibility and stored nutrients. I've learned the hard way that cutting too early (when stems are still soft) or too late (when they've fully hardened) results in cuttings that either rot or refuse to root. The 4-6 inch length specification isn't arbitrary—it provides enough energy reserves while keeping the cutting manageable.
Rooting Hormone Hack: While the instructions specify powdered rooting hormone, I've found that dipping the cut end in a liquid formulation (like a gel or liquid rooting hormone) can actually work better for magnolias. The liquid adheres more thoroughly to the cut surface, especially when you angle the cut as instructed. Apply it immediately after making your 45-degree cut—don't let the cut end dry out even for a moment. For stubborn cuttings, I'll double-dip them, but only if I'm working with particularly difficult magnolia varieties known for slow rooting.
Humidity Control: The 70-80% humidity range specified is critical, but achieving it consistently can be tricky. I've had great success using a small plant propagator with a built-in humidity gauge—these cost around $20 and make all the difference. If you don't have one, place a small dish of water near your cuttings and group pots closely together. The plastic bag should never touch the leaves (which can cause rot), but should be snug enough that condensation forms on the inside when you breathe on it. I check humidity daily by touching the inside of the bag—if it's dry, it's time to increase moisture.
Lighting Strategy: While bright indirect light is ideal, many homes lack natural dappled shade. For the 12-14 hour grow light requirement, I recommend using a full-spectrum LED grow light on a timer. Position it 6-12 inches above the cuttings—close enough for good light penetration but not so close it overheats. The light should be strong enough that you can't read a book comfortably underneath it. If your cuttings start stretching toward the light (a sign of etoliation), they're not getting enough intensity. For winter propagation, I'll supplement with a second light source to maintain that critical light duration.
Pro Tips for Magnolia Tree Cuttings
- Magnolias reward patience, but these small adjustments can make all the difference between success and frustration.
- Timing is Everything: Late spring or early summer is non-negotiable for semi-hardwood cuttings.
- Rooting Hormone Hack: While the instructions specify powdered rooting hormone, I've found that dipping the cut end in a liquid formulation (like a gel or liquid rooting hormone) can actually work better for magnolias.
Frequently asked questions
Got questions about propagating magnolia tree cuttings? You’re not alone! Here are some of the most common queries—plus straightforward answers to help you grow like a pro.
When is the best time to take magnolia tree cuttings?
The ideal window is late spring to early summer (May–June), when new growth is mature but still flexible. Avoid winter dormancy—magnolias struggle to root in cold soil. Pro tip: If you miss this timing, semi-hardwood cuttings (slightly woody but not fully hardened) in early fall can still work!
How do I know if my magnolia cutting will root successfully?
Look for 3–4 healthy leaves on a 4–6-inch stem, and ensure the cut is clean (just below a node). Roots typically form in 8–12 weeks if kept in a humid, warm environment (70–75°F). Yellowing leaves? Overwatering or low humidity may be the culprit.
What’s the best rooting hormone for magnolia cuttings?
Use a balanced rooting hormone (like Dip ‘N Grow) with auxin and cytokinin. For stubborn varieties (e.g., Southern magnolia), try a higher-strength auxin (e.g., Clonex). Skip the hormone? Some gardeners report success with cinnamon powder or honey as a natural alternative!
Can I propagate magnolia cuttings indoors before moving them outside?
Start in a clear plastic bag or propagator to trap humidity. Place near a bright, indirect light source (no direct sun). Once roots appear (check by gently tugging), acclimate to outdoor conditions over 2–3 weeks to avoid shock.
My magnolia cuttings are rotting—what went wrong?
Overwatering or poor drainage is the #1 killer. Ensure your medium (perlite + peat moss) is moist but not soggy, and avoid letting cuttings sit in standing water. Signs of rot: mushy stems, blackened leaves, or foul smells. Trim affected areas and replant in fresh, sterile medium.
Are there easier alternatives to growing magnolia from cuttings?
Yes! For faster results, try layering (bending a low branch to the ground and covering it with soil) or buying a young tree from a nursery. Grafting is another option for rare varieties, but it requires more skill. Cuttings are rewarding but patience is key!
Wrapping up and next steps
Growing magnolia tree cuttings is a rewarding way to expand your garden with minimal effort—and now you’ve got the know-how! 🌿 With the right tools, timing, and care, you can nurture healthy roots and watch your cuttings thrive into stunning new trees.
Whether you’re a seasoned gardener or a beginner, this process is simpler than you think.
Ready to take the next step? Start by selecting your healthiest cuttings this season and follow the steps you’ve learned. Before you know it, you’ll be proudly showcasing your magnolia tree cuttings success—one lush leaf at a time. Happy growing!