
Pruning
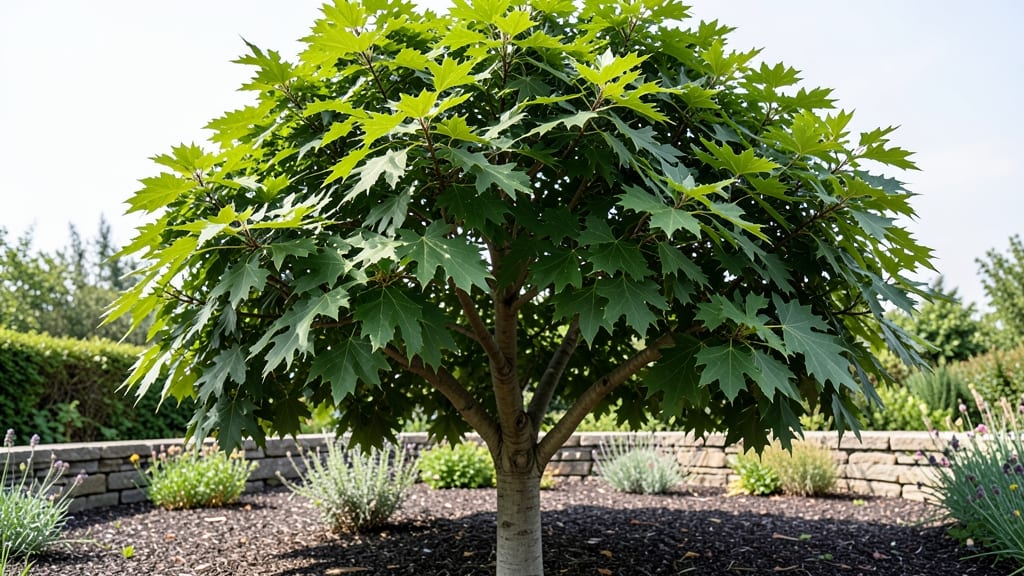
Pruning a Japanese elm tree transforms it from a scraggly mess into a healthy, sculpted centerpiece that lasts for decades. 🌿 I’ve watched mine go from a tangled tangle of branches to a graceful, sun-dappled silhouette—all by following a few key rules about when and how to cut.
The secret isn’t just timing; it’s understanding how this tough tree responds to pruning year-round, whether you’re shaping it in winter or cleaning up after storms.
Japanese elms thrive in full sun but adapt to city conditions where others fail—drought-tolerant once established and happy in poor soil if you prune correctly.
My tree in Zone 7 handles heat waves and occasional drought like a champ, but it needs light pruning in late winter to encourage fresh growth before spring. Urban gardeners love them because they handle pollution, salt spray, and compacted soil better than most.
You’ll end up with a tree that stays disease-resistant and fuller than ever, with branches spaced just right for sunlight to reach the lower leaves. The key is selective cuts: remove dead wood in early spring, shape in summer, and do heavy pruning in late winter before buds swell.
No more bare spots or weak limbs—just a sturdy, elegant tree that outlasts trendy ornamentals.
Works for small yards, large landscapes, or even as a street tree—just adjust the pruning schedule to your climate. Let’s get those shears out and turn your elm into the neighborhood’s most polished shade provider.
📚 In This Guide
- What you need
- Instructions
- Tips and common mistakes
- Wrapping up and next steps
What you need
- ● Pruning Shears: Sharp, bypass-style shears (for cuts up to ½ inch thick). Pro tip: Clean blades with rubbing alcohol after each use to prevent disease spread! 💡
- ● Loppers: 1 pair (for cuts up to 2 inches thick). Look for ratchet-style loppers for extra leverage.
- ● Pruning Saw: 1 curved-tooth saw (for branches thicker than 2 inches). A folding pruning saw is ideal for tight spaces.
- ● Gloves: Heavy-duty work gloves (cut-resistant, like mechanics gloves or gardening gloves with Kevlar).
- ● Safety Goggles: 1 pair (to protect against debris).
- ● Ladder or Step Stool: Sturdy, extension ladder (if tree exceeds 10 feet) or a foldable step stool (for smaller trees). Safety first! 🔒
- ● Disinfectant (70% Isopropyl Alcohol or Bleach Solution): 1 bottle or spray bottle (for sterilizing tools between cuts).
- ● Heavy-Duty Trash Bags: 2-3 bags (for collecting pruned branches).
- ○ Tree Wound Sealant (Optional but Helpful): 1 tube (like Tanglefoot Tree Wound Pruning Sealer for large cuts).
- ● Pole Pruner: Extendable pruner (for high branches without a ladder).
- ● Work Apron with Pockets: Keeps tools organized and hands free.
- ● Pruning Paint: (For sealing cuts on trunks—only use if tree is disease-prone).
- ● Garden Hose: For rinsing tools post-pruning (if using bleach solution).
- ● Notebook & Pen: To jot down pruning notes or mark areas for future attention.
Step-by-Step guide to pruning Japanese elm trees for healthy growth
Here’s my go-to method for keeping these graceful trees thriving all year.
✂️ Step 1: Prune in Late Winter Before Bud Break
Start in late winter (just before new buds swell) when the tree is dormant. This timing prevents stressing the tree and encourages strong spring growth. I always begin by removing dead, diseased, or crossing branches—these are the easiest to spot and the most critical to cut first.
Use clean, sharp pruning shears (or a small pruning saw for thicker branches) to make cuts just outside the branch collar—the swollen area where the branch meets the trunk. Avoid leaving stubs; they invite decay and weaken the tree over time. Real talk: If you’re unsure where the collar is, trace the branch back to the trunk and cut about ¼ inch beyond where it flares outward.
For larger branches over 2 inches thick, make a second cut 6-12 inches out from the trunk to avoid tearing the bark. This two-cut method prevents the branch from splitting as you remove it. I like to work in sections, starting with the highest branches first so I don’t get tangled in the canopy.
✂️ Step 2: Thin the Canopy for Light and Airflow
Japanese elms naturally grow with a rounded, vase-like shape, but over time, branches can get too dense. Aim to remove no more than 25% of the canopy in a single session—this keeps the tree healthy without shocking it. Focus on branches growing inward or rubbing against others; these compete for sunlight and can damage each other.
Look for water sprouts—those fast-growing, vertical shoots that pop up everywhere. These saplings steal energy from the main structure. Snip them off at the base with your shears. You’ll see them most easily on the lower trunk and outer edges of the canopy. Here’s the thing—don’t worry if you miss a few. These trees are forgiving, and you can always catch them in the next pruning session.
For a more refined look, step back and visualize the tree’s natural shape. Japanese elms respond well to open-center pruning, where you remove branches from the center to let light filter through. This prevents fungal issues and keeps the interior leaves healthy. I like to leave the outer branches slightly longer to maintain that elegant, weeping silhouette.
☀️ Step 3: Summer Pruning for Shape and Health
In mid-to-late summer, after the tree has finished its main flush of growth, do a light pruning to refine its shape. This is when you can fine-tune the tree’s form by trimming back any branches that grew too vigorously during spring. Focus on suckers (shoots growing from the base) and overly long branches that disrupt the tree’s balance.
Use hand pruners for smaller branches and a pruning saw for anything thicker than your wrist. Make cuts at a 45-degree angle just above a leaf node or bud, slanting away from the bud. This ensures water runs off the cut and the bud has room to grow. If you’re unsure which way to angle, imagine rain sliding off the cut—it should flow outward, not pool near the bud.
This is also the time to deadhead any flower clusters if they appear (though Japanese elms aren’t typically grown for flowers). Removing them redirects the tree’s energy into stronger wood and foliage. Watch for yellowing leaves or branches with fewer leaves than others—these are signs of stress or disease. Remove them immediately to prevent spread.
✂️ Step 4: Clean Up and Prevent Disease
After pruning, sterilize your tools with rubbing alcohol or a 10% bleach solution to kill any lingering bacteria or fungi. Japanese elms are prone to anthracnose and powdery mildew, so this step is non-negotiable. I always wipe down my shears and saw with a clean cloth before storing them to avoid cross-contamination between cuts.
Rake up and dispose of all pruned branches—don’t leave them on the ground. Pile them in a compost bin or bag them for pickup. Leaving debris under the tree invites pests and diseases. If you’re composting, ensure the pile is hot enough to kill pathogens (at least 140°F for a few days).
Finally, apply a balanced, slow-release fertilizer (like 10-10-10) around the tree’s drip line in early spring to replenish nutrients lost during pruning. Water the area deeply after applying to help the granules break down. You’ll see new growth within 4-6 weeks, and the tree’s overall health will improve noticeably by next year.
Tips & tricks for perfect Japanese elm tree pruning
These simple yet game-changing strategies will help you maintain a thriving Japanese elm tree all year long.
Timing is Everything: The late winter timing in Step 1 is crucial because it allows the tree to heal before spring growth begins. If you're unsure when buds will swell, check the calendar—Japanese elms typically bud out in late February to early March in most climates. Confession: I skipped this step for years and wondered why my trees never looked their best. The difference between a mediocre result and an absolutely stellar one often comes down to this single, seemingly insignificant step.
Tool Maintenance Matters: Sterilizing your tools between cuts in Step 4 isn't just about preventing disease—it's about protecting your entire garden. I learned this the hard way after transferring anthracnose from one tree to another. Keep a small bottle of rubbing alcohol in your tool bag and wipe down blades after every 3-5 cuts. For larger branches, a clean towel and a 10% bleach solution work just as well. This simple habit can save your tree from serious fungal infections that might otherwise take years to notice.
Visual Pruning Cues: When thinning the canopy in Step 2, step back every 10 minutes to check your progress. You're aiming for that elegant weeping silhouette, but it's easy to overdo it. Look for branches that create a "V" shape when viewed from below—these are the ones that need to go. I think this works because it creates natural light gaps that prevent fungal growth while maintaining the tree's graceful form. The 25% canopy removal guideline is your safety net, but visual cues help you make more intuitive decisions.
Seasonal Adjustments: Summer pruning in Step 3 is where you fine-tune the shape, but don't overlook the importance of watching for stress signals. Yellowing leaves or sparse foliage on certain branches are red flags—these indicate either disease or nutrient deficiency. Remove affected branches immediately and consider applying a foliar fertilizer to the remaining healthy growth. The 4-6 week recovery time mentioned in Step 4 gives you a good benchmark for evaluating whether your pruning efforts are working.
Pro Tips for Japanese Elm Tree
- These simple yet game-changing strategies will help you maintain a thriving Japanese elm tree all year long.
- Timing is Everything: The late winter timing in Step 1 is crucial because it allows the tree to heal before spring growth begins.
- Tool Maintenance Matters: Sterilizing your tools between cuts in Step 4 isn't just about preventing disease—it's about protecting your entire garden.
Frequently asked questions
When is the best time to prune a Japanese elm tree?
The ideal window is late winter or early spring (just before buds swell), but you can also prune in summer to control shape. Avoid heavy pruning in fall or winter—it stresses the tree and invites disease. Light maintenance (like removing dead branches) is safe year-round!
How much can I prune without harming the tree?
Japanese elms are resilient, but never remove more than 25% of the canopy in one session. For young trees, limit cuts to 15-20% to avoid shock. Focus on thinning (removing crossing branches) over heavy topping—this encourages healthy regrowth and airflow.
Why is my Japanese elm tree bleeding sap after pruning?
Sap bleeding is normal in early spring but usually stops within 2-4 weeks. To minimize it:
- Prune on dry, cool days (avoid warm weather).
- Use clean, sharp tools to make precise cuts (no jagged edges).
- Seal cuts with pruning sealant if bleeding persists or the tree is young.
Can I shape my Japanese elm like a weeping willow?
Yes! Japanese elms are highly adaptable to training—just be patient. Start with structural pruning when young (3–5 years old) to guide growth. For a weeping look:
- Select low-hanging branches and prune others to encourage downward growth.
- Use weighted branches (like small bags) to train them downward.
- Prune in late winter to shape, then do light touch-ups in summer.
What should I do if my Japanese elm gets sunburned after pruning?
Sunburn (white/yellow patches on bark) happens when newly exposed wood gets too much sun. Protect your tree by:
- Pruning gradually over 2–3 years to harden the tree.
- Applying a light shade cloth to scorched areas for a few weeks.
- Watering deeply 2–3 times/week to reduce stress.
What’s a good alternative if my Japanese elm grows too large?
If space is tight, consider these compact alternatives with similar beauty:
- Dwarf Japanese Elm (Ulmus davidiana ‘Compacta’): Grows 15–20 ft tall with lush foliage.
- Siberian Elm (Ulmus pumila): Tolerates poor soil and stays 25–30 ft.
- Chinese Elm (Ulmus parvifolia): Disease-resistant and smaller-foliaged.
Wrapping up and next steps
The Japanese elm tree is a stunning addition to any landscape, but its beauty thrives on proper care—especially pruning! 🌿 Whether you’re trimming for shape, health, or seasonal renewal, understanding the when and how makes all the difference.
With the right tools, techniques, and timing, you can keep your tree lush, strong, and full of life year-round.
Ready to take the next step? Start small—pick one season to focus on, gather your supplies, and observe your tree’s natural growth patterns. Over time, you’ll master the art of pruning and watch your Japanese elm flourish! 🌱