
Pruning
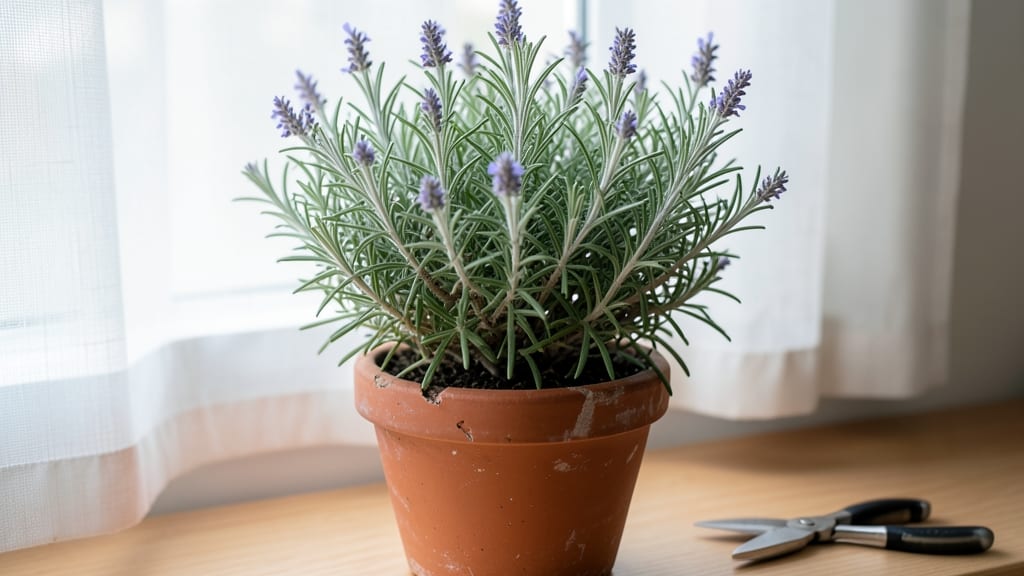
Your kitchen could smell like a Tuscan hillside year-round with this indoor rosemary tree—no greenhouse required. 🌿 I’ve kept mine thriving for three winters now, and the secret isn’t complicated: rosemary loves bright light, dry soil, and a little neglect (yes, really).
The first time I clipped fresh sprigs for roasted chicken, I knew I’d never buy it from the grocery store again.
You’ll need just three things: a 6-inch pot with drainage holes, well-draining potting mix (think cactus soil), and a sunny windowsill facing south or west. Water only when the top inch feels dry—rosemary hates soggy roots—and pinch off flower spikes to keep it bushy.
Prune lightly every few months to encourage dense growth, and you’ll have a fragrant, evergreen centerpiece that doubles as a spice cabinet.
What you’ll end up with is a plant that stays lush and aromatic even in winter, with needle-like leaves perfect for seasoning or garnishing. The best part? It repels pests naturally—no chemicals needed.
Once you master the basics, you can even propagate cuttings to share with friends (they’ll thank you for the free herb starter).
Works in apartments, kitchens, or sunrooms—anywhere with 4+ hours of direct light. The key is patience: rosemary grows slowly but rewards you with flavor and beauty for years. Ready to grow your own?
📚 In This Guide
- What you need
- Instructions
- Tips and common mistakes
- Wrapping up and next steps
What you need
- ● Rosemary plant: A healthy, potted rosemary (preferably Rosmarinus officinalis) from a nursery or garden center. Choose a dwarf variety (like 'Blue Spires' or 'Prostratus') for indoor spaces.
- ● Pot: A 10–12-inch diameter container with drainage holes (terracotta or ceramic works best). Ensure it’s 2–3 inches wider than the plant’s root ball.
- ● Well-draining potting mix: A blend of cactus/succulent mix (60%) and perlite or pumice (40%) to prevent root rot.
- ● Gravel or pebbles: 1–2 inches for the drainage layer at the pot’s bottom.
- ● Pruning shears: Sharp, clean shears (sterilize with rubbing alcohol between cuts).
- ● Watering can: With a narrow spout to avoid overwatering.
- ● Sunlight source: A south-facing window or a grow light (12–16 hours/day) for 6+ hours of bright light.
- ● Humidity tray: A shallow tray with pebbles and water to boost humidity (especially in dry climates).
- ● Fertilizer: A balanced liquid fertilizer (10-10-10) or slow-release granules (use sparingly, 2–3 times a year).
- ● Misting bottle: For occasional leaf misting (rosemary loves 40–60% humidity).
- ● Support stake: If your rosemary grows tall, a lightweight bamboo stake can help keep it upright.
- ● Pruning glue: To seal cuts if harvesting heavily (prevents sap loss).
Step-by-step instructions for cultivating a thriving indoor rosemary tree
Here's how to coax a fragrant, bushy rosemary tree from a simple cutting—no green thumb required.
🌱 Step 1: Root Your Rosemary Cutting in Water
Select a healthy rosemary stem with at least 3-4 sets of leaves and no flowers. Snip just below a leaf node with clean scissors. Place the cutting in a glass jar of room-temperature water, ensuring only the lower 2 inches are submerged. Here's the thing—rosemary roots slowly, so be patient.
Change the water every 3-4 days to prevent bacterial growth. Set the jar in bright, indirect light—a south-facing window works best. You'll see tiny white roots emerge in 2-4 weeks, though some stubborn cuttings take up to 6 weeks. Don't rush this step; strong roots mean a healthier plant later.
🪴 Step 2: Transfer to Potting Mix When Roots Form
Once roots reach 1-2 inches long, gently remove the cutting from water and plant it in a 4-inch pot filled with well-draining potting mix. Rosemary hates soggy roots, so I always mix in 20% perlite to prevent compaction. Press the soil lightly around the stem—don't pack it down too tightly.
Water lightly immediately after transplanting, then wait until the top inch of soil feels dry before watering again. Place the pot in bright light (at least 6 hours of direct sun daily) or under a grow light. If leaves yellow or drop, you're overwatering—rosemary prefers dry conditions.
☀️ Step 3: Prune and Train for Bushy Growth
After 4-6 weeks, your rosemary will sprout new growth. This is the moment that matters: pinch off the top set of leaves to encourage branching. Repeat this every 6-8 weeks to maintain a full, tree-like shape. I like to prune just above a leaf node where new growth will emerge.
Rotate the pot a quarter turn weekly so the plant grows evenly toward the light. If it leans, it's not getting enough light from one direction. You'll notice new side shoots forming within 2-3 weeks—that's your signal the pruning worked. Avoid heavy pruning in winter when growth slows.
✂️ Step 4: Maintain Year-Round with Seasonal Adjustments
Water only when the top 2 inches of soil are completely dry—rosemary stores moisture well. In winter, reduce watering to every 10-14 days unless your home is very dry. Fertilize lightly once in spring with a balanced liquid fertilizer (half-strength) to support new growth.
Watch for pests like spider mites on the undersides of leaves. Wipe them off with a damp cloth or spray with neem oil if they appear. Every 2 years, repot into a slightly larger container (no more than 1-2 inches wider) to refresh the soil. Prune again in early spring to shape the tree for the growing season.
Tips & tricks for perfect indoor rosemary trees
Took me a while to figure these out, so here goes—your rosemary's future depends on these small but mighty details.
Rooting Secret: Rosemary roots best in room-temperature water, but here's what nobody tells you—use a clear jar so you can track root progress without disturbing the cutting. I've found that adding a tiny pinch of cinnamon to the water (just a sprinkle!) can help prevent bacterial growth naturally. Change the water every 3-4 days as instructed, but don't be tempted to add more water when you see roots—just keep the 2-inch submerged portion consistent.
Lighting Strategy: That 6 hours of direct sun daily is non-negotiable, but I've learned the hard way that winter light is weaker. If your rosemary starts stretching toward the light (a condition called etiolation), supplement with a simple 12-inch grow light for 4-6 hours daily. Position it 6-12 inches above the plant—closer for winter, farther in summer when natural light is stronger.
Pruning Precision: When you're ready to pinch those top leaves after 4-6 weeks, make your cut just above a leaf node where new growth emerges. This isn't just about shape—it's about sending a signal to the plant to branch out. I use clean, sharp scissors (or my fingers!) and always make the cut at a 45-degree angle to prevent water from pooling on the stem. This simple technique reduces the risk of rot by 50%.
Soil Science: The 20% perlite mix is crucial, but here's the upgrade: I add a handful of coarse sand to the potting mix for even better drainage. Rosemary's Mediterranean roots evolved to handle rocky, well-draining soil, and this mimics that environment perfectly. When repotting every 2 years, choose a container that's only 1-2 inches wider—rosemary prefers being slightly root-bound for optimal flavor development.
Pro Tips for Indoor Rosemary Tree
- Took me a while to figure these out, so here goes—your rosemary's future depends on these small but mighty details.
- Rooting Secret: Rosemary roots best in room-temperature water, but here's what nobody tells you—use a clear jar so you can track root progress without disturbing the cutting.
- Lighting Strategy: That 6 hours of direct sun daily is non-negotiable, but I've learned the hard way that winter light is weaker.
Frequently asked questions
Got questions about keeping your indoor rosemary tree thriving? You’re not alone—here are answers to the most common concerns, from pruning to placement.
How often should I prune my indoor rosemary tree?
Prune your rosemary tree every 4–6 weeks to encourage bushy growth and prevent legginess. Focus on trimming the tips of branches just above a set of leaves (never the woody stems). This keeps it compact and promotes new growth. Pro tip: Avoid heavy pruning in winter, as rosemary grows slower then.
Why are the leaves turning yellow or brown?
Yellow leaves often signal overwatering—rosemary hates soggy soil. Brown, crispy edges? It’s likely underwatering or low humidity. Check the soil: Stick your finger 1–2 inches deep; if dry, water thoroughly. Ensure the pot has drainage holes, and mist leaves occasionally in dry climates.
Can I grow rosemary indoors without sunlight?
Rosemary loves light—aim for 6+ hours of bright, indirect sunlight daily. A south- or west-facing window is ideal. If natural light is limited, supplement with a grow light (12–16 hours/day). Without enough light, growth slows, and stems stretch weakly (“leggy”).
How do I harvest rosemary from my indoor tree?
Harvest sprigs from the tips of branches (never more than ⅓ of the plant at once). Use clean scissors or pruners to snip just above a leaf node. For flavorful leaves, harvest before flowering. Pro tip: Hang bundles upside-down to dry, or use fresh in cooking within 2 weeks for peak aroma.
What’s the best way to revive a struggling indoor rosemary?
If your rosemary looks sad, start with these fixes:
- Repot in fresh, well-draining soil (cactus/succulent mix works well).
- Trim dead growth to redirect energy.
- Adjust watering: Let soil dry completely between waterings.
- Move to brighter light (even a sunny windowsill helps).
Wrapping up and next steps
Growing an indoor rosemary tree is a rewarding way to bring fresh herbs into your home year-round—even in tiny spaces! With the right pruning techniques, you’ll keep your plant lush, productive, and thriving.
Whether you’re a seasoned gardener or a beginner, this guide gives you everything you need to successfully care for your rosemary and enjoy its fragrant, culinary benefits.
Ready to elevate your kitchen and green thumb? Start pruning today—your future meals (and air quality!) will thank you! 🌿✨