Pruning
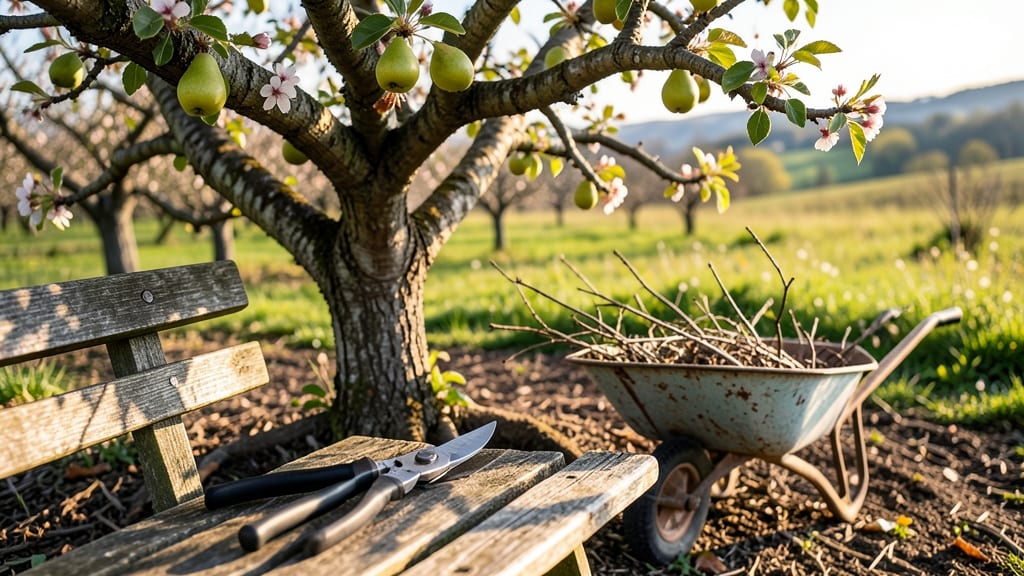
Pruning an overgrown pear tree transforms a tangled mess into a productive, sunlit canopy—if you do it right. 🌳 I’ve turned my neighbor’s wild, bird-nest of a tree into a structured beauty that now yields bushels of ripe pears each summer.
The key isn’t brute force; it’s strategic cuts that open the tree to light and air, while keeping its natural shape.
You’ll need sharp pruners, a sturdy ladder, and a clear day—no wind or rain. Start by removing dead, crossing, or diseased branches first; these are the tree’s weak points. Then, thin out the interior to let sunlight reach the center, where fruit develops best.
Patience here pays off: one aggressive session won’t fix years of neglect, but steady progress over 2-3 years works wonders.
What you’ll end up with is a tree that’s easier to harvest from, produces more fruit, and looks like it belongs in a postcard. The branches will be spaced just right for picking, and new growth will sprout where you’ve opened up the canopy.
Plus, fewer branches mean fewer places for pests to hide—so your harvest stays healthier too.
Ornamental varieties benefit just as much as fruit-bearing ones, though the timing tweaks slightly. Whether you’re pruning for beauty or bounty, the same principles apply: less is more, and every cut should have a purpose. Ready to roll up your sleeves and reclaim that tree?
📚 In This Guide
- What you need
- Instructions
- Tips and common mistakes
- Wrapping up and next steps
What you need
- ● Pruning shears or bypass pruners: Sharp, bypass-style shears (not anvil-type) for clean cuts. Choose 5- to 8-inch blades for medium-sized branches.
- ● Loppers: For branches ½ to 2 inches thick. Opt for long-handled loppers (20+ inches) for overhead cuts.
- ● Pruning saw: A curved-tooth saw for branches 2+ inches thick. Avoid cheap tools—they dull quickly!
- ● Rope or extension pole: A 10- to 15-foot pole with a hook or a sturdy rope to pull down heavy branches.
- ○ Disinfectant (optional but recommended): 70% isopropyl alcohol or a 10% bleach solution to sterilize tools between cuts and prevent disease spread.
- ● Heavy-duty gloves: Garden gloves with cut resistance (e.g., mechanized or leather-reinforced) to protect your hands.
- ● Safety glasses: Protect your eyes from debris—ANSI-rated goggles are ideal.
- ● Ladder or step stool: A stable, non-slip ladder (or extension ladder for tall trees) rated for your weight.
- ● Tarp or drop cloth: A 10x12-foot tarp to collect branches and debris.
- ● Pole pruners: For high branches without a ladder—20- to 30-foot reach options available.
- ● Tree wound dressing: Pruning sealant (controversial but some swear by it for large cuts).
- ● Marking twine or spray paint: To flag branches to remove before cutting.
- ● First-aid kit: Just in case—bandages, antiseptic wipes, and tweezers for splinters.
- ● Sunscreen & water bottle: Pruning in the sun? Stay hydrated and protected!
Step-by-step guide to reviving your overgrown pear tree
Here's how I bring pear trees back to health—strong branches, better airflow, and fruit you'll actually reach.
✂️ Step 1: Assess the Tree's Structure and Safety
Start by examining the tree from all sides. Look for dead, diseased, or crossing branches—these are your first targets. Dead branches snap easily when bent; diseased ones have blackened bark or oozing sap. Crossing branches rub together, creating wounds that invite pests and rot. Mark these with colored flags or tape so you don't miss them later.
Next, identify the central leader—the main vertical trunk or branch that should guide the tree's growth upward. If it's broken or weak, you'll need to establish a new leader from strong lateral branches. This is the backbone of your pruning plan, so take your time here. I always step back every few minutes to visualize how the tree will look after cuts—it's easier to spot mistakes from a distance.
✂️ Step 2: Remove Hazardous and Problematic Branches
Begin with dead, diseased, or damaged branches—cut these out completely, even if it means removing large sections. Use clean, sharp pruners for branches under ½ inch thick, and a pruning saw for anything thicker. Make cuts just outside the branch collar (the swollen area where the branch meets the trunk) to prevent tearing. This ensures the tree can heal properly and reduces the risk of infection.
Next, tackle crossing branches—choose one to keep based on its health, position, and future growth potential. The branch that creates the least angle with the trunk or another branch is usually the better choice. Cut back to the branch collar, making sure your cut is smooth and angled slightly away from the branch collar. Avoid leaving stubs; they trap moisture and invite decay. Here's the thing—if two branches are rubbing, the one you remove might seem important now, but the tree will thank you later for the extra space and light.
✂️ Step 3: Thin the Canopy for Airflow and Light
Now focus on thinning the canopy to improve airflow and sunlight penetration. Remove branches that grow inward or downward, as these block light and create a dense, shaded interior where fruit rots and pests hide. Aim to open up the center of the tree so light reaches the lower branches. You're not just cutting for shape—you're creating a healthier environment for your tree to produce fruit.
For each branch you remove, step back and check how it affects the overall shape. The goal is to maintain an open, vase-like structure with a strong central leader. If you're unsure whether to cut a branch, ask yourself: "Does this branch contribute to the tree's health or future fruit production?" If the answer is no, it's time to remove it. Real talk: It's easier to take out a branch now than to deal with a tree that's too dense to prune later.
✂️ Step 4: Shape the Tree for Future Growth
Now it's time to shape the tree for balanced growth. Focus on maintaining the central leader while encouraging strong lateral branches to form a wide, sturdy framework. Cut back any branches that grow too close to the central leader or compete with it. You want the tree to have a clear hierarchy—one main leader with well-spaced branches that spread evenly.
For lateral branches, aim to leave 3-5 well-spaced branches per main scaffold. These should be evenly distributed around the trunk and spaced 8-12 inches apart. If a branch is growing too upright, you can lightly prune the top to encourage it to spread outward. This step is where your tree's future shape takes form, so take your time. I like to sketch a rough outline of how I want the tree to look before I start cutting—it keeps me focused and prevents over-pruning.
⏰ Step 5: Clean Up and Monitor Recovery
After pruning, clean up the area thoroughly. Remove all cut branches and debris from the base of the tree to prevent pests and diseases from taking hold. Sterilize your pruning tools with rubbing alcohol or a 10% bleach solution to kill any lingering pathogens. This is especially important if your tree had any signs of disease.
Finally, monitor the tree's recovery over the next few weeks. You'll see new growth within 2-4 weeks, which is a good sign the tree is healing. Keep an eye out for any signs of stress, like yellowing leaves or oozing sap, which could indicate over-pruning or infection. If you see these signs, adjust your care routine—water deeply but less frequently, and avoid fertilizing until the tree shows signs of recovery. You've done the hard part; now it's about giving your tree the best chance to thrive.
Tips & tricks for reviving your overgrown pear tree
Let me share the hard-won lessons that'll help you avoid common pitfalls and get the best results from your pruning efforts.
Timing is Everything: Late winter or early spring is the ideal time to prune—right before buds swell but before new growth begins. This timing ensures you're cutting while the tree is still dormant, minimizing stress. If you must prune outside this window, avoid extreme heat or cold periods, which can shock the tree. I've learned this the hard way after seeing trees struggle when pruned in summer heat.
Tool Selection Matters: Your pruning tools make all the difference. Use bypass pruners for clean cuts on branches under ½ inch thick—they leave a smoother surface that heals faster. For thicker branches, a pruning saw with a fine-toothed blade prevents tearing. I keep a small pair of loppers handy for branches between ½ and 2 inches thick. Always sterilize your tools between cuts to prevent spreading disease—just a quick wipe with rubbing alcohol works wonders.
Visualize the Final Shape: Before making any cuts, take a step back and visualize how your tree will look after pruning. Sketch a rough outline if needed—this helps you see the big picture and prevents over-pruning. Focus on creating an open, vase-like structure with the central leader clearly dominant. I've seen too many trees end up looking like a tangled mess because the pruner didn't step back often enough during the process.
Recovery Care is Critical: After pruning, the real work begins. Water your tree deeply but less frequently—this encourages strong root growth. Avoid fertilizing immediately, as the tree needs to recover from the stress of pruning first. I've found that monitoring for new growth within 2-4 weeks is the best indicator that your tree is healing properly. If you see yellowing leaves or oozing sap, it's a sign to back off on watering and wait for the tree to stabilize.
Pro Tips for Prune An Overgrown Pear Tree
- Let me share the hard-won lessons that'll help you avoid common pitfalls and get the best results from your pruning efforts.
- Timing is Everything: Late winter or early spring is the ideal time to prune—right before buds swell but before new growth begins.
- Tool Selection Matters: Your pruning tools make all the difference.
Frequently asked questions
Got questions about pruning your overgrown pear tree?
You’re not alone! Here are some of the most common concerns—and straightforward answers—to help you tackle the job with confidence.
When is the best time to prune a pear tree?
For most pear varieties, late winter or early spring (just before buds swell) is ideal. Dormant season pruning (Dec–Feb) works too, but avoid pruning in fall—it can invite disease. If your tree is heavily overgrown or diseased, prune in dry, mild weather (even in summer) to minimize stress.
How much can I cut back without harming the tree?
Never remove more than 25–30% of the canopy in a single pruning session. For severely overgrown pears, spread cuts over 2–3 years. Focus on dead, crossing, or inward-growing branches first—these are the biggest threats to health and fruit production.
Will pruning reduce my pear harvest?
Not if done correctly! Pruning actually boosts fruit quality and quantity by improving airflow and sunlight. However, over-pruning (especially in fruiting years) can temporarily reduce yields. Balance structural cuts (thinning branches) with fruitwood preservation (keeping older branches that bear fruit).
How do I prevent pests/disease after pruning?
Sterilize tools with rubbing alcohol between cuts to avoid spreading pathogens. Seal larger wounds with pruning sealant (optional for pears, but helpful in humid climates). Remove and dispose of fallen debris promptly—pests like borers and fungi love overgrown messes!
What if my pear tree doesn’t bloom after pruning?
Lack of blooms often signals over-pruning, poor nutrition, or age. Check for:
- Thin canopies (add nitrogen-rich fertilizer in spring).
- Old wood (pears fruit on 2–3-year-old branches—avoid cutting these!).
- Environmental stress (drought, extreme heat/cold).
Wrapping up and next steps
Pruning your overgrown pear tree might feel like a big task, but with the right tools, timing, and technique, you can transform it into a thriving, fruit-bearing beauty! 🌳✨ Remember to prioritize safety, patience, and consistency—your efforts will pay off in healthier branches, better airflow, and those coveted juicy pears.
Once you’ve tackled the pruning, keep an eye on your tree’s progress and repeat the process annually to maintain its shape and productivity.
Now that you’re armed with knowledge, grab those shears and get pruning! Your future harvests—and your tree’s happiness—will thank you. 🍐💚