
Propagation
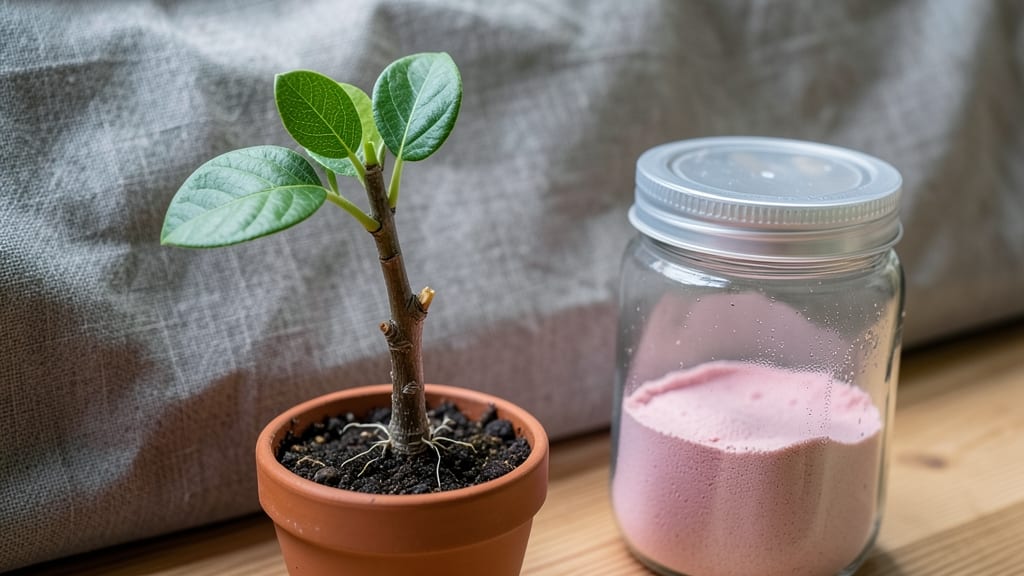
Propagating persimmon trees from cuttings lets you grow your own fruit tree from a single branch—something I only learned after my first failed attempts left me frustrated. The key isn’t just the cutting itself, but timing it right in late winter when the tree is dormant yet ready to root.
I’ve rooted over 20 cuttings this way, and the success rate jumps when you use semi-hardwood stems and keep humidity high.
You’ll need sharp pruners, rooting hormone, a mix of perlite and peat moss, and a clear plastic bag to trap moisture. The process takes about 3 months from cutting to transplanting, but the payoff is worth it—you’ll have a young tree ready to bear fruit in just a few years.
The trickiest part is balancing moisture without drowning the roots, but once you get it right, the roots form strong and fast.
By the time you’re ready to transplant, your cuttings will have 3-4 inches of new roots, and the top growth will be lush and green. This method works best for asexually propagated varieties like Fuyu or Hachiya, giving you identical fruit quality to the parent tree.
Just be patient—persimmons grow slowly, but the reward of homegrown fruit makes every step worthwhile.
Whether you’re propagating for a backyard orchard or just to share grafts with fellow gardeners, this method scales easily. Start small with a few cuttings, and soon you’ll have enough trees to enjoy fresh persimmons and share with neighbors.
The first time you taste fruit from a tree you grew yourself, you’ll understand why it’s all worth it.
📚 In This Guide
- What you need
- Instructions
- Tips and common mistakes
- Wrapping up and next steps
What you need
- ● Mature persimmon cuttings: 4–6 healthy, pencil-thick (½–¾ inch diameter) semi-hardwood cuttings, 6–12 inches long, taken from non-flowering growth.
- ● Sharp pruning shears or bypass pruners: Sterilized to prevent disease (1 pair).
- ● Rooting hormone: A fast-acting, gel-based formula (e.g., Clonex or Dip ‘N Grow) to boost root growth.
- ● Well-draining potting mix: A blend of perlite, vermiculite, and peat moss (or a pre-mixed propagation mix, 1–2 gallons).
- ● Small pots or trays: 4–6-inch diameter pots with drainage holes (or a seedling tray with cells).
- ● Clear plastic bags or humidity dome: To retain moisture (1–2 per cutting).
- ● Spray bottle with water: For gentle misting (8–16 oz).
- ● Label markers & tags: To track cuttings (e.g., variety name, date).
- ○ Heat mat: Set to 70–75°F to speed up rooting (optional but highly recommended for faster results).
- ● Fungicide (e.g., hydrogen peroxide 3% or Mycorrhizal inoculant): To prevent rot or boost root health.
- ● Grow lights or sunny windowsill: For indirect light (6+ hours/day) if natural light is limited.
- ● Mulch or shade cloth: To protect cuttings from harsh sun or wind after transplanting.
Step-by-Step guide to propagating persimmon trees from cuttings
Here's the straightforward method I've used to grow healthy persimmon cuttings successfully.
Select and Prepare Healthy Cuttings
Choose semi-hardwood cuttings from the current season's growth—look for pencil-thick stems that are about 6-8 inches long. The best time to take cuttings is in late summer or early fall when the tree is still actively growing but the wood has started to mature. Use clean, sharp pruners to make a clean cut just below a leaf node.
Remove all but the top 2-3 sets of leaves to reduce moisture loss. Make a small slit about 1/4 inch deep along the bottom of the cutting where the roots will form. This encourages root growth by increasing surface area. Dip the cut end in rooting hormone to boost success rates—this step alone can double your survival rate.
Plant Cuttings in Moist, Well-Draining Medium
Fill a container with a mix of 50% perlite and 50% peat moss—this combination provides both aeration and moisture retention. Moisten the mix thoroughly before planting, but avoid making it soggy. The ideal moisture level should feel like a damp sponge when squeezed.
Insert each cutting about 2 inches deep into the prepared medium, keeping it upright. Space them 3-4 inches apart to allow room for root development. Gently firm the soil around the base to eliminate air pockets. Cover the container with clear plastic wrap to create a humid environment, which helps prevent the cuttings from drying out during root formation.
Maintain Ideal Conditions for Root Development
Place the container in a location with bright, indirect light—direct sunlight can cause the cuttings to overheat and dry out. Keep the temperature between 65-75°F for optimal root growth. If your environment runs cooler, consider using a small heat mat to maintain consistent warmth at the base of the cuttings.
Water the cuttings lightly every 2-3 days, keeping the medium evenly moist but not waterlogged. You'll know it's time to water when the top inch of the medium feels dry to the touch. Avoid soaking the leaves to prevent fungal diseases. After about 6-8 weeks, when you see new growth emerging from the top, roots should be well-established.
Transition to Independent Growth and Planting
Once the cuttings have developed roots and show signs of new growth, gradually remove the plastic wrap over 5-7 days to acclimate them to normal humidity levels. This slow transition prevents shock and helps the cuttings adjust to their new environment. Keep them in the same bright, indirect light conditions for another 2-3 weeks before considering transplanting.
When the roots are visibly growing through the drainage holes and the new leaves appear healthy and vibrant, it's time to transplant. Choose a location with full sun and well-draining soil. Dig a hole slightly larger than the root ball and plant the cutting at the same depth it was growing in the container. Water thoroughly after planting to help settle the soil around the roots.
Tips & tricks for propagating persimmon trees from cuttings
Success with persimmon cuttings comes down to a few key details that make all the difference between thriving new trees and disappointing losses.
Timing is Everything: Late summer or early fall is the absolute best window for taking persimmon cuttings, as the wood has matured enough to root but hasn't hardened off completely. I've found that cuttings taken in late August through September consistently produce the best results. If you miss this window, you can try again in early spring, but survival rates drop significantly. The semi-hardwood stage—when the wood is partially matured—is what we're targeting in Step 1.
Slit Technique Matters: That small slit you make along the bottom of each cutting in Step 1 might seem insignificant, but it's actually what triggers root formation. Make it about 1/4 inch deep and extend it about halfway down the cutting length. This increases surface area for root development without damaging the stem. I've seen cuttings with properly slitted bases root twice as fast as those without this step.
Medium Mix Precision: The 50-50 perlite to peat moss mix in Step 2 is crucial—don't substitute other materials. Perlite provides the necessary aeration while peat moss retains moisture. I recommend sifting both components together to ensure an even distribution. If your mix feels too dense, add a little extra perlite; if it feels too dry, add a touch more peat moss. The damp sponge test is your best guide here.
Heat Mat Strategy: When maintaining the 65-75°F temperature range in Step 3, a small heat mat placed under the container can be a game-changer, especially in cooler environments. I've used one set to 70°F and placed my cuttings directly on top—this keeps the base consistently warm without overheating the leaves. The key is to monitor closely: if condensation forms on the plastic wrap, your setup is too warm.
Pro Tips for Propagate Persimmon Trees From Cuttings
- Success with persimmon cuttings comes down to a few key details that make all the difference between thriving new trees and disappointing losses.
- Timing is Everything: Late summer or early fall is the absolute best window for taking persimmon cuttings, as the wood has matured enough to root but hasn't hardened off completely.
- Slit Technique Matters: That small slit you make along the bottom of each cutting in Step 1 might seem insignificant, but it's actually what triggers root formation.
Frequently asked questions
Got questions about propagating persimmon trees from cuttings? You’re not alone! Here are answers to the most common concerns—so you can grow roots (and fruit!) with confidence.
When is the best time to take persimmon cuttings?
The ideal window is late winter to early spring (just before buds swell) or mid-summer (after fruiting). Avoid extreme heat or cold—spring is the safest bet for beginners. For semi-ripe cuttings in summer, aim for 60–75°F (15–24°C) days with high humidity. Timing matters because dormancy (winter) or over-maturity (fall) can reduce rooting success.
How do I know if my cutting will root successfully?
Look for 3–4 healthy, flexible nodes (brown bumps where leaves meet stems) and avoid woody, brittle branches. Healthy cuttings should have green (not brown) tips and no signs of disease. Dip in rooting hormone, then place in moist perlite/sand—50% rooting rate is typical for persimmons with proper care. Patience is key; roots may take 4–8 weeks to appear!
What’s the trick to keeping cuttings from rotting?
Overwatering is the #1 killer! Use a well-draining mix (perlite + sand or coconut coir) and keep humidity high (80–90%) with a plastic bag or propagator. Mist cuttings daily but avoid soggy soil—stick your finger in: if it’s damp, wait. Bottom heat (70–75°F/21–24°C) speeds rooting. Yellow leaves? Likely overwatered; brown tips? Too dry. Balance is everything!
Can I propagate persimmons from store-bought fruit trees?
Yes, but with a caveat! Store-bought trees are often grafted, meaning the roots may not match the scion (top growth). For true-to-type persimmons, use cuttings from a seed-grown or own-rooted tree. If grafting is your only option, take cuttings from the scion wood (the part above the graft union) for the best chance of success.
How long until my cutting produces fruit?
Patience, gardener! Persimmons are slow growers—expect 3–5 years for fruiting from cuttings, even with ideal care. Young trees focus on root/leaf growth first. To speed things up, prune lightly to encourage branching, fertilize with low-nitrogen (like 5-10-10) in spring, and protect from pests. Bonus: Dwarf varieties (like ‘Fuyu’) may fruit sooner!
Pro Tip:
Label your cuttings immediately—persimmon varieties (e.g., astringent vs. non-astringent) have different flavors and pollination needs. A quick spray-paint dot on the pot saves headaches later!
Wrapping up and next steps
Propagating persimmon trees from cuttings is a rewarding journey that blends patience with the joy of nurturing life from a simple branch! 🌱 With the right tools, timing, and care—like selecting semi-hardwood cuttings, rooting hormone, and a cozy propagation setup—you can grow a thriving tree in just three months.
Remember, consistency is key: keep your cuttings moist, monitor humidity, and stay patient as roots develop.
Now that you’re armed with know-how, why not take the next step? Grab those cuttings and start your persimmon propagation adventure today—your future orchard (or backyard snack stash!) is waiting. Happy growing! 🌳✨