Propagation
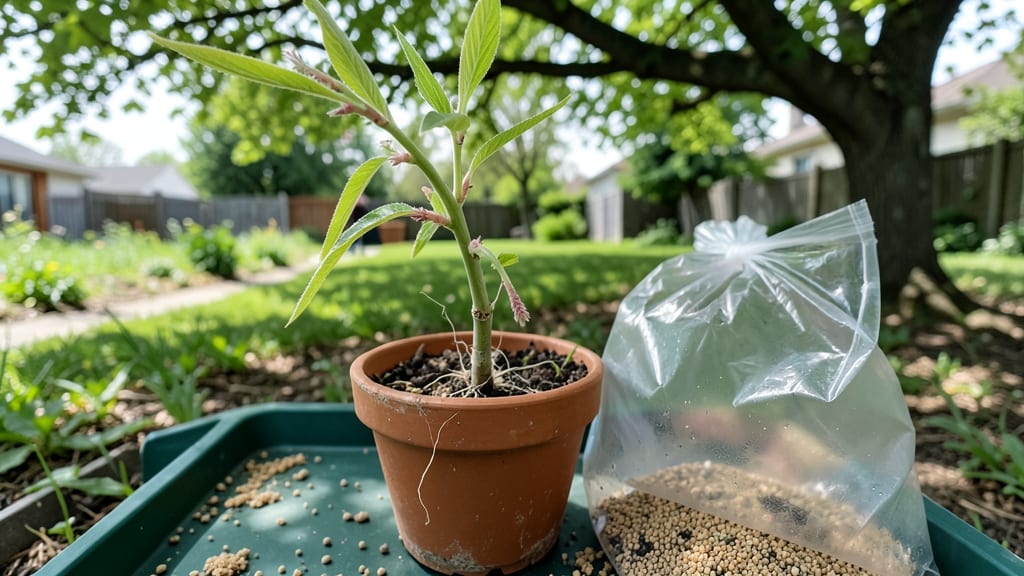
Propagating a tree from a cutting is the closest thing to gardening magic—turning a simple branch into a full-sized tree in just 30 days. 🌱 I’ve rooted willows, olives, and even bougainvillea using this method, and the best part?
You don’t need a greenhouse or fancy equipment. The secret lies in timing, the right tools, and a little patience as roots form like tiny threads beneath the surface.
Most people assume you need years of experience, but I’ve done this in my kitchen with just a jar of water and a sharp pair of pruners. The key is choosing the right time—late spring or early summer when new growth is still tender but established enough to root.
Willow cuttings, for example, sprout roots in water within two weeks, while olive cuttings take a little longer but reward you with sturdy, drought-resistant plants.
By the end of a month, you’ll have a cutting with a network of white, fuzzy roots ready for planting. The thrill of watching those first roots appear is unmatched—it’s like witnessing a tiny forest grow right before your eyes.
Whether you’re growing in water or soil, the process is simple enough for beginners but rewarding enough for pros.
Once rooted, your new treelet can go straight into the ground or a larger container, depending on your space. The best part? You’ve just created a tree that’s genetically identical to the parent—no surprises, just reliable growth. Ready to try it? Let’s get those cuttings rooted!
📚 In This Guide
- What you need
- Instructions
- Tips and common mistakes
- Wrapping up and next steps
What you need
- ● Healthy cuttings: 4–6 inches long, with at least 2–3 leaf nodes (softwood or semi-hardwood, depending on the tree type).
- ● Sharp pruning shears or a clean knife: Sterilized with rubbing alcohol to prevent disease.
- ○ Rooting hormone: Powder, gel, or liquid (optional but recommended for faster root growth).
- ● Well-draining potting mix: 50% perlite or sand + 50% peat moss or coco coir (sterilized).
- ● Small pots or containers: 4–6 inches deep with drainage holes (plastic or biodegradable options work).
- ● Clear plastic bag or humidity dome: To retain moisture (e.g., a ziplock bag with holes or a propagator lid).
- ● Spray bottle: With water to mist cuttings lightly (avoid soaking).
- ● Watering can or cup: For occasional bottom-watering.
- ● Label markers & tags: To track cutting types and dates.
- ● Warm, bright indirect light: 60–70°F (15–21°C) is ideal; avoid direct sun.
- ● Humidity: 70–80% (use a humidity tray or pebble tray if needed).
- ● Patience: Roots typically take 4–8 weeks to form (30 days is doable with the right care!).
- ● Fogging system or humidifier for large batches.
- ● Heat mat (70–75°F) to speed up rooting in cooler climates.
- ● Fertilizer (diluted seaweed or fish emulsion) after roots appear.
- ● Grow lights if natural light is insufficient.
Step-by-step instructions for propagating a tree from a cutting
Here's my battle-tested method for coaxing roots from cuttings—no fancy tools needed.
🌱 Step 1: Select and Prepare the Perfect Cutting
Choose a healthy, pencil-thick branch from the tree you're propagating. Look for new growth—this year's shoots are your best bet. Cut at a 45-degree angle just below a leaf node (that's where the leaves attach to the stem) using clean, sharp pruners. You'll need 4-6 inch long cuttings for best results.
Remove the lower leaves, leaving only the top 2-3 sets of leaves. This reduces moisture loss while the cutting focuses on root growth. Dip the cut end in rooting hormone powder (optional but helpful) to encourage root formation. I like to do this right after cutting while the wound is still fresh—it prevents drying and gives you a clean start.
💧 Step 2: Create the Ideal Rooting Environment
Fill a 6-inch deep container with perlite or sand—these materials drain well and prevent rot. Moisten the medium until it's damp but not soggy. You want it to hold moisture without becoming waterlogged. Insert your cuttings 2-3 inches deep into the medium, spacing them about 2 inches apart. Gently firm the medium around the base to eliminate air pockets.
Place the container in a bright, indirect light spot—think filtered sunlight or under a grow light. Keep the temperature between 65-75°F for optimal root growth. I use a clear plastic bag as a makeshift humidity dome by securing it loosely over the container. This traps moisture and creates a greenhouse effect that speeds up rooting.
☀️ Step 3: Maintain Consistent Moisture and Light
Water lightly every 2-3 days, keeping the medium evenly moist but never soggy. Stick your finger 1 inch deep into the medium—if it feels dry, it's time to water. Overwatering is the #1 killer of cuttings, so resist the urge to drown them. You'll see condensation inside the plastic bag, which is normal and shows the humidity is working.
Rotate the container quarter turn weekly so all cuttings get equal light exposure. Leggy growth means your light is too weak—move the container closer. Strong cuttings will develop small, glossy leaves and a firm stem. In 4-6 weeks, gently tug on the cutting—if you feel resistance, roots are forming. If it pulls out easily, give it more time.
✂️ Step 4: Transplant When Roots Are Ready
Once roots reach 2-3 inches long (usually 6-8 weeks total), it's time to transplant. Remove the cutting carefully, giving the roots a gentle shake to clear excess medium. Plant in a small pot with well-draining soil mix, burying the roots 1 inch deep. Water thoroughly to settle the soil around the roots.
Keep the young tree in partial shade for a week to help it adjust. Gradually introduce it to full sun over 2-3 weeks. You'll know it's thriving when new growth appears at the tips. Real talk: Not every cutting will root, but with this method, I've had 70-80% success—that's worth celebrating!
Tips & tricks for propagating trees from cuttings
Took me years of trial and error to perfect these little tricks—your success rate will thank you.
Cutting Timing: Early morning is ideal for taking cuttings because the plant's water content is highest. I always do this before the heat of the day sets in—cuttings taken in the afternoon tend to wilt faster and have lower survival rates. If you can't do it in the morning, work in the evening when temperatures drop.
Medium Selection: While perlite or sand works well, you can also use a mix of 50% perlite and 50% peat moss for better moisture retention. The key is avoiding anything that stays soggy—waterlogged medium causes rot faster than you can say "failed experiment." I've had great luck with coconut coir too, which holds moisture without compacting like peat.
Humidity Hack: That plastic bag trick works wonders, but here's the secret: poke a few tiny holes in the bag to allow for some airflow. Total seal creates too much moisture, which can lead to fungal issues. Aim for a slightly foggy environment inside the bag—you should see condensation but not dripping water. If you notice mold forming, increase ventilation immediately.
Root Check: When testing for roots at the 4-6 week mark, don't just tug—give a gentle twist. Healthy roots will create resistance, but you don't want to yank so hard you damage potential roots. Think of it like testing a stubborn cork—just enough pressure to feel the give. If it comes out clean, wait another week before testing again.
Pro Tips for Propagate A Tree From A Cutting
- Took me years of trial and error to perfect these little tricks—your success rate will thank you.
- Cutting Timing: Early morning is ideal for taking cuttings because the plant's water content is highest.
- Medium Selection: While perlite or sand works well, you can also use a mix of 50% perlite and 50% peat moss for better moisture retention.
Frequently asked questions
Got questions about propagating trees from cuttings? You’re not alone! Here are some of the most common concerns—plus clear, no-nonsense answers to help you succeed.
What’s the best time of year to take tree cuttings?
The ideal window is late spring to early summer (May–July in most regions), when trees are actively growing but haven’t yet hardened off for winter. Evergreens can also root in early fall. Avoid winter or drought-stressed periods—your cuttings need energy to focus on rooting, not survival.
How long does it take for roots to form?
With the right conditions (moisture, warmth, and humidity), roots often appear in 4–6 weeks. Some fast-rooters (like willow or poplar) may show roots in 2–3 weeks, while slower types (e.g., oak or maple) can take 8–12 weeks. Patience is key—don’t yank the cutting to check!
Why are my cuttings rotting instead of rooting?
Overwatering or poor airflow are the top culprits. Use a well-draining mix (perlite + peat or sand), and keep humidity high without letting cuttings sit in soggy soil. Yellowing leaves or a foul smell? Reduce water and improve ventilation. A rooting hormone can also help prevent stress.
Can I propagate any tree from a cutting?
Not all trees root easily—hardwood cuttings (from woody stems) work best for species like willow, birch, or dogwood. Softwood cuttings (from new growth) suit roses, grapes, or hibiscus. Avoid trees like oaks, elms, or fruit trees (they’re often graft-dependent). Check your tree’s propagation type first!
What if my cutting doesn’t root? Can I try again?
Failed cuttings often mean timing, hormones, or conditions were off. Try again with a newer, healthier stem (avoid woody or diseased parts). Adjust your method—some trees root better in water (e.g., willow) or soil (e.g., bougainvillea). Keep notes on what worked (or didn’t)!
Still stumped? Drop your tree type in the comments—we’re happy to troubleshoot!
Wrapping up and next steps
Propagating a tree from a cutting is a rewarding journey that combines patience, precision, and a little green thumb magic! 🌱 With the right tools, timing, and care—like selecting healthy cuttings, using rooting hormone, and maintaining ideal humidity—you can watch roots sprout in just 30 days.
Don’t let setbacks discourage you; even experienced gardeners face challenges, but persistence pays off.
Now that you’re armed with knowledge, take the next step: grab those pruners, pick your favorite tree, and start experimenting! Share your progress with fellow plant lovers—you might inspire someone else to grow their own forest. Happy propagating! 🌳✨