
Trees
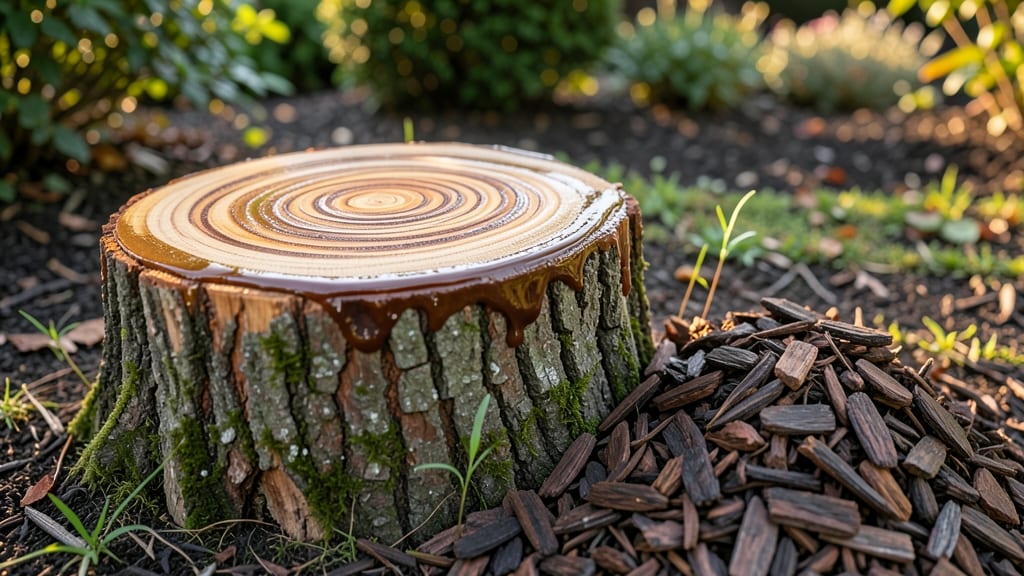
Preserving a tree stump isn't just about stopping decay—it's about reclaiming that yard space without the mess of rot or regrowth. 🌳 I learned this the hard way after my oak stump sprouted a ring of suckers that took over my garden beds.
The right method turns a stump into a stable base for a fire pit, seating area, or even a planter.
You don’t need expensive tools—just a few basics like a stump grinder (or a chainsaw for smaller stumps), wood preservative, and a brush for application. For natural decay prevention, mulch or landscape fabric works too.
The key is acting fast after cutting to prevent fungal growth and pests from moving in.
What you’ll end up with is a stump that lasts 10+ years without rotting, sprouting, or attracting termites. The surface stays smooth enough for seating or decorating, and the base won’t sink or become a tripping hazard. Plus, you skip the labor of digging it out entirely.
Works for any yard size, from suburban backyards to rural properties. Here’s how to make it last—without the guesswork.
📚 In This Guide
- What you need
- Instructions
- Tips and common mistakes
- Wrapping up and next steps
What you need
- ● Pruning saw or chainsaw – For cutting the stump to your desired height (aim for 4–6 inches above ground).
- ○ Stump grinder (rental recommended) – Optional but highly effective for grinding down the stump to ground level.
- ● Shovel and mattock – To dig around the stump and remove excess soil or roots.
- ● Hammer and cold chisel – For carving out the center of the stump (if not grinding).
- ● Wood sealant or preservative – Choose a non-toxic, outdoor-rated option like linseed oil, tung oil, or a commercial wood sealer (e.g., Ready Seal or Thompson’s WaterSeal).
- ● Paintbrush or roller – For applying sealant evenly.
- ○ Roots barrier (optional but recommended) – A plastic root barrier sheet (10–20 mil thickness) or cardboard soaked in saltwater to deter regrowth.
- ● Mulch or landscape fabric – To cover the base and suppress weeds (e.g., cypress mulch or black plastic sheeting).
- ● Garden hose and bucket – For cleaning the stump before sealing.
- ● Wood stain or paint – For a polished look (e.g., Behr Premium or Sherwin-Williams outdoor paint).
- ● Decorative elements – Moss kits, solar-powered lights, or engraved plaques for a personalized touch.
- ● Epoxy resin – For filling cracks or creating a glossy finish (e.g., ArtResin).
- ● Fireproof sealant – If using the stump as a fire pit (e.g., Concord Fire Pit Cement).
- ● Safety gear – Gloves, safety goggles, ear protection (for power tools), and long sleeves.
- ● Weather check – Work on a dry, clear day to avoid slippery conditions or sealant issues.
- ● Local regulations – Verify if your area requires permits for stump removal or grinding.
- ● Stump height – Leave it no taller than 4–6 inches to prevent tripping hazards.
Step-by-step guide to preserving a tree stump for years
Here's how to keep your stump standing strong—no rot, no pests, just solid wood for decades.
🪴 Step 1: Clean and Prep the Fresh Cut Surface
First, remove any loose bark or debris from the freshly cut stump. Use a wire brush or stiff broom to scrub away sap and residue—this ensures your preservative sticks properly. A clean surface means better adhesion and longer protection.
If the stump is still oozing sap, let it dry completely for 24-48 hours before proceeding. Fresh sap creates a barrier that prevents sealants from bonding effectively. You'll know it's ready when the surface feels dry to the touch and no more sticky residue appears.
💧 Step 2: Apply a Wood Sealant or Stump Filler
Choose a wood sealant or stump filler designed for outdoor use—look for products containing petroleum-based sealants or epoxy compounds. These create an impermeable barrier that blocks moisture and oxygen, the two main causes of decay.
Use a paintbrush or roller to apply a ¼-inch thick layer evenly across the entire cut surface. Don’t skip the sides—even small exposed areas can become entry points for fungi and insects. Let the first coat dry completely (4-6 hours) before adding a second layer for maximum protection.
☀️ Step 3: Protect with a Physical Barrier
After the sealant dries, install a metal or plastic stump cap over the top. This adds an extra layer of defense against rain, snow, and UV damage. Make sure the cap fits snugly—if it’s loose, secure it with waterproof tape or construction adhesive to prevent water from seeping underneath.
For extra durability, wrap the stump’s lower 12 inches with landscape fabric or metal flashing. This prevents moisture from wicking up through the soil and protects against burrowing pests like termites. Bury the fabric 2 inches below ground level to create a moisture barrier.
✂️ Step 4: Maintain and Inspect Regularly
Check your preserved stump twice a year—spring and fall—to ensure the sealant remains intact. Look for cracks, peeling, or soft spots, which signal it’s time to reapply. A simple sandpaper touch-up on rough areas helps the new sealant bond better.
If you notice mold growth or pest activity, scrub the area with a bleach solution (1 part bleach to 10 parts water) before resealing. Mold indicates trapped moisture, so improve drainage around the stump if needed—redirecting rainwater with a soil berm or drainage pipe can make a big difference.
🌱 Step 5: Extend Longevity with Optional Upgrades
For stumps in high-moisture areas, consider adding a concrete collar around the base. Pour a 2-inch thick ring of concrete 6 inches out from the stump to create a moisture barrier. This keeps groundwater from seeping directly into the wood.
If aesthetics matter, paint the stump with exterior-grade wood stain after sealing. Not only does this enhance curb appeal, but it also adds another protective layer. Just avoid dark colors—they absorb more heat, which can accelerate wear over time.
Tips & tricks for perfect tree stump preservation
Real talk: Preserving a stump isn't just about slapping on some paint—it's about creating a moisture-proof fortress. Here's what nobody tells you about making your stump last for years.
Surface Prep is Everything: I learned this the hard way after ruining three sealant jobs—always remove every last bit of loose bark and sap before applying anything. Use a wire brush to get into crevices, and for stubborn sap, a putty knife works better than you'd think. The 24-48 hour drying time is non-negotiable; rushing this step means your sealant will peel off like wallpaper in a rainstorm. Pro tip: Test the dryness by pressing a paper towel to the surface—if it comes away clean, you're good to go.
Sealant Application Technique: That ¼-inch thick layer isn't just a suggestion—it's the difference between a stump that lasts and one that starts rotting in two years. Use a roller for large surfaces and a brush for edges, but don't go crazy with pressure. Too much force can push sealant into the wood instead of creating that protective barrier. Let that first coat dry completely for the full 4-6 hours before adding a second layer—cutting corners here means gaps where moisture can sneak in.
Physical Barrier Upgrades: The stump cap is your first line of defense against the elements, but the real game-changer is that 12-inch fabric wrap. I've seen stumps last twice as long with this protection because it stops moisture from wicking up through the soil. Burying the fabric 2 inches deep creates a moisture barrier that works like a root barrier for your stump. For extra peace of mind, add a layer of landscape fabric underneath the concrete collar if you're doing that upgrade—it creates a double barrier against groundwater.
Maintenance Secret: Those twice-yearly inspections are your early warning system. I always check in spring (when moisture levels rise) and fall (before winter freezes). The sandpaper touch-up isn't just about looks—it roughens the surface so new sealant bonds better. And if you see mold, don't just scrub and reseal—look for why moisture is getting trapped. Sometimes it's as simple as improving drainage with a soil berm or redirecting downspouts away from the stump.
Pro Tips for Preserve A Tree Stump
- Real talk: Preserving a stump isn't just about slapping on some paint—it's about creating a moisture-proof fortress.
- Surface Prep is Everything: I learned this the hard way after ruining three sealant jobs—always remove every last bit of loose bark and sap before applying anything.
- Sealant Application Technique: That ¼-inch thick layer isn't just a suggestion—it's the difference between a stump that lasts and one that starts rotting in two years.
Frequently asked questions
Got questions about preserving a tree stump? You’re not alone! Here are answers to the most common concerns—from timing to troubleshooting—to help you keep that stump looking great (or just decay-free) for years.
How long does it take for a preserved tree stump to fully decay?
A properly treated stump can last decades—some even outlive the original tree! With chemical treatments or sealing, decay slows dramatically, though environmental factors (moisture, pests, or weather) may still play a role. Expect 5–10+ years before noticeable deterioration, but regular inspections (every 6–12 months) help catch issues early.
Is there a best time of year to preserve a tree stump?
The ideal window is late winter or early spring, when the ground is thawed but before pests (like termites) become active. Avoid treating in wet conditions—wait for dry weather so sealants adhere properly. If you’re in a humid climate, opt for summer preservation (with extra protective layers) to prevent mold growth.
Can I reuse or repurpose a preserved stump instead of removing it?
Preserved stumps make unique planters, firewood holders, or even artistic installations. Just ensure the treatment is pet- and child-safe (avoid toxic chemicals like creosote). For functional uses (e.g., cutting firewood), let the stump dry fully first. Pro tip: Sand rough edges and seal with non-toxic stain for a polished look!
What if ants, termites, or fungi start attacking my treated stump?
Don’t panic—it’s fixable! For insects (ants/termites), apply borax-based treatments or insecticidal dust to borrows. For fungus/mold, scrub with a mix of 1 part bleach to 3 parts water, then reseal. If decay is severe, consider retreating the entire surface with a fresh coat of sealant or preservative. Prevention tip: Inspect stumps annually for cracks or soft spots!
Is DIY stump preservation cheaper than hiring a pro?
Yes! DIY costs $20–$50 (for sealants, paint, or treatments) vs. $100–$300+ for professional services. The trade-off? Pros offer longer-lasting results (like pressure-treated stumps) and handle hazardous chemicals. For most homeowners, DIY is budget-friendly—just prioritize quality products and follow instructions closely for best results.
| Quick Troubleshooting Guide |
|---|
| Problem: Sealant peeling after application |
| Fix: Sand the surface lightly, clean with soap/water, and reapply sealant in dry, warm weather. |
| Problem: Stump smells bad or attracts pests |
| Fix: Scrub with vinegar/water, then treat with pesticide dust or a fresh coat of pet-safe sealant. |
Wrapping up and next steps
Preserving a tree stump doesn’t have to be a daunting task—with the right techniques, you can extend its lifespan and even turn it into a functional or decorative feature! 🌳 Whether you choose to seal it with paint or epoxy, cover it with mulch or rocks, or transform it into a planter or bench, the key is consistency and proper care.
Your efforts will not only protect the stump but also enhance your outdoor space.
Now that you’re armed with these practical steps, why not take action today? Grab your supplies, roll up your sleeves, and give your tree stump the care it deserves. Happy preserving—and enjoy the long-term benefits of your hard work! 🛠️✨