Landscaping
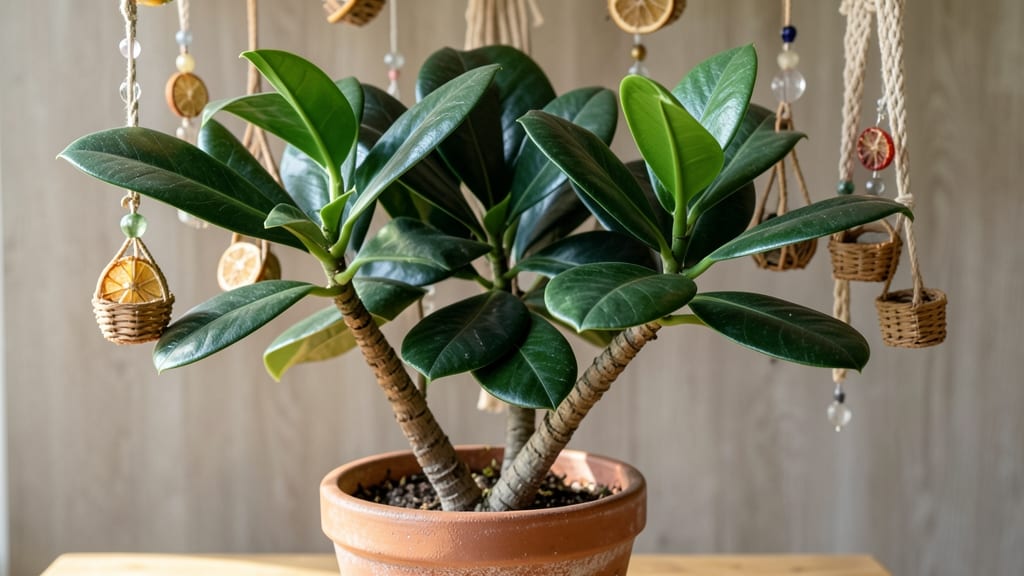
Decorating your tree transforms it into a living centerpiece that steals the show—no holiday season required. ✨ I’ve turned bare branches into lush canopies with climbing vines, whimsical lights, and even hanging planters full of flowers, all without damaging the tree.
The best part? Most projects take less than an hour and use supplies you likely already own.
Start with what you love: fairy lights for a magical glow, air plants for a low-maintenance touch, or bold fabric drapes for a boho vibe. My favorite trick is weaving in seasonal blooms like sweet peas or clematis—they climb naturally and add fragrance.
For a pop of color, try painted terracotta pots or woven baskets filled with trailing plants.
You’ll end up with a tree that feels like a year-round garden feature, not just a seasonal decoration. The results? A canopy that draws compliments, attracts pollinators, and creates cozy outdoor spaces. Plus, it’s a project that adapts to any yard—urban balconies, rural backyards, or everything in between.
Whether you’re prepping for summer or winter, the key is balancing beauty with practicality. Use lightweight materials, secure everything tightly, and always check for pests or damage before hanging. Now, let’s get that tree looking like the star it is!
📚 In This Guide
- What you need
- Instructions
- Tips and common mistakes
- Wrapping up and next steps
What you need
- ● Tree (or shrub): A healthy, sturdy tree or shrub with a dense canopy. Ideal options include magnolias, dogwoods, or ornamental cherries.
- ● Festive lights: 100-200 LED string lights (solar-powered or battery-operated for ease). Choose warm white or colorful options for ambiance.
- ● Decorative ribbons or fabric: 1-2 rolls of waterproof, weather-resistant ribbon (e.g., satin, burlap, or metallic) in your color scheme.
- ● Ornaments: 20-50 pieces (wooden, ceramic, or plastic) in varying sizes. Hang them at different heights for dimension.
- ● Tree ties or zip ties: 50-100 (soft, non-damaging ties to secure decorations without harming the branches).
- ○ Ladder (optional but helpful): A lightweight, extendable ladder (6-10 ft) if your tree is tall.
- ● Spray paint: For a bold look (e.g., pastel or metallic). Use outdoor-safe, non-toxic paint and a stencil if desired.
- ● Projections or decals: Silhouette cutouts (e.g., stars, moons, or holiday themes) for a magical touch.
- ● Fairy lights or lanterns: 10-20 small solar-powered lanterns or fairy lights for extra glow.
- ● Weatherproof adhesive: For lightweight decorations like paper flowers or signs.
- ● Themed accents: Mini pumpkins, pinecones, or faux greenery for seasonal vibes.
- ● Check weather forecasts—avoid decorating if rain or wind is expected within 24 hours.
- ● Work in natural light to see colors and placements clearly.
- ● Use gloves if handling thorny branches or rough materials.
Step-by-step guide for creating a festive tree canopy
Here’s how to transform your tree into a stunning centerpiece—quickly and beautifully.
🌿 Step 1: Choose Your Decoration Style and Gather Supplies
Start by deciding on a theme—whether it’s classic, rustic, or whimsical. I like to sketch a quick layout on paper first to visualize spacing and balance. For a 4-foot tree, you’ll need about 15-20 decorations to fill the canopy evenly without looking crowded.
Grab your supplies: string lights (warm white or multicolor), ornaments (mix of sizes and textures), ribbons or garland (for draping), and a step stool (if your tree is tall). Don’t forget a ladder if you’re working high up—safety first! I always test-fit a few decorations on a branch first to see how they’ll look before committing.
🪴 Step 2: Hang String Lights for Instant Ambience
Begin with the lights—they’re the backbone of your tree’s glow. Wrap them around the trunk first, securing them with zip ties or twist ties every 12-18 inches. For a 50-foot strand, you’ll need about 3-4 ties to keep it taut and even.
Next, weave the lights through the branches, working from the bottom up. Leave 6-8 inches of slack between each branch to create a soft, cascading effect. If your tree has dense foliage, tuck the lights gently between branches so they peek through naturally. Turn them on halfway through to check for even lighting—this helps spot any gaps before you finish.
✂️ Step 3: Distribute Ornaments for Balance and Depth
Start with larger ornaments at the bottom third of the tree, then work upward with medium and small decorations. I like to use the "rule of thirds"—place a few statement pieces (like oversized bows or themed ornaments) at key spots to draw the eye. For a 4-foot tree, aim for 3-4 large ornaments, 8-10 medium, and 5-7 small to avoid a cluttered look.
Use ornament hooks or floral wire to hang decorations securely. If your tree has fragile branches, wrap a small piece of netting around the branch before attaching ornaments to prevent damage. Step back every few minutes to check for balance—if one side looks heavier, redistribute a few pieces to even it out.
💧 Step 4: Add Final Touches with Garland and Ribbon
Drape garland or ribbon across the branches to soften the look and add texture. For a 3-foot garland, start at the top and let it cascade down one side, securing it with clear fishing line (invisible when tied). If using ribbon, tie a bow around the trunk or weave it through the branches for a polished finish.
Here’s the thing—less is often more. A few well-placed ribbons or a single bow can elevate the whole look without overwhelming the tree. If your tree has bare spots, tuck in a few pinecones or berry clusters for natural texture. Finish by fluffing any flattened branches to restore fullness—your tree should look lush and inviting.
☀️ Step 5: Step Back and Adjust for Perfection
Take a 10-foot step back to assess your work. The goal is a harmonious, festive canopy that feels intentional, not rushed. If one area feels sparse, add a few more ornaments or adjust the lighting. I always check the tree in daylight and at night—lights look different under each condition, and you want it to shine in both.
Once you’re happy, give the tree a final once-over to ensure all decorations are secure. A gentle tug on a few ornaments will confirm they’re held tight. Now, step back and admire your handiwork—your tree is ready to be the star of the season!
Tips & tricks for perfect tree decoration
Transforming your tree into a showstopper takes more than just hanging decorations—it’s about creating harmony and depth. Here’s how to elevate your festive canopy effortlessly.
Lighting Layout: When wrapping your 50-foot strand of string lights around the trunk, space the 3-4 zip ties evenly between the bottom and top. This prevents bunching near the base while keeping the lights taut. For a more dramatic effect, alternate between wrapping lights clockwise and counterclockwise as you move up the tree—this creates visual interest without extra effort.
Ornament Distribution: The rule of thirds isn’t just for photos—it works for trees too! After placing your 3-4 large ornaments at the bottom, use the same principle for the middle and top sections. For example, if the bottom third has 4 large ornaments, the middle should have 3 medium ones, and the top just 2 small ones. This creates a natural flow that draws the eye upward.
Garland Placement: For that 3-foot garland, resist the urge to drape it all on one side. Instead, create a diagonal line from the top center to the bottom outer edge—this adds movement and balance. Secure it with clear fishing line instead of twist ties, which can leave visible marks. If your tree has uneven branches, tuck the garland behind thicker areas to create the illusion of fullness.
Final Check: That 10-foot step back is your best friend. Before you’re done, turn off the lights and examine your tree in natural light—this reveals any uneven spots or missing decorations. Then, turn them on and check for any dark patches where lights might be hidden. A quick adjustment here can make all the difference between "done" and "showstopping."
Pro Tips for Decorate Your Tree
- Transforming your tree into a showstopper takes more than just hanging decorations—it’s about creating harmony and depth.
- Lighting Layout: When wrapping your 50-foot strand of string lights around the trunk, space the 3-4 zip ties evenly between the bottom and top.
- Ornament Distribution: The rule of thirds isn’t just for photos—it works for trees too!
Frequently asked questions
Got questions about decorating your tree? You’re not alone! Here are some of the most common queries—and quick answers—to help you create the perfect festive canopy without the stress.
What’s the best time of year to decorate a tree in my yard?
For most climates, late fall (October–November) is ideal—just after leaves have fallen but before harsh winter winds. If you live in a warm-weather area, decorate in early winter (December–January) to avoid pests or extreme heat. Pro tip: Check local frost dates to time it right!
Can I decorate any tree, or are there restrictions?
Most healthy, mature trees (oak, maple, pine, etc.) can handle decorations, but avoid weak branches, diseased trees, or those near power lines. For extra safety, use lightweight materials and secure them gently with tree-friendly clips or clear fishing line. Skip evergreens if they’re drought-stressed!
How do I keep decorations from damaging the tree’s bark?
Use soft, flexible materials like felt or fabric ornaments and avoid nails/screws. For lights, opt for battery-powered LED strands (no heat damage) and wrap them loosely around branches. If using ribbons, tie them in loose loops—never tightly. A quick check: If you can’t see the bark through the decoration, it’s too tight!
What’s a quick fix if my tree is too small for traditional ornaments?
No problem! Try:
- Mini fairy lights (battery-operated, solar, or string lights)
- Pinecone garlands (paint and hang with twine)
- Hanging lanterns (use clear fishing line for a magical glow)
- Nature-themed decor (acorns, feathers, or dried citrus slices)
How do I protect my tree from pests after decorating?
Pests love decorations! After the holidays, remove all ornaments and store them in sealed containers. Shake off debris and inspect for eggs or spiderwebs. For extra defense, spray branches lightly with water (pests hate dampness) or apply a neem oil solution in early spring.
Wrapping up and next steps
Decorating your tree doesn’t have to be a time-consuming task—with the right tools and a little creativity, you can transform it into a stunning focal point in just 30 minutes! 🌲✨ Whether you’re using natural elements, lights, or ornaments, the key is to keep it simple, personal, and joyful.
Trust your instincts, and don’t forget to step back occasionally to admire your handiwork.
Now that you’re armed with ideas, grab your supplies and get started! Why not invite a friend or family member to join in the fun? Your newly decorated tree will be the perfect centerpiece for gatherings—and the memories made along the way will last even longer. Happy decorating! 🎄💛