Size
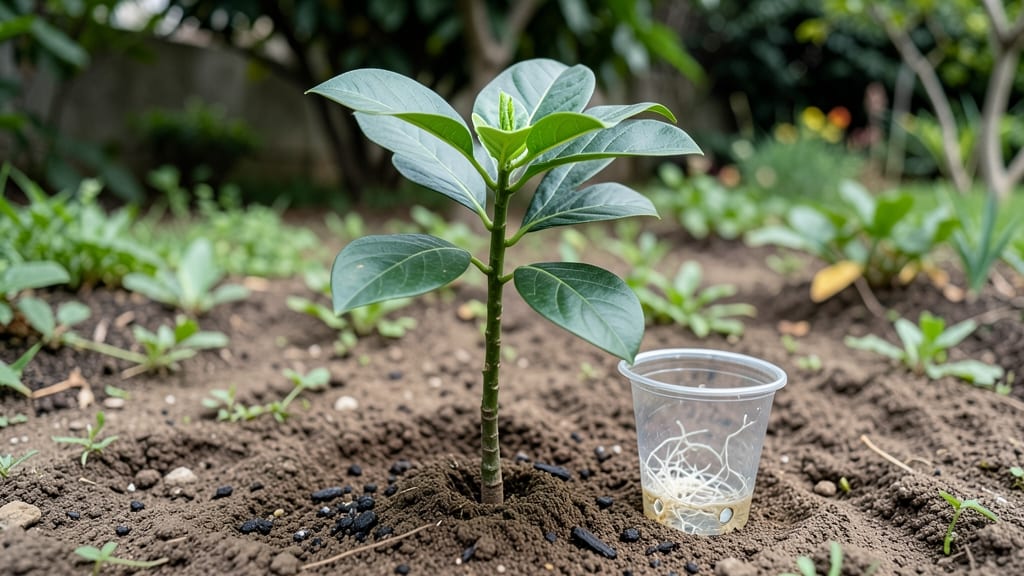
Growing an avocado tree from a pit is easier than you think—your kitchen counter could soon host a tiny jungle. 🌱 I’ve turned three pits into thriving plants, and the key is patience, not perfection.
The first green sprouts appear in just 2-4 weeks, but real growth takes months of gentle care and smart adjustments.
All you need is a pit, toothpicks, water, and a sunny windowsill. No fancy tools, no greenhouse—just a clear jar and a little attention. The real magic happens when those first leaves unfurl, signaling your plant is ready for its next home in soil.
Most beginners overwater or move too fast; I’ll show you how to avoid those mistakes.
By month six, you’ll have a 2-foot-tall sapling with glossy leaves and a sturdy stem. It’s not a full-grown tree yet, but it’s a living reminder that great things grow from small beginnings. The best part? This method works in apartments, kitchens, or sunrooms—no yard required.
We’ll cover everything from rooting the pit to transplanting and troubleshooting yellow leaves. Whether you’re a skeptic or a hopeful gardener, this guide makes the process foolproof. Let’s get those toothpicks ready!
📚 In This Guide
- What you need
- Instructions
- Tips and common mistakes
- Wrapping up and next steps
What you need
- ● Avocado pit: 1 fresh, organic avocado pit (preferably Hass variety for best results).
- ● Toothpicks or small skewers: 3-4 (bamboo or plastic, ~3-4 inches long).
- ● Glass or jar: 1 (wide-mouth, 16-20 oz, like a mason jar).
- ● Water: Distilled or tap water (room temperature).
- ● Potting soil: 1 bag (well-draining, peat-based or cactus/succulent mix).
- ● Small pot: 1 (4-6 inches in diameter, with drainage holes).
- ● Spray bottle: 1 (for misting roots).
- ● Rooting hormone: 1 small bottle (speeds up root growth).
- ● Fertilizer: Balanced liquid fertilizer (e.g., 10-10-10) for later stages.
- ● Humidity dome or plastic wrap: Keeps moisture high during early growth.
- ● Grow lights: 1-2 (LED or fluorescent, for indoor light support).
- ● Thermometer/hygrometer: Monitors temperature/humidity (ideal: 70-85°F, 60-70% humidity).
- ● Pruning shears: Small pair (for shaping later).
Step-by-Step guide to growing an avocado tree from a pit
Here's how to coax life from that grocery store pit—no green thumb required.
🌱 Step 1: Prepare the Pit for Germination
Rinse the avocado pit thoroughly to remove any remaining fruit flesh. This prevents mold and rot. Look for the small dimple at the top—the "stem end"—where the tree will sprout. I like to use three toothpicks arranged in a triangle around the pit to suspend it above water in a glass.
Fill a glass with 3-4 inches of water, making sure the pit floats with just the bottom third submerged. The dimpled end should face upward. Place the glass in a warm spot with bright, indirect light—a south-facing window works well. Avoid direct sun, which can overheat the water and stress the emerging roots.
💧 Step 2: Monitor and Maintain Germination Conditions
Change the water every 2-3 days to prevent bacterial growth. You'll know it's time when the water looks cloudy or smells funky. Keep the pit submerged enough to maintain hydration but not so deep that it drowns—just the bottom third should stay underwater.
Germination can take 2-6 weeks, depending on the pit's freshness and warmth. You'll see a small sprout first, followed by a root that grows downward into the water. Once the root reaches about 2-3 inches, it's ready for the next step. Don't rush this—patience here means a stronger start.
🪴 Step 3: Transition to Soil and Support Growth
Fill a 6-inch diameter pot with well-draining potting mix—avoid garden soil, which compacts and suffocates roots. Make a small hole in the center and gently place the germinated pit so the root sits 1 inch below the soil surface. Press lightly around the edges to secure it without compacting the mix.
Water thoroughly until it drains from the bottom, then place the pot in a spot with bright, indirect light. Avocado trees love warmth—keep the soil temperature between 65-75°F. You'll notice new leaves forming within 4-6 weeks if conditions are right. If the leaves yellow or wilt, you're either overwatering or the light isn't sufficient.
☀️ Step 4: Gradually Acclimate to Sunlight
After 2-3 weeks in soil, begin introducing direct sunlight slowly. Start with 1-2 hours of morning sun and increase by 1 hour daily over 10-14 days. Sudden exposure can scorch tender leaves. A south- or west-facing window is ideal, but avoid harsh afternoon sun in hot climates.
Rotate the pot a quarter turn weekly so the tree grows straight and doesn't lean toward the light. You'll know it's adjusting well when new leaves appear darker green and firmer. If the tree grows leggy (long stems with sparse leaves), it's a sign it needs more light—move it closer to the window or supplement with a grow light.
⏰ Step 5: Prune and Care for Long-Term Health
Once the tree reaches 12-18 inches tall, prune the top set of leaves to encourage bushier growth. Use clean, sharp scissors to make the cut just above a leaf node. This redirects energy to the lower branches, preventing a single, weak stem. Remove any yellow or damaged leaves immediately—they drain the tree's resources.
Water when the top 1-2 inches of soil feel dry. Avocado trees are drought-tolerant once established, but young trees need consistent moisture. Fertilize lightly every 2-3 months with a balanced, water-soluble fertilizer during the growing season (spring and summer). Over-fertilizing can burn roots, so always dilute to half-strength.
Tips & tricks for perfect avocado tree germination
Here's what nobody tells you about turning that grocery store pit into a thriving plant.
Water Quality Matters: Use filtered or distilled water when starting your pit—tap water often contains chlorine and minerals that can inhibit root growth. If you must use tap water, let it sit uncovered in the glass for 24 hours before adding the pit to allow chlorine to evaporate. The 3-4 inches of water should feel lukewarm to the touch, mimicking natural conditions that encourage faster germination.
Light Positioning: In Step 1, place your glass near a south-facing window where it receives bright, indirect light for at least 6-8 hours daily. If you notice condensation forming on the glass, it's getting too much direct heat—move it back slightly. For even lighting, rotate the glass a quarter turn daily so the pit doesn't develop uneven growth toward the light source.
Germination Timing: The 2-6 week germination window can feel endless, but there's a trick: place the glass in a warm spot (like near a heating vent) to speed up the process. If you're impatient, you can cover the glass loosely with plastic wrap to create a mini greenhouse effect—just remember to remove it daily for 10 minutes to prevent mold buildup. Once that 2-3 inch root appears, resist the urge to rush to soil—let it grow another inch for better stability.
Soil Transition: When moving your pit to soil in Step 3, choose a 6-inch pot with drainage holes—this prevents root rot from excess moisture. Mix your potting soil with 20% perlite or vermiculite to improve aeration. After planting, gently press the soil around the root to eliminate air pockets, then water until it drains freely from the bottom. This ensures the root sits 1 inch below soil level without suffocating.
Pro Tips for How Do You Grow An Avocado Tree From A Pit
- Here's what nobody tells you about turning that grocery store pit into a thriving plant.
- Water Quality Matters: Use filtered or distilled water when starting your pit—tap water often contains chlorine and minerals that can inhibit root growth.
- Light Positioning: In Step 1, place your glass near a south-facing window where it receives bright, indirect light for at least 6-8 hours daily.
Frequently asked questions
How long does it take for an avocado pit to sprout?
Patience is key! Most avocado pits take 2–8 weeks to sprout after planting, depending on moisture, warmth, and pit health. Keep the soil consistently damp and place your jar in a warm, bright spot (but avoid direct sunlight). If nothing happens after 8 weeks, your pit may not be viable—try another!
Can I grow an avocado tree indoors year-round?
Yes, but with care! Avocado trees thrive indoors in well-lit spaces (like near a south-facing window) or under grow lights. They need 6–8 hours of light daily and prefer temperatures between 60–80°F (15–27°C). In winter, reduce watering and watch for dry air—consider a humidifier to keep leaves lush.
Why is my avocado tree’s leaves turning yellow?
Yellow leaves usually signal overwatering, underwatering, or nutrient deficiencies. Check the soil—it should be slightly moist but not soggy. If the yellowing starts at the bottom, it’s often overwatering; if it’s scattered, your tree may need fertilizer (balanced 10-10-10) or more light. Brown edges? Low humidity!
Will my indoor avocado tree ever produce fruit?
It’s possible but unlikely indoors—avocado trees need full sun, space, and pollination (often from bees) to fruit. Most indoor trees stay ornamental, but with patience (5–10+ years), large trees in greenhouses or sunny outdoor climates (USDA zones 9–11) can bear fruit. Try planting outdoors if you’re in a warm region!
What’s the best way to transplant my avocado seedling?
Wait until your seedling has 3–4 inches of height and 2–3 leaves before transplanting. Use a well-draining pot (1–2 gallons) with potting mix and bury the stem up to the first leaves. Water lightly after transplanting and place it in bright, indirect light for a week to reduce stress.
Wrapping up and next steps
Growing an avocado tree from a pit is a rewarding journey that blends patience with simple care—and you’ve got this! 🌱 From sprouting to transplanting, each step builds confidence in your green thumb.
Once your tree reaches 6 months, celebrate your progress and keep nurturing it—soon, you might even enjoy homegrown avocados!
Next up: Share your avocado adventure on social media or tag us—we’d love to see your tree thrive! 📸 Or, explore advanced care tips to help it grow even stronger.