Pruning
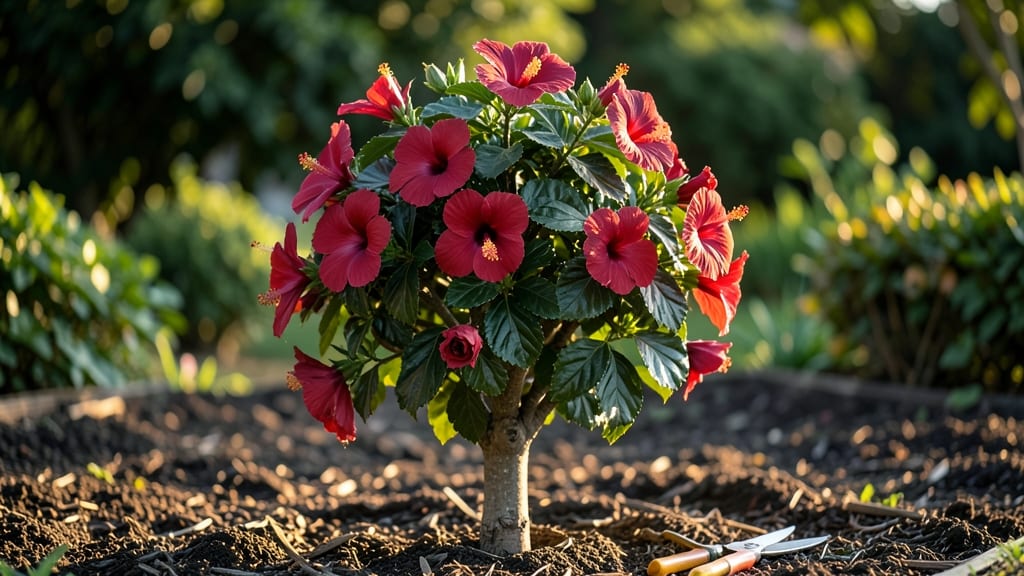
A hibiscus topiary tree turns your garden into a living work of art—vibrant blooms and glossy leaves that stay striking all year with just a little shaping. I’ve pruned mine into a sleek, rounded form that draws admiring glances from neighbors, and the best part?
It requires far less work than most topiaries. The secret lies in strategic cuts and understanding how hibiscus responds to shaping, which I’ll walk you through step by step.
You’ll need sharp pruning shears, a sturdy ladder (for taller varieties), and a vision for your design—whether that’s a classic rounded dome or a more dramatic tiered shape.
My favorite part is watching the fresh new growth fill in after each trim, creating that luxurious, manicured look without needing constant upkeep. Hibiscus thrives in zones 5-11, making it a versatile choice for almost any climate.
With the right technique, your topiary will burst with bold, jewel-toned blooms from spring through fall, while the evergreen foliage adds year-round texture. The key is timing your prunes just after flowering and using the "pinch-and-shape" method to encourage dense growth.
I’ll show you how to keep it looking sharp with minimal effort—no green thumb required.
Once you’ve mastered the basics, you can get creative with companion plants—think trailing ivy at the base or bright annuals around the edges to highlight your masterpiece. The possibilities are endless, and the results? A garden centerpiece that turns heads without the fuss of high-maintenance shrubs.
📚 In This Guide
- What you need
- Instructions
- Tips and common mistakes
- Wrapping up and next steps
What you need
- ● Hibiscus plant: A healthy, mature hibiscus (preferably Hibiscus rosa-sinensis or Hibiscus syriacus for best results). Choose a plant with a sturdy trunk (1–2 inches in diameter) for structural support.
- ● Pruning shears: Sharp, bypass-style shears (for clean cuts) or anvil-style shears (for thicker branches). Size: 6–8 inches for precision.
- ● Hand pruners: A pair for trimming smaller branches (avoid dull tools—they crush stems!).
- ○ Pruning saw: Optional but helpful for thicker branches (if your hibiscus has woody stems over ½ inch thick).
- ● Gloves: Heavy-duty gardening gloves (to protect against thorns and sap).
- ● Disinfectant: 70% isopropyl alcohol or a pruning sealant (to prevent disease spread).
- ● Stake & ties: A bamboo stake (3–4 feet tall) and soft tree ties or cloth strips (to support the topiary shape while it grows).
- ● Balanced fertilizer: A slow-release, 10-10-10 NPK fertilizer (to encourage lush, vibrant growth).
- ● Topiary wire: Thin, flexible copper or aluminum wire (for shaping stubborn branches).
- ● Hairspray or clear sealant: A light coat of water-based hairspray (to temporarily hold delicate cuts in place while drying).
- ● Plant food: A hibiscus-specific or acid-loving plant fertilizer (for extra color boosts).
- ● Mulch: Organic mulch (like pine bark) to retain moisture and protect roots.
Step-by-step guide to shaping a hibiscus topiary tree
Here's how to transform a hibiscus bush into a striking architectural centerpiece.
Choose the Right Hibiscus Variety and Planting Location
Start with a hardy hibiscus variety like Hibiscus syriacus or Hibiscus rosa-sinensis—both respond well to topiary shaping. Plant in full sun (at least 6 hours daily) with well-draining soil. The key is a spot where the plant gets morning sunlight and afternoon shade in hotter climates, preventing leaf scorch.
Dig a hole twice as wide as the root ball but no deeper. Hibiscus roots spread horizontally, so avoid planting too deep—set the root crown 1 inch above soil level. Water deeply immediately after planting to settle the soil around roots. You'll see vigorous new growth within 2-3 weeks if the location suits the plant.
Establish the Initial Framework in Early Spring
Wait until new spring growth appears (typically March-April in most climates) before pruning. Use clean, sharp pruning shears to shape the main trunk and branches into your desired topiary form—whether a formal cone, spiral, or rounded globe. I like to start with a central leader (main upward-growing stem) and 3-4 primary branches spaced evenly around it.
Cut back any overly long branches by one-third to encourage bushier growth. Avoid cutting into old wood—hibiscus flowers best on new growth. After shaping, apply a balanced fertilizer (10-10-10) to support the plant's recovery. You'll notice fresh, tender shoots emerging within 4-6 weeks—these are your building blocks for further refinement.
Refine the Shape Through Summer Maintenance
Throughout the growing season, trim back any branches that grow beyond your desired shape. The goal is to maintain symmetry while encouraging dense foliage. I find that light pruning every 4-6 weeks keeps the hibiscus looking polished without stressing the plant. Always cut just above a leaf node or bud to promote new growth.
Watch for new shoots that emerge after pruning—these are your cues to keep shaping. If a branch looks leggy or sparse, pinch off the tip to redirect energy into side shoots. Mulch around the base with 2-3 inches of organic mulch to retain moisture and suppress weeds. Hibiscus thrives with consistent moisture, so water deeply once a week during dry spells.
Final Pruning Before Winter Dormancy
Late fall, just before the first frost, give your topiary a light cleanup. Remove any dead, diseased, or crossing branches. You can also do a light shaping trim to maintain the form, but avoid heavy pruning—hibiscus needs its energy reserves for winter survival. Apply a slow-release fertilizer to help the plant store nutrients for next year's growth.
Protect young or newly planted hibiscus from harsh winter winds by wrapping the base with burlap or placing a tree guard around it. In colder climates, mulch heavily (up to 4 inches) to insulate the roots. You'll see fresh spring growth emerging from the same buds you pruned in fall—proof that your winter prep paid off.
Tips & tricks for perfect hibiscus topiary tree
These practical insights will help you craft a stunning hibiscus topiary that thrives year after year with minimal effort.
Planting Precision: When planting your hibiscus, pay special attention to the root crown placement—it should sit exactly 1 inch above soil level. I learned this the hard way after struggling with a plant that kept looking stressed. Proper positioning ensures strong root development and prevents waterlogging, which hibiscus plants hate. The 6 hours of daily sunlight is non-negotiable; even a slight reduction can lead to leggy growth and fewer flowers.
Spring Framework Strategy: In Step 2, when establishing your topiary framework, focus on creating that central leader and 3-4 primary branches. I recommend using a small mirror or reflective surface to check symmetry as you work—it makes a huge difference in achieving that polished look. The one-third pruning cut is critical; it stimulates bushier growth while maintaining the plant's health. After pruning, that 10-10-10 fertilizer application gives your hibiscus the nutrients it needs to recover quickly.
Summer Maintenance Secret: During the growing season, those 4-6 week pruning intervals might seem frequent, but they're what keep your topiary looking sharp. Here's what nobody tells you—always make your cuts just above a leaf node or bud. This tiny detail ensures new growth emerges exactly where you want it, maintaining your design. When you see those new shoots appearing, that's your cue to keep shaping; don't let branches get too leggy before trimming.
Winter Protection: The late fall cleanup is your chance to prepare for winter. While removing dead branches is obvious, don't overlook the importance of that light shaping trim. It maintains your design without stressing the plant. In colder climates, that extra 2 inches of mulch (bringing it to 4 inches total) can make all the difference in protecting roots from freezing temperatures. The burlap wrapping around young plants acts like a windbreak, preventing winter burn from harsh winds.
Pro Tips for Hibiscus Topiary Tree
- These practical insights will help you craft a stunning hibiscus topiary that thrives year after year with minimal effort.
- Planting Precision: When planting your hibiscus, pay special attention to the root crown placement—it should sit exactly 1 inch above soil level.
- Spring Framework Strategy: In Step 2, when establishing your topiary framework, focus on creating that central leader and 3-4 primary branches.
Frequently asked questions
Got questions about keeping your hibiscus topiary tree thriving? You’re not alone! Here are some of the most common queries—and their straightforward answers—to help you master this stunning, low-maintenance plant.
How often should I prune a hibiscus topiary tree to keep its shape?
Prune your hibiscus topiary tree twice a year for best results: once in late winter (before new growth) to shape the framework, and again in early summer to maintain its form. Light trims between prunings can help too—just avoid heavy cuts during flowering season (spring/summer) to preserve blooms. Pro tip: Use sharp, sterilized shears for clean cuts!
Can hibiscus topiary trees survive winter in cold climates?
Most hibiscus topiary trees (like Hibiscus rosa-sinensis) are tender perennials and thrive in USDA zones 10–11. In colder areas (zones 7–9), grow them in containers and move them indoors before temperatures drop below 40°F. If planted in the ground, mulch heavily and wrap the base with burlap for protection. Hibiscus syriacus (hardy hibiscus) is a frost-tolerant alternative!
What’s the easiest way to train a hibiscus topiary tree into a specific shape?
Start with a young plant (1–2 feet tall) and use a wire frame or flexible twigs to guide growth. Prune just above a leaf node (where new buds form) to encourage branching. For intricate designs (like spirals or animals), use topiary shears and trim gradually over months. Patience is key—hibiscus responds well to gentle shaping!
Why are my hibiscus topiary leaves yellowing or dropping?
Yellowing leaves often signal overwatering, underwatering, or nutrient deficiencies. Check the soil—it should stay evenly moist but not soggy. Yellow edges? Likely low humidity or fluoride buildup (from tap water). Brown spots? Fungal issues—prune affected areas and avoid wetting foliage. Feed monthly with a balanced fertilizer during growing season!
Are there dwarf hibiscus varieties better suited for topiary?
Yes! Look for compact hibiscus varieties like:
- ‘Little Red’ (dwarf H. rosa-sinensis, 3–4 ft tall)
- ‘Lavender Lady’ (fragrant, 4–5 ft)
- ‘Dwarf Blue’ (hardy H. syriacus, 3–4 ft)
Wrapping up and next steps
Transforming your hibiscus into a stunning topiary tree isn’t just about skill—it’s about patience, creativity, and a little love. With the right tools, techniques, and a dash of regular maintenance, you’ll enjoy vibrant, year-round color that turns heads and lifts spirits.
Whether you’re a pruning pro or a curious beginner, this bold project is totally within reach!
Ready to take the next step? Start small—pick a single branch or a manageable section to practice your cuts. Before you know it, you’ll be shaping your hibiscus into a masterpiece that’s as unique as your green thumb! 🌿✨