Pruning
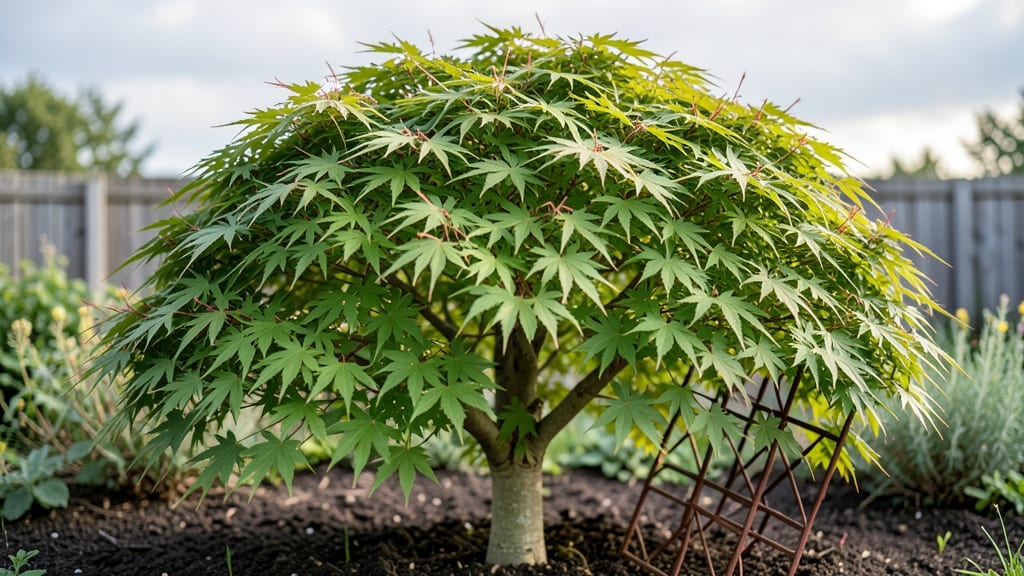
Pruning a green leaf maple tree isn’t just about shaping its branches—it’s about unlocking its full potential for vibrant growth and graceful form. ✨ I’ve learned that the right cuts at the right time transform these trees from ordinary shrubs into showstopping garden features, whether you’ve got a delicate Acer palmatum ‘Sango-kaku’ or a sturdy Bloodgood with emerald foliage.
The key starts with understanding its natural shape and growth habits. Green leaf maples respond best to light pruning in late winter or early spring, right before new growth begins.
You’ll want sharp bypass pruners, a ladder (for taller varieties), and a clear vision—these trees reward precision over brute force. Even a single misplaced cut can disrupt that delicate balance of form and health.
What you’ll end up with is a tree that stays compact, disease-resistant, and lush all year. The foliage takes on deeper hues in fall, branches develop a more refined structure, and you’ll notice fewer pests clinging to overgrown areas.
Think of it as a yearly reset that keeps your maple looking its absolute best.
This approach works for both container-grown maples and those planted in the ground. Whether you’re dealing with a 5-foot dwarf cultivar or a 20-foot specimen, the same principles apply—just adjust the scale. Let’s get those branches looking intentional!
📚 In This Guide
- What you need
- Instructions
- Tips and common mistakes
- Wrapping up and next steps
What you need
- ● Pruning shears – Sharp, bypass-style shears (for cuts Example: Felco F-2 or Corona Tools 4-in-1.
- ● Lopping shears – For thicker branches (1–2 inches). Example: Fiskars X27 PowerGear.
- ● Pruning saw – For branches >2 inches. Example: Bahco Laplander.
- ● Disposable gloves – Heavy-duty, cut-resistant (e.g., Mechanix Wear or leather work gloves).
- ● Cleaning supplies – 70% isopropyl alcohol, rubbing alcohol wipes, or a 10% bleach solution (1 part bleach to 9 parts water).
- ○ Sealing wax or pruning sealant – Optional but recommended for cuts >½ inch (e.g., Tanglefoot Tree Wound Pruning Seal).
- ● Ladder or extension pole – Sturdy, non-slip (e.g., aluminum telescoping ladder or a 10–12 ft. pole saw).
- ● Safety gear – Safety glasses and long sleeves/pants (maple sap can irritate skin!).
- ● Tree bag or tarp – To collect fallen branches/debris.
- ● Marking spray – Fluorescent paint to mark cuts (e.g., TreeMark).
- ● Sterilizing spray bottle – For quick tool disinfection between cuts.
- ● Notebook & pencil – To sketch a pruning plan or track progress.
Step-by-step instructions for pruning green leaf maple trees
Here's how I keep these stunning trees thriving year-round with clean, strategic cuts.
✂️ Step 1: Assess the Tree in Late Winter or Early Spring
Begin pruning when the tree is fully dormant but buds are just starting to swell—typically February through March in most climates. This timing prevents stressing the tree during extreme cold or when it's pushing new growth. Look for dead, diseased, or crossing branches first; these are your top priorities. I always start with the "four D's": dead, dying, diseased, and damaged limbs.
Use a 10x magnifying lens to inspect branch bark ridges and leaf scars for signs of disease like cankers or fungal growth. Healthy bark should be smooth and greenish-brown, while infected areas often appear sunken, cracked, or oozing sap. Mark these branches with a colored flagging tape before making any cuts—you'll thank yourself later when you're high up in the tree.
✂️ Step 2: Make Clean Cuts Using Proper Techniques
For branches under 2 inches thick, use bypass pruners to make cuts just outside the branch collar—the swollen area where the branch meets the trunk. The cut should be at a 45-degree angle, sloping away from the trunk, but never flush with it. This ensures proper healing and prevents water from pooling on the wound. For larger branches (2-4 inches), switch to loppers, and for anything thicker, use a pruning saw.
Never leave stubs—this invites decay and weakens the tree's structure. If you're removing a large branch, make the first cut about 12-18 inches out from the trunk, then follow up with a second cut to avoid tearing the bark. For branches over 4 inches thick, consider hiring a professional to avoid damaging the tree's vascular system. Always sterilize your tools between cuts with 70% isopropyl alcohol to prevent spreading disease.
✂️ Step 3: Thin the Canopy for Airflow and Light
Green leaf maples benefit from selective thinning to improve airflow and light penetration. Focus on removing branches that grow directly inward or rub against others—these compete for resources and create weak points. Aim to open the canopy by 20-30% to reduce disease risk and encourage stronger growth. I like to step back every few cuts to visualize the tree's shape; it's easier to see what needs removal from a distance.
Never remove more than 25% of the tree's foliage in a single season—this stresses the tree and can lead to decline. Prioritize branches that are thinner than a pencil for removal, as these are easier for the tree to heal. If you're unsure about a cut, wait until the next season and reassess. The goal is to maintain the tree's natural form while improving its health—never to drastically alter its structure.
✂️ Step 4: Clean Up and Monitor for Recovery
After pruning, rake up all debris and dispose of diseased branches immediately—never compost them. This prevents spores from spreading to other parts of the tree or garden. Apply a 1-inch layer of mulch around the base (but not touching the trunk) to retain moisture and suppress weeds. Water deeply if the following week is dry, as pruning can temporarily stress the tree. You'll see new growth within 4-6 weeks if the cuts were made correctly.
Keep an eye on the pruned areas for epicormic shoots—small, fast-growing branches that sprout from the trunk or larger branches. These are a sign the tree is compensating for lost foliage. If they appear in large numbers, it's a red flag that the tree was over-pruned. For the next 12 months, avoid heavy pruning to allow the tree to recover fully. A well-pruned green leaf maple should show vibrant, evenly distributed foliage by late summer.
Tips & tricks for pruning green leaf maple trees
These precision-focused tips will help you prune like a professional arborist—without risking damage to your tree.
Timing is Everything: The February-March window isn't just about avoiding extreme cold—it's about catching the tree in its dormant yet responsive state. I've seen trees stressed when pruned too early (still frozen) or too late (new growth already budding). Check for swollen buds as your cue—they signal the tree is ready to heal cleanly. A simple finger test on the bark tells me if it's time: healthy bark should give slightly but not crack.
Tool Technique: Your pruners aren't just cutting tools—they're surgical instruments for your tree. For branches under 2 inches, position the bypass pruners so the cutting edge faces up, then make your cut just outside the branch collar at that precise 45-degree angle. I've ruined too many cuts by rushing this step—take your time to align the blade perfectly. For larger branches, the two-cut method prevents bark tearing: first cut removes the bulk, the second refines the shape while preserving the collar.
Canopy Vision: Step back every 5-6 cuts to reassess your work. What looked balanced from 3 feet away might create awkward gaps when viewed from the street. I use the "thirds rule" for thinning: divide the canopy into thirds vertically and horizontally, then remove branches that disrupt this balance. This creates that airy, elegant look while maintaining structural integrity. Remember, you're sculpting—not hacking.
Recovery Watch: Those epicormic shoots popping up after pruning? They're not just unsightly—they're your tree's SOS signal. A few scattered shoots are normal, but if they appear in dense clusters, you've over-pruned. I monitor my trees closely for 12 months post-pruning, adjusting watering (deep but infrequent) and avoiding any further cuts. The goal is vibrant, evenly distributed foliage by late summer—proof your pruning worked.
Pro Tips for Green Leaf Maple Tree
- These precision-focused tips will help you prune like a professional arborist—without risking damage to your tree.
- Timing is Everything: The February-March window isn't just about avoiding extreme cold—it's about catching the tree in its dormant yet responsive state.
- Tool Technique: Your pruners aren't just cutting tools—they're surgical instruments for your tree.
Frequently asked questions
Got questions about keeping your green leaf maple tree thriving with the right pruning? Here are some of the most common ones—and their answers!
When is the best time to prune a green leaf maple?
The ideal time is late winter or early spring (before buds break) to remove dead or weak branches. Light pruning can also happen in summer to shape the tree—but avoid heavy cuts during fall or winter when the tree is dormant. Pro tip: Never prune when the tree is under stress (like during drought).
How much can I trim without harming the tree?
For young trees, limit pruning to no more than 25% of the foliage per year. Mature trees can handle up to 30% with caution. Over-pruning weakens the tree—focus on removing dead, diseased, or crossing branches first. If you’re unsure, consult an arborist!
Why is my green leaf maple bleeding sap after pruning?
Sap bleeding (especially in early spring) is normal but can attract pests. To minimize it, prune on dry, cool days (not warm or rainy). Seal larger cuts with pruning sealant if needed, but avoid overdoing it—healthy trees heal well on their own.
Can I prune a green leaf maple in summer for shaping?
Yes! Light summer pruning (after 60% of new growth appears) helps shape the tree and encourages bushier growth. Just avoid heavy cuts—this can stress the tree. Focus on selective trimming to maintain its natural form and airflow.
What if my green leaf maple isn’t recovering after pruning?
If new growth stalls or leaves yellow, check for over-pruning, disease, or pests. Adjust future cuts to 10-15% max and fertilize lightly. If issues persist, test soil pH or inspect for aphids, scale, or fungal spots. A local nursery can help diagnose problems!
Wrapping up and next steps
Pruning your green leaf maple tree isn’t just about aesthetics—it’s about nurturing its health, strength, and longevity. 🌿 With the right tools, timing, and techniques, you can keep your tree thriving year-round while shaping it to your vision.
Whether you’re a seasoned gardener or a curious beginner, every careful cut brings you one step closer to a stunning, resilient tree.
Ready to roll up your sleeves? Start small: pick one section of your tree to practice your pruning skills this weekend. Over time, you’ll build confidence—and your green leaf maple will thank you with vibrant foliage and robust growth!