Trees
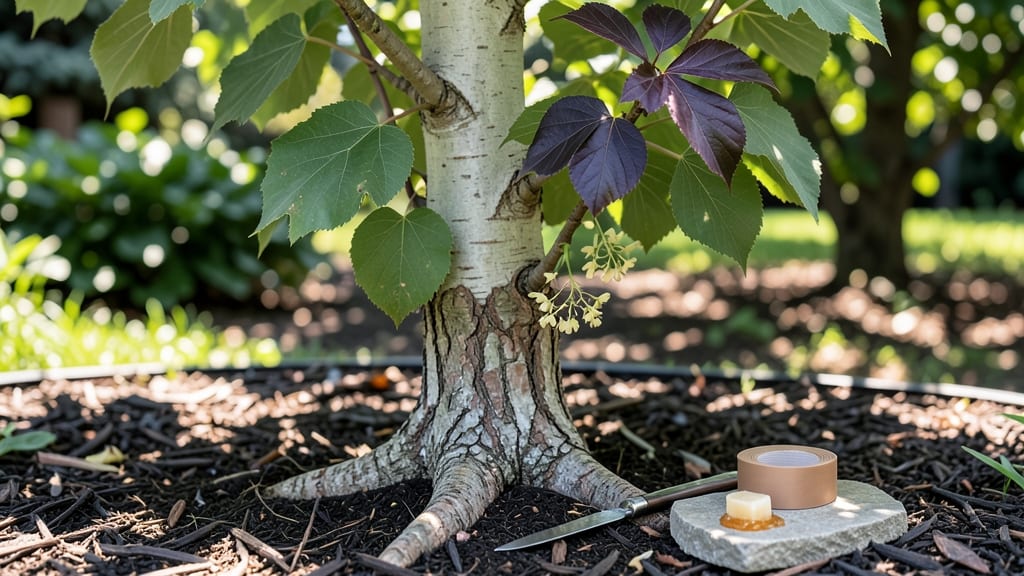
Grafting mulberry trees unlocks stronger growth and disease resistance—something I learned after my first weak, spindly sapling gave way to a thriving tree. The right combination of rootstock and scion can double fruit production and hardiness, but timing and technique matter just as much as the tools you use.
You’ll need a sharp grafting knife, grafting tape, and compatible rootstock (like Morus alba for cold climates) paired with a scion from your favorite variety. Spring is the best time to graft, when sap flows but buds haven’t broken yet—this ensures the union takes hold before summer heat sets in.
Once the graft is sealed with tape and protected from drying, monitor the healing process closely. In about 4-6 weeks, you’ll see new growth at the graft union—proof it worked.
Prune back any competing shoots to focus energy on the new scion, and you’ll have a tree that outgrows and outproduces its neighbors.
This method works for backyard orchards, urban homesteads, or even container-grown mulberries. The key is patience and precision—skip the guesswork with these step-by-step instructions to avoid common pitfalls like poor healing or contamination.
📚 In This Guide
- What you need
- Instructions
- Tips and common mistakes
- Wrapping up and next steps
What you need
- ● Rootstock: Healthy 1–2-year-old mulberry saplings (diameter: ¼–½ inch) or cuttings with strong roots.
- ● Scion wood: Disease-free, dormant-season cuttings (4–6 inches long, pencil-thick) from your desired mulberry variety.
- ● Grafting tape: 1–2 rolls of tree grafting tape (breathable, non-toxic, and flexible).
- ● Pruning shears: Sharp, sterilized shears (or a grafting knife for precision cuts).
- ○ Pruning sealant: 1 small bottle of tree wound dressing (optional but recommended for sealing cuts).
- ● Grafting wax: 1 small tub of tree grafting wax (to prevent drying).
- ● Plastic bags: 2–3 ziplock bags (to create a humid microclimate post-grafting).
- ○ Grafting clips: 5–10 plastic or rubber grafting clips (optional for extra security).
- ● Horticultural glue: 1 small tube (for sealing larger grafts).
- ● Spray bottle: With water (to keep scions moist during grafting).
- ● Notebook & pen: To label grafts by variety/date!
- ● Gloves: Nitrile or gardening gloves (to protect from sap and thorns).
- ● Choose a dormant season (late winter/early spring) for best success.
- ● Ensure rootstock and scions are compatible mulberry varieties (e.g., Morus alba or Morus nigra).
- ● Work in a clean, shaded area to avoid stressing the plants.
- ● Pro tip: 💡 Sterilize tools with rubbing alcohol to prevent disease!
How to graft mulberry trees for vigorous rootstock and scion compatibility
Mulberry grafting combines hardy rootstock with prized scion varieties for disease resistance and bountiful fruit.
Select and Prepare Compatible Rootstock and Scion Wood
Choose a healthy, disease-free mulberry rootstock no thicker than ¼ inch in diameter. I prefer 1-year-old wood that's just beginning to lignify—it's flexible enough to work with but sturdy enough to hold the graft. For scions, select current season's growth from your desired variety, ensuring they're ¼ to ½ inch in diameter at the cut end.
Timing matters here: perform the graft in late winter to early spring when the tree is dormant but sap begins to flow. I make my cuts just before a predicted warm spell—this jumpstarts the healing process. Collect scion wood and store it in a damp paper towel inside a sealed plastic bag in the fridge until ready to use.
Make Precision Cuts for Perfect Union
Using a sharp grafting knife, make a clean, slanted cut on the rootstock about 2-3 inches above the soil line. The cut should expose pith (white center) but leave a 3-4 inch length of healthy stem below. For the scion, make a matching slanted cut on the bottom end, ensuring the vascular cambium layers align perfectly when joined.
Here's the thing—precision prevents failure. I like to make a shallow notch on one side of both cuts so I can orient them correctly later. The goal is a 1-2 inch contact surface where the cambium layers meet. If the scion is too long, trim it to 4-6 inches total length—longer scions dry out before the graft takes.
Bind the Graft Tightly and Protect the Union
Insert the scion into the rootstock cut at a 45-degree angle, ensuring the cambium layers match completely. Wrap the union tightly with rafting tape or plastic grafting tape, leaving no air gaps. I make two complete wraps around the entire graft, then add a third wrap just above and below the union to secure everything.
Cover the entire graft with grafting wax or sealing compound to prevent moisture loss and infection. This isn't optional—mulberry grafts fail quickly if they dry out. I like to apply a thin, even layer over the tape, making sure to seal the cut ends completely. The wax should feel slightly tacky when applied.
Provide Ideal Conditions for Healing
Place the grafted tree in a shady, humid environment with 60-70% humidity for the first 4-6 weeks. I use a clear plastic bag secured loosely over the graft to maintain moisture without trapping too much heat. Keep the soil evenly moist—not soggy, not dry—during this critical period.
Monitor the graft weekly for signs of callusing (a white, swollen area forming at the union). This usually appears within 3-4 weeks if conditions are right. Once callus forms, you can gradually reduce humidity over 7-10 days. Avoid removing the tape until you see new growth emerging from the scion—this confirms the graft has taken.
Care for the Newly United Tree
After the graft takes, remove all tape and wax. Prune the rootstock 6-8 inches above the graft to encourage energy flow upward. I make the cut just above a bud to stimulate new growth. Keep the tree in partial shade for another 2-3 weeks, then gradually introduce it to full sun over 10-14 days.
Water deeply once weekly during the first growing season, focusing on soil moisture rather than foliar sprays. Mulberry grafts are vulnerable to transplant shock—don't rush the hardening process. You'll know it's working when the scion shows vigorous new leaves within 6-8 weeks of grafting.
Tips & tricks for perfect mulberry grafting
Mulberry grafting success comes down to precision and patience—here's how to avoid common pitfalls while maximizing your chances of a strong union.
Timing is Everything: Late winter to early spring is your ideal window, but don't just follow the calendar—watch for that predicted warm spell. I've seen grafts fail when done too early because the tree isn't ready to respond. If you're unsure, check for slight swelling at the buds as your signal to proceed. The goal is to catch that moment when sap begins to flow but before active growth starts—this jumpstarts the healing process without overwhelming the tree.
Cutting Technique Matters More Than You Think: That 1-2 inch contact surface between cambium layers isn't just a suggestion—it's the difference between success and failure. I've ruined more grafts than I care to admit by rushing this step. Use a sharp grafting knife and make clean, precise cuts—no jagged edges. The shallow notch on one side serves two purposes: it helps orient your graft correctly during assembly, and it creates a visual reference to verify perfect cambium alignment. Remember, the vascular tissues need to connect perfectly for nutrient flow.
Humidity Control Makes or Breaks Your Graft: The 60-70% humidity range during those first 4-6 weeks isn't arbitrary—it mimics natural forest conditions where mulberries thrive. I've had better success with a clear plastic bag secured loosely over the graft than with commercial humidity tents. The key is maintaining even moisture without creating a steam bath. Check soil moisture daily—it should feel like a wrung-out sponge, not a swamp. Too much water leads to rot, too little causes desiccation.
Callus Formation is Your Progress Report: When you see that white, swollen callus forming at the union after 3-4 weeks, you're getting feedback that everything is working. Don't be tempted to peek too early—disturbing the graft before this stage can set you back weeks. Once callus appears, you can begin reducing humidity gradually over 7-10 days, but wait until you see new growth from the scion before removing any tape. This confirms the graft has taken and the vascular connection is established.
Pro Tips for Grafting Mulberry Trees
- Mulberry grafting success comes down to precision and patience—here's how to avoid common pitfalls while maximizing your chances of a strong union.
- Timing is Everything: Late winter to early spring is your ideal window, but don't just follow the calendar—watch for that predicted warm spell.
- Cutting Technique Matters More Than You Think: That 1-2 inch contact surface between cambium layers isn't just a suggestion—it's the difference between success and failure.
Frequently asked questions
Got questions about grafting mulberry trees?
You’re not alone! Here are answers to the most common queries to help you succeed—whether you're a beginner or refining your skills.
When is the best time to graft mulberry trees?
The ideal window is late winter to early spring, just before buds swell but before leaves emerge. This timing ensures the tree is dormant but ready to heal. For tropical climates, grafting can also work in early fall. Avoid extreme heat or frost—think "chilly but not freezing."
Can I graft mulberry trees onto other fruit trees?
Mulberries are best grafted onto mulberry rootstock for compatibility, but you can try grafting them onto closely related trees like figs or blackberries—though success rates drop. Always use a compatible rootstock to avoid stress or disease. Pro tip: Stick to mulberry rootstock for reliability!
What if my graft fails or doesn’t take?
Don’t panic! Graft failure often stems from poor wound alignment, drying out, or incompatible stock/scion. Check for callus formation (a swollen, healing bump) 4–6 weeks post-graft. If it doesn’t form, redo the graft with sharper tools and tighter binding. Patience is key—some grafts take 2–3 months to seal!
Do I need special tools for grafting mulberry trees?
Basic tools like a sharp grafting knife, pruning shears, and grafting tape are essential. A grafting clamp can help secure the union, but it’s not mandatory. Avoid dull tools—clean cuts = better healing. Bonus: Rubbing alcohol wipes keep tools sterile!
How do I know if my grafted mulberry is healthy?
Healthy grafts show new growth from the scion (top part) within 6–8 weeks. Check for leaf color (dark green = good, yellow = stress) and stem thickness. If the rootstock sprouts below the graft, prune it aggressively to redirect energy upward.
Wrapping up and next steps
Grafting mulberry trees is a rewarding skill that can boost your orchard’s productivity and resilience—whether you’re a hobbyist or a seasoned gardener. By mastering the right techniques, timing, and aftercare, you’ll unlock stronger, healthier trees with consistent yields and disease resistance. 🌱✨
Ready to take the next step? Start small with just one or two trees to refine your skills, then expand as your confidence grows. Share your progress with fellow gardeners or local agricultural groups—you’ll find plenty of support along the way!