Pruning
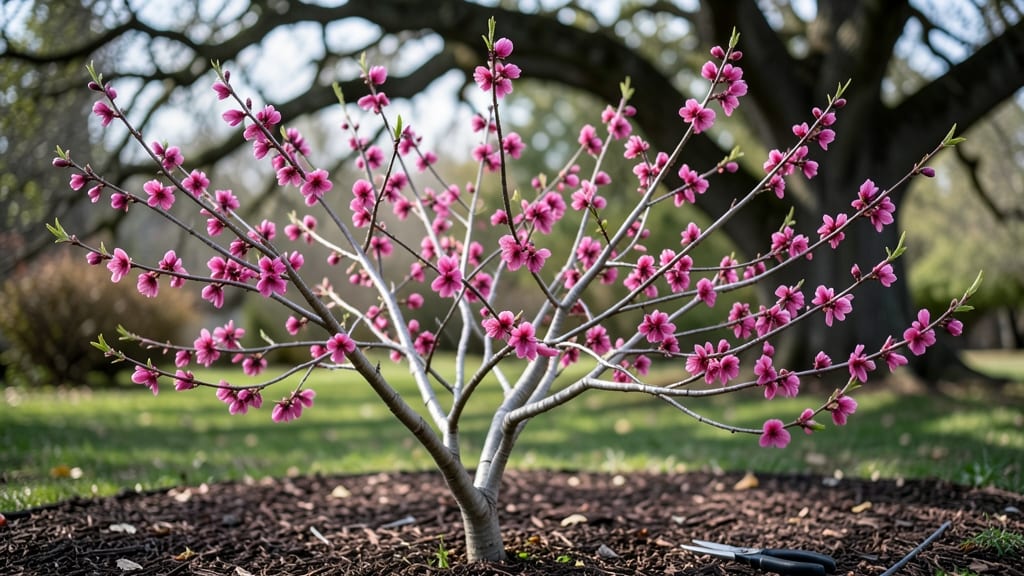
That single flower tree branch can transform your garden from ordinary to extraordinary—it’s all in how you prune it. 🌸 I learned this the hard way after my crape myrtle looked like a tangled mess for years, until I discovered the right cuts make all the difference.
The secret isn’t just trimming; it’s shaping for both beauty and health, so your tree stays strong while showcasing its best blooms.
You only need three basic cuts: the cleanup cut to remove dead wood, the thinning cut to open up the canopy, and the shaping cut to direct growth where you want it. Most people skip the thinning step, which is what leaves trees looking overcrowded and stressed.
With just a sharp pair of pruners and a clear vision, you can turn a wild, leggy tree into a showstopper that blooms better every season.
What you’ll end up with is a tree that looks intentional, not accidental—branches spaced just right to catch sunlight and rain, with blooms that stand out against a clean silhouette. The best part? These cuts work year-round, so you’re never stuck waiting for the perfect season to shape your tree.
Once you see how much lighter and more vibrant your tree becomes, you’ll wonder why you didn’t start sooner.
This method works for almost any flowering tree—from cherries to dogwoods to your neighborhood’s favorite magnolia. The key is patience: a little pruning now means fewer drastic cuts later. Let’s get those branches looking like they belong in a postcard, not a jungle.
📚 In This Guide
- What you need
- Instructions
- Tips and common mistakes
- Wrapping up and next steps
What you need
- ● Pruning shears: Bypass pruners (for clean cuts on branches up to ½ inch thick). Pro tip: 💡 Sharpen blades before use for precision!
- ● Loppers: For branches ½ to 1½ inches thick—look for ergonomic handles for comfort.
- ○ Pruning saw: A curved-tooth saw for thicker branches (1½+ inches). Optional: A folding saw for portability.
- ● Disinfectant: 70% isopropyl alcohol or a 10% bleach solution (1 part bleach to 9 parts water) to sterilize tools between cuts.
- ● Garden gloves: Heavy-duty, cut-resistant gloves (e.g., blank">mechanics’ gloves) to protect your hands.
- ● Tarp or bucket: For collecting debris (a 4’x6’ tarp works great!).
- ● Rubbing alcohol or hydrogen peroxide: To clean wounds on the tree if needed.
- ● Pole saw: For high branches (extendable up to 10–12 feet).
- ● Ladder: A sturdy, non-slip ladder (e.g., blank">extension ladder) rated for your height needs.
- ● Tree wound dressing: Controversial but useful: Pruning sealant (like Tanglefoot Tree Wound Pruning Seal) for large cuts.
- ● Notebook & pen: To sketch your tree’s shape before pruning (great for planning!).
- ● Check the weather: Prune on a dry, cloudy day (avoid extreme heat or frost).
- ● Know your tree: Identify dead, diseased, or crossing branches before you start.
- ● Safety first: Wear closed-toe shoes and avoid pruning near power lines.
Step-by-step guide to pruning flower tree branches for perfect shape
Here's how to transform your tree into a stunning, healthy showpiece—no green thumb required!
🌿 Step 1: Identify and Remove Dead or Weak Branches
Start by scanning your tree for branches that are completely bare, brittle, or showing signs of disease. These are the first to go—they’re just taking up energy from your healthy growth. Use sharp pruning shears to make a clean cut just outside the branch collar, the swollen area where the branch meets the trunk. This ensures the tree can heal properly and prevents unsightly stubs.
I always work from the bottom up, removing the easiest targets first. If you’re unsure whether a branch is dead, scratch the bark with your fingernail—if it’s green underneath, it’s still alive. Skip these and focus on the obvious ones. You’ll know you’re doing it right when you’re left with branches that all look plump and full of life.
✂️ Step 2: Shape the Tree for Balance and Airflow
Now it’s time to sculpt! Hold your pruners at a 45-degree angle and cut just above a bud or side branch that’s growing in the direction you want new growth to go. For example, if you want to fill out the lower branches, look for buds facing outward and upward. This creates a natural, full look while encouraging airflow—critical for preventing fungal diseases.
I like to step back every few cuts to check the overall shape. Imagine your tree as a vase—wide at the bottom, narrowing slightly toward the top. Remove any branches that are rubbing against each other or growing straight inward. These are the ones that’ll create weak spots or block sunlight from reaching the interior. You’ll see the difference immediately when you step back and admire your work!
🌱 Step 3: Thin Out Overcrowded Areas for Light and Growth
Look for clusters of branches that are too close together. These compete for sunlight and nutrients, leading to weak growth and fewer flowers. Your goal is to thin out one-third of the branches in these areas, focusing on the smallest or oldest ones. This opens up the canopy so light can reach the center of the tree, where new blooms will form.
Here’s the trick: don’t cut more than 25% of the tree’s foliage in one session—this can stress it out. Instead, spread your pruning over 2-3 sessions if needed, especially for larger trees. You’ll notice within a few weeks that the remaining branches perk up, growing stronger and producing more vibrant flowers. It’s like giving your tree a spa day!
Tips & tricks for perfect flower tree branch pruning
Transforming your tree into a healthy, blooming masterpiece starts with these game-changing pruning tips that'll have your branches looking like a professional landscaper did the work!
Timing Secret: Late winter or early spring, just before new growth begins, is your ideal window for pruning. This timing ensures you’re not removing flower buds that may have already formed. If you must prune during the growing season, do it right after flowering to avoid cutting off next year’s blooms. I’ve learned this the hard way—pruning too late can leave your tree looking bare for months!
Tool Technique: Never use dull pruning shears—they tear branches instead of making clean cuts, which can invite disease. Always keep your tools sharp and clean with rubbing alcohol between cuts. For larger branches over ½ inch thick, use loppers or a pruning saw to avoid damaging the tree. And here’s a pro move: Wipe your tools with a disinfectant solution after each use to prevent spreading fungal spores between cuts.
Visual Cue for Success: When shaping your tree in Step 2, look for buds that face outward—they’ll guide your cuts to create a fuller, more natural shape. The 45-degree angle isn’t just about looks; it helps water run off the branch, reducing rot risk. For extra confidence, snap a photo of your tree before you start so you can compare the before-and-after transformation!
Pro Tips for Flower Tree Branch
- Transforming your tree into a healthy, blooming masterpiece starts with these game-changing pruning tips that'll have your branches looking like a professional landscaper did the work!
- Timing Secret: Late winter or early spring, just before new growth begins, is your ideal window for pruning.
- Tool Technique: Never use dull pruning shears—they tear branches instead of making clean cuts, which can invite disease.
Frequently asked questions
Got questions about pruning flower tree branches?
You’re not alone! Whether you’re a seasoned gardener or just starting out, these common queries will help you master the art of keeping your tree healthy and blooming beautifully.
When is the best time to prune flower tree branches?
The ideal time depends on your tree type. For spring-flowering trees (like cherry or magnolia), prune immediately after blooming to avoid cutting off next year’s flowers. For summer/fall bloomers (like crape myrtle or hibiscus), prune in late winter or early spring before new growth starts. Always avoid pruning during frost or extreme heat.
How do I know which branches to cut?
Look for branches that are dead, diseased, crossing, or rubbing against others. Also remove water sprouts (fast-growing vertical shoots) and branches growing inward. Use the “third rule”: Cut back to a bud or branch that’s at least 1/3 the size of the branch you’re removing for a clean cut.
Will pruning my flower tree reduce blooms next year?
Not if done correctly! Pruning stimulates new growth and can increase blooms—if you avoid over-pruning. For heavy bloomers (like roses), limit cuts to 20-30% of the canopy per year. If you notice fewer flowers after pruning, you may have cut too aggressively or pruned at the wrong time.
What should I do if my tree bleeds sap after pruning?
Sap bleeding (common in maples, birches, or dogwoods) is normal and harmless. It won’t harm the tree, but you can reduce it by pruning on dry, cool days (avoid warm, sunny ones). Seal cuts with pruning sealant only if the branch is larger than 2 inches in diameter—otherwise, let it air-dry naturally.
Can I prune a flower tree branch without professional tools?
Yes! For small branches (1 inch thick), hand pruners or bypass pruners work great. For thicker branches (up to 2 inches), use loppers. For anything larger, rent a pruning saw or call an arborist. Never use hedge trimmers—they tear bark and damage the tree.
Wrapping up and next steps
Transforming your flower tree branch into a stunning year-round feature is simpler than you think! By mastering the 3-step pruning method—timing, technique, and aftercare—you’ll boost health, encourage blooms, and keep your tree looking its best.
Remember, confidence grows with practice, so don’t hesitate to grab those shears and get started.
Ready to take the next step? Plan your pruning session today—mark your calendar, gather your tools, and give your tree the love it deserves! 🌸✂️