
Pruning
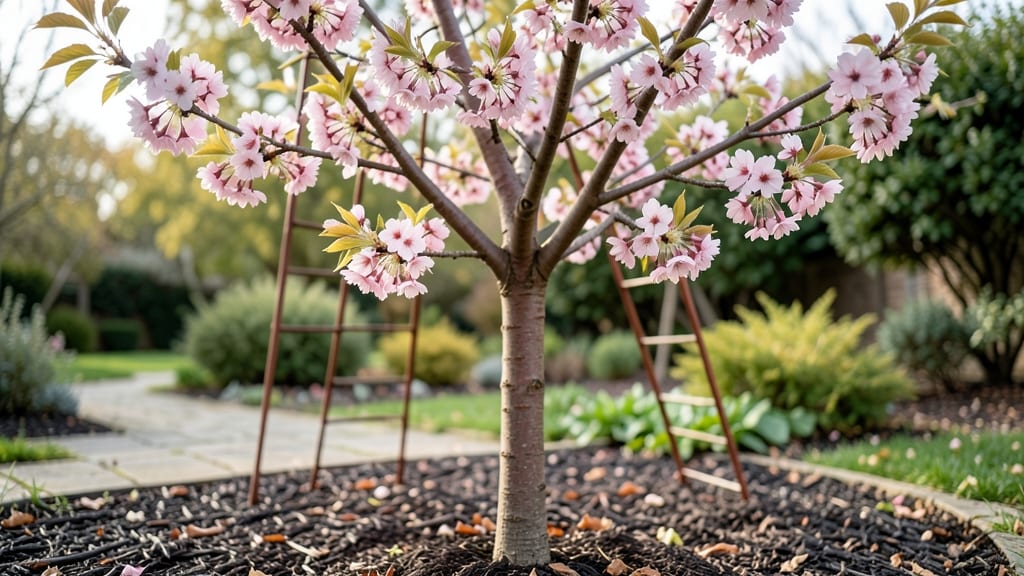
The First Blush cherry tree bursts into pink blooms earlier than most—sometimes even before spring officially arrives. 🌸 I still remember the first time I saw mine covered in blossoms in late February, when the rest of the yard was still brown and dormant.
That early bloom means you’ve got a narrow window to prune without sacrificing next year’s fruit, and I’ll show you exactly how to do it right.
Late-winter pruning isn’t just about shaping the tree—it’s about setting up a healthier, more productive season ahead. You’ll need sharp pruning shears, a clean work surface, and about 30 minutes of focused time. The goal?
Open up the center for sunlight, remove dead or crossing branches, and encourage strong new growth where those stunning pink flowers will appear. Trust me, your tree will thank you with vibrant blooms and better fruit come summer.
What you’ll end up with is a tree that looks like it belongs in a botanical garden, not just your backyard. The blooms stay longer and brighter, the fruit ripens more evenly, and the structure stays open enough to prevent disease.
Plus, you’ll avoid the heartbreak of pruning too late and losing next year’s blossoms entirely. This is the secret to keeping your First Blush looking its best for decades.
Works in USDA Zones 4-8, though colder climates may need a little extra winter protection. Whether you’re a first-time cherry grower or a seasoned pruner looking to refine your technique, this method keeps things simple without sacrificing results. Let’s get those branches trimmed and ready for spring!
📚 In This Guide
- What you need
- Instructions
- Tips and common mistakes
- Wrapping up and next steps
What you need
- ● Pruning shears – Sharp, bypass-type (avoid anvil shears; they crush branches). Size: 6–8" for small branches, 8–10" for thicker limbs.
- ● Loppers – For branches ½" to 2" in diameter. Bypass-style preferred.
- ● Pruning saw – 8–10" curved blade for branches 2"+" in diameter. Dull blades tear wood—replace if needed!
- ● Disinfectant – 70% isopropyl alcohol or bleach solution (1 part bleach : 9 parts water) to sterilize tools between cuts.
- ● Gloves – Heavy-duty, cut-resistant (e.g., mechanics’ gloves) to protect from thorns and sap.
- ○ Pruning sealant – Optional but helpful for large cuts (>2" diameter). Use a tree wound paint with mycorrhizal fungi (e.g., Tanglefoot Tree Wound Pruning Seal).
- ● Safety gear – Safety glasses and closed-toe shoes (sap and falling branches are sneaky!).
- ● Extension pole – 3–6 ft with bypass pruners attached for high branches.
- ● Rope or harness – If your tree is tall (>10 ft) and you’re working alone.
- ● Sharpie or marker – To tag branches for future reference (e.g., "Remove in Spring").
- ● Trash bags – For collecting pruned debris (compost or dispose—don’t leave on the ground!).
- ● Ladder – Sturdy, 3-sided if reaching 10+ ft. Never stand on the top rung!
How to prune a First Blush cherry tree for healthy spring growth
Late-winter pruning sets the stage for stunning blooms and robust fruit—here's my foolproof approach.
✂️ Step 1: Time Your Prune for Dormant Season
Prune your First Blush cherry tree in late winter, just as buds begin to swell but before new growth starts. This timing—typically February to early March in most climates—allows the tree to heal quickly once warm weather arrives. I always check for tight, plump buds as my signal that it's time to start.
If you're in a warmer zone, wait until after the last frost date to avoid damaging tender new growth. Cold snaps can still occur, so have your pruners ready to act when the weather stabilates. The goal is to prune while the tree is still dormant but about to wake up.
🌿 Step 2: Remove Dead, Diseased, or Crossing Branches First
Start by scanning the entire tree for dead wood—branches that are brittle, cracked, or have no bark. These should be cut back to the main trunk. Next, look for diseased branches (often spotted with fungal growth or oozing sap) and remove them completely. I always sterilize my pruners with rubbing alcohol between cuts to prevent spreading disease.
Then, tackle crossing or rubbing branches—these create wounds where pests and diseases can enter. Cut one of the branches at its base if they're growing toward each other. You'll know you're doing it right when the tree's structure starts looking more open and airy, allowing sunlight and air to reach the center.
☀️ Step 3: Thin the Canopy for Better Light Penetration
First Blush cherries thrive when light reaches all parts of the tree. Focus on removing about 20% of the tree's branches, prioritizing those that are too close together or growing inward. Start at the outer edges and work your way in, cutting back branches that are one-third to one-half their length to encourage bushier growth.
Look for water sprouts—those fast-growing, vertical shoots that steal energy from fruit production. These should be cut back to a lateral branch or removed entirely. You'll notice the tree's shape becoming more balanced, with branches spaced evenly to allow sunlight to reach the lower limbs.
⏰ Step 4: Shape for Balance and Airflow
Step back and assess the tree's overall shape. First Blush cherries respond well to an open-center form, so aim to create a vase-like structure with a strong central leader (main trunk). If the tree has multiple leaders, remove all but the strongest one, cutting it back to a healthy lateral branch.
Make your cuts just outside the branch collar—the swollen area where the branch meets the trunk. Avoid leaving stubs, as they can rot and invite pests. Use sharp pruners for clean cuts, and seal larger wounds (over ½ inch in diameter) with pruning sealant to protect the tree from disease.
💧 Step 5: Clean Up and Fertilize for Recovery
After pruning, rake up and dispose of all debris to reduce disease risk. I always sterilize my tools again and store them in a dry place. Once the tree is pruned, apply a balanced fertilizer (like 10-10-10) around the drip line to give it a nutrient boost for spring growth.
Water deeply once a week for the first month after pruning to help the tree recover. You'll see new growth emerge within 4-6 weeks, signaling that your pruning was successful. Keep an eye out for bud break—this is when the tree truly comes alive, and you'll know your hard work paid off.
Tips & tricks for pruning your First Blush cherry tree
Late-winter pruning transforms your First Blush cherry tree from a tangled mess into a thriving fruit machine. Here's what I've learned after years of trial and error with my own First Blush.
The Timing Secret: Don't rush into pruning just because winter's over! Those tight, plump buds in February are your green light. I've pruned too early when buds were still tight and ended up with more stress on the tree. Wait until you can see buds starting to swell but haven't broken open yet—that's your perfect window. In warmer climates, check your local frost date calendar and wait until after the last frost to avoid damaging new growth that might appear after pruning.
Branch Collar Matters: I used to make cuts just anywhere, but that's how you end up with unsightly stubs that rot and attract pests. Always cut just outside the branch collar—the swollen area where the branch meets the trunk. This ensures the tree can heal properly. For larger branches over ½ inch, seal the wound with pruning sealant immediately after cutting. I keep a small bottle of sealant in my pruning kit for this exact purpose.
Pruning Tool Essentials: Sharp pruners aren't just a recommendation—they're a necessity. Dull blades crush branches, causing more damage than the cut itself. I invest in high-quality bypass pruners and keep them razor-sharp by honing them regularly. For thicker branches, use loppers or a pruning saw. And here's what nobody tells you—sterilize your tools between cuts, especially when dealing with diseased branches. A quick wipe with rubbing alcohol prevents spreading fungal infections.
Post-Pruning Care: The work doesn't end when you put down your pruners. After finishing, rake up all debris and dispose of it properly (don't compost diseased branches). Then give your tree a nutrient boost with balanced fertilizer (10-10-10) spread around the drip line. Water deeply once a week for the first month after pruning—this helps the tree recover faster. I've seen trees that looked like they were struggling after pruning bounce back beautifully with this simple aftercare routine.
Pro Tips for First Blush Cherry Tree
- Late-winter pruning transforms your First Blush cherry tree from a tangled mess into a thriving fruit machine.
- The Timing Secret: Don't rush into pruning just because winter's over!
- Branch Collar Matters: I used to make cuts just anywhere, but that's how you end up with unsightly stubs that rot and attract pests.
Frequently asked questions
Got questions about pruning your First Blush cherry tree? You’re not alone!
Here are answers to the most common queries—from timing to troubleshooting—to help you keep your tree thriving year-round.
When is the exact best time to prune a First Blush cherry tree?
The golden window is late winter to early spring (just before buds swell but before they break). For most climates, this means February through March. Avoid pruning in fall or during active growth—it stresses the tree and invites disease. Pro tip: If you miss the window, wait until late spring, but prioritize removing dead/diseased branches immediately.
Can I prune if we’ve had a late frost or unpredictable winter?
Yes! First Blush cherry trees are hardy, but frost timing matters. Prune after the last expected frost (check your USDA zone). If buds are already swelling, delay pruning until they’ve hardened off. Watch for: Frost-damaged branches (brown, mushy wood)—trim those first to prevent rot. Light pruning can still be done safely even with late frosts.
How do I know if I’m over-pruning or under-pruning?
Over-pruning = removing more than 25% of the canopy in one season. Signs include sparse foliage, weak growth, or excessive water sprouts. Under-pruning shows as dense, tangled branches with poor airflow (inviting pests/disease). Aim for 15–20% removal annually, focusing on dead wood, crossing branches, and inward growth. Rule of thumb: Never cut back more than 1/3 of a branch’s diameter.
My tree has brown spots or holes—is it pests or disease?
Brown spots + holes likely mean cherry fruit fly larvae or borers. Disease (like bacterial canker) causes oozing cankers or leaf spots. Act fast:
- Pests: Prune infested branches below the damage and dispose of them. Use horticultural oil in spring.
- Disease: Sterilize pruners with rubbing alcohol, remove infected wood, and avoid wetting foliage when watering.
Are there alternatives if I can’t prune in late winter?
If you miss the late-winter window, light maintenance pruning can still be done in:
- Late spring (after flowering): Focus on shaping and removing suckers.
- Summer (dormant season): Trim only dead/diseased wood—avoid heavy cuts.
Wrapping up and next steps
Pruning your First Blush cherry tree in late winter isn’t just about shaping—it’s about setting the stage for a burst of color and health all year long. 🌸 With the right tools, timing, and technique, you’ll unlock lush blooms, stronger branches, and a tree that thrives for seasons to come.
Whether you’re a seasoned gardener or just starting out, this guide gives you the confidence to tackle the job like a pro.
Ready to transform your yard? Grab your pruners, mark your calendar, and get ready to witness the magic of a well-pruned First Blush cherry tree! Start with a single branch this year—you’ll be amazed at the difference.