Pruning
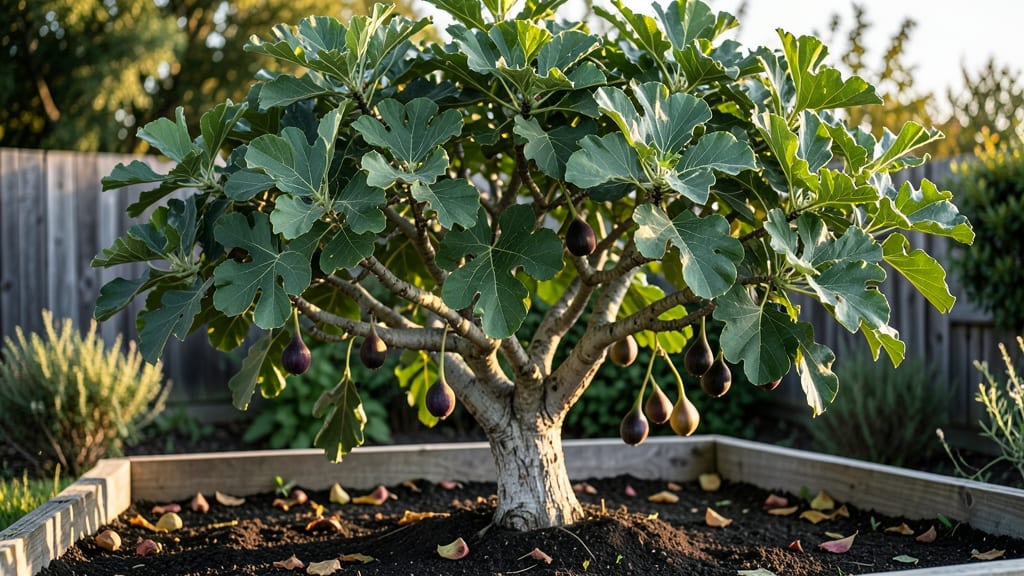
Crafting the perfect fig tree shape isn’t just possible—it’s easier than you think. 🌿 The secret lies in understanding how these fast-growing trees respond to pruning, turning wild canopies into structured masterpieces that reward you with year-round interest.
My first attempt at shaping a Mission fig into a graceful arch left me skeptical, but after a few seasons of trial and error, I now have a tree that looks like it belongs in a European villa.
The beauty of fig tree shaping is that it works with your tree’s natural growth habits. You don’t need fancy tools—just sharp pruners, a little patience, and a clear vision of the shape you want.
Whether you’re aiming for a classic espalier against a fence, a whimsical topiary ball, or a cascading fountain-style tree, the principles are the same: prune at the right time, cut back to strong branches, and let the tree fill in the gaps naturally.
What you’ll end up with is a tree that’s not only stunning but also more productive. Proper shaping improves airflow, reducing disease risk while encouraging better fruit development. The best part?
You can start small—even a single branch can become a sculptural statement—and adjust as the tree matures. Your neighbors will be asking for your secrets by next summer.
This method works for both dwarf varieties in containers and full-sized trees in the ground. The key is consistency—just 15 minutes of shaping every few months keeps the vision alive. Let’s get started with the tools and techniques that turn good figs into showstoppers.
📚 In This Guide
- What you need
- Instructions
- Tips and common mistakes
- Wrapping up and next steps
What you need
- ● Pruning shears – Bypass pruners (sharp, 6-8" blades) for clean cuts on small branches.
- ● Loppers – Long-handled (20-24") for thicker branches (½"–1.5" diameter).
- ● Pruning saw – Curved-tooth, 8-10" blade for stubborn, large branches (1.5"+ diameter).
- ● Rubbing alcohol (70%+) – Small bottle (4 oz) for sterilizing tools between cuts.
- ○ Pruning sealant – Optional but recommended (e.g., Tanglefoot Tree Wound Pruning Sealer for cuts > ½").
- ● Gloves – Heavy-duty, cut-resistant (e.g., Pip Boys or Tough Outdoors).
- ● Ladder or step stool – Sturdy, 6-10 ft (ensure stability for taller trees).
- ● Measuring tape – 10-15 ft for spacing branches evenly.
- ● Notebook & pencil – Small, waterproof for sketching your design.
- ● Fig tree – Mature enough to support shaping (3+ years old) and healthy (no signs of disease).
- ● Branch spreaders – Adjustable metal clips to guide branch growth direction.
- ● Plant ties – Soft fabric or plastic for securing branches temporarily.
- ● Spray bottle with water – Mist cuts to reduce stress on the tree.
- ● Camera or phone – Document progress! Before/after photos are gold for tracking growth.
- ● Earplugs – If your tree is dense (some cuts can be loud!).
- ● Check your fig tree variety—some (like Ficus carica 'Chicago Hardy') respond better to shaping than others.
- ● Prune during dormancy (late winter/early spring) for best results (avoid heavy pruning in summer).
- ● Ensure your tree has no active pests or disease—wait until it’s fully recovered if needed.
- ● Plan your design in advance! Sketch a rough outline of your umbrella, weeping, or multi-trunk vision.
How to sculpt your fig tree into a stunning year-round canopy
Here's the method I've used to transform wild fig growth into elegant, sculpted beauty—no advanced skills needed.
🌿 Step 1: Assess Your Tree's Natural Growth Habits
Start by observing your fig tree's natural branching patterns. Figs grow with a distinctive vase shape, but they can become overgrown and tangled without guidance. Look for the strongest central leader—the main vertical stem—and note where side branches emerge. These will become your primary structural limbs.
Run your hand along the trunk to feel where branches are thickest. These are your "skeleton" branches—the ones that will support the rest of the tree's shape. Thin, weak branches can be removed entirely to improve airflow and light penetration. I like to sketch a rough outline of my vision on paper first, marking where I want branches to grow and where they should be pruned.
✂️ Step 2: Prune for Structure During Dormancy
The best time to shape your fig tree is in late winter or early spring, just before new growth begins. This is when the tree is dormant, and pruning causes less stress. Use sharp, clean pruning shears to make cuts at a 45-degree angle, about ¼ inch above a bud that faces outward. This encourages growth in the direction you want.
Start by removing any dead, diseased, or crossing branches first—these are the easiest to spot and eliminate. Next, thin out branches that grow inward toward the center of the tree. You'll want to create an open, airy structure that allows sunlight to reach all parts of the canopy. Remember, fig trees respond well to pruning, so don't be afraid to make bold cuts. If you're unsure, cut back to a strong lateral branch rather than leaving a stub.
☀️ Step 3: Train Branches for an Artistic Silhouette
Once the tree begins active growth in spring, focus on training the remaining branches to create your desired shape. Figs grow quickly, so you'll need to prune and guide them regularly. Use soft plant ties or twine to gently bend young branches into place—never force them, as this can cause breakage. I like to create a slightly rounded or tiered shape, which mimics the natural form of mature fig trees.
To encourage branching, pinch back the tips of new growth by about ½ inch. This stimulates the plant to produce more lateral shoots, creating a fuller, bushier appearance. Watch for new growth emerging from the sides of branches—these are your future limbs. You'll know you're on the right track when the tree starts filling out evenly and sunlight can reach all parts of the canopy. Avoid over-pruning, as this can reduce fruit production.
🌱 Step 4: Maintain Shape Through Seasonal Trimming
Throughout the growing season, keep an eye on your fig tree's shape and make minor adjustments as needed. Figs grow vigorously, so you may need to prune back new growth that starts to disrupt your design. Use hand pruners for smaller branches and loppers for thicker stems. Always make clean cuts just above a bud or branch collar to prevent damage.
In late summer, after the tree has finished fruiting, do a light pruning to tidy up any straggly growth. This is also a good time to remove any suckers—shoots that grow from the base of the tree—that aren't part of your design. Water the tree deeply after pruning to help it recover. With consistent care, your fig tree will develop into a beautifully shaped, productive tree that provides year-round interest with its striking foliage and delicious fruit.
Tips & tricks for perfect fig tree shaping
Transforming your fig tree into a work of art takes patience—but these tricks will help you avoid common pitfalls and create stunning results.
The Right Time Matters: Late winter or early spring is your golden window for shaping, right before new growth begins. I've learned this the hard way—pruning in summer stresses the tree and can reduce fruit production. Look for swollen buds on branches; these signal dormancy has ended, and it's time to hold off on major cuts. If you miss this window, wait until late summer after fruiting to do light maintenance trimming.
Cutting Technique That Makes All the Difference: When pruning, always make your cuts at a 45-degree angle about ¼ inch above an outward-facing bud. This simple technique encourages growth in the direction you want while preventing water from pooling on the cut. I use a sharp pair of pruning shears and make clean cuts—never tear or rip branches. For thicker branches, use loppers and follow the same angle rule. The cleaner the cut, the faster the tree heals.
Visualizing Your Vision First: Before making any cuts, sketch your ideal shape on paper. I like to draw the tree's current structure and mark where I want branches to grow. This helps me visualize the end result and prevents over-pruning. Look for the natural "skeleton" branches—the thickest, strongest limbs that will support your design. These should become your primary structural limbs, while thinner branches can be guided or removed to create an open, airy canopy.
Gentle Training for Lasting Results: When training branches in spring, use soft plant ties or twine to guide them into place. Never force branches—this can cause breakage. I've found that gently bending young branches over a stake or trellis works best. For a tiered look, space your branches evenly along the trunk, leaving about 12-18 inches between each main limb. This spacing allows sunlight to reach all parts of the tree and creates that beautiful layered effect.
Pro Tips for Fig Tree Shape
- Transforming your fig tree into a work of art takes patience—but these tricks will help you avoid common pitfalls and create stunning results.
- The Right Time Matters: Late winter or early spring is your golden window for shaping, right before new growth begins.
- Cutting Technique That Makes All the Difference: When pruning, always make your cuts at a 45-degree angle about ¼ inch above an outward-facing bud.
Frequently asked questions
Got questions about shaping your fig tree for that perfect artistic canopy? You’re not alone! Here are some of the most common queries—plus straightforward answers to keep your tree thriving and looking stunning.
Why does my fig tree’s shape keep reverting to its natural form?
Fig trees are resilient! Their natural growth habits (like vigorous shoots) can override pruning if not managed consistently. Solution: Prune in late winter before new growth starts, and repeat every 6–8 weeks during the growing season. Use sharp bypass pruners and seal cuts with pruning paste to reduce stress.
How long does it take to see noticeable changes in my fig tree’s shape?
Patience is key! With regular pruning, you’ll start seeing subtle improvements in 4–6 weeks as new shoots grow. For dramatic transformations (like a formal espalier or rounded dome), plan for 1–2 years of dedicated shaping. Pro tip: Take progress photos to track changes!
Can I shape a fig tree too aggressively? What are the signs?
Yes—over-pruning stresses the tree, leading to leaf drop, weak growth, or even death in extreme cases. Watch for yellowing leaves, stunted branches, or excessive sap. Rule of thumb: Never remove more than 25% of the canopy in one session, and avoid pruning during heatwaves or droughts.
Are there alternative methods to shaping if I’m not confident with pruning?
Try these low-risk options:
- Trellising: Grow the tree along a fence or wall for a natural, guided shape.
- Espalier training: Use wires and stakes to flatten branches into artistic patterns (great for small spaces!).
- Topiary cages: Install a decorative cage early in the tree’s life to encourage uniform growth.
Will shaping my fig tree affect fruit production?
Not if done correctly! Pruning actually boosts fruit yield by improving airflow and sunlight penetration. However, avoid heavy pruning during fruiting season (late summer/fall), as the tree directs energy to ripening figs. Focus on shaping in winter or early spring for the best balance of beauty and bounty.
Wrapping up and next steps
Transforming your fig tree into a stunning, functional masterpiece is all about patience, creativity, and a little green-thumbed love! 🌿 Whether you’re shaping it into an elegant espalier, a whimsical topiary, or a sprawling archway, the key is consistency and confidence.
Start small, observe how your tree responds, and soon you’ll have a year-round centerpiece that’s as practical as it is beautiful.
Ready to take the next step? Pick a design that excites you, gather your tools, and begin with a single branch—your artistic canopy awaits! 🌟 Happy pruning!