
Pruning
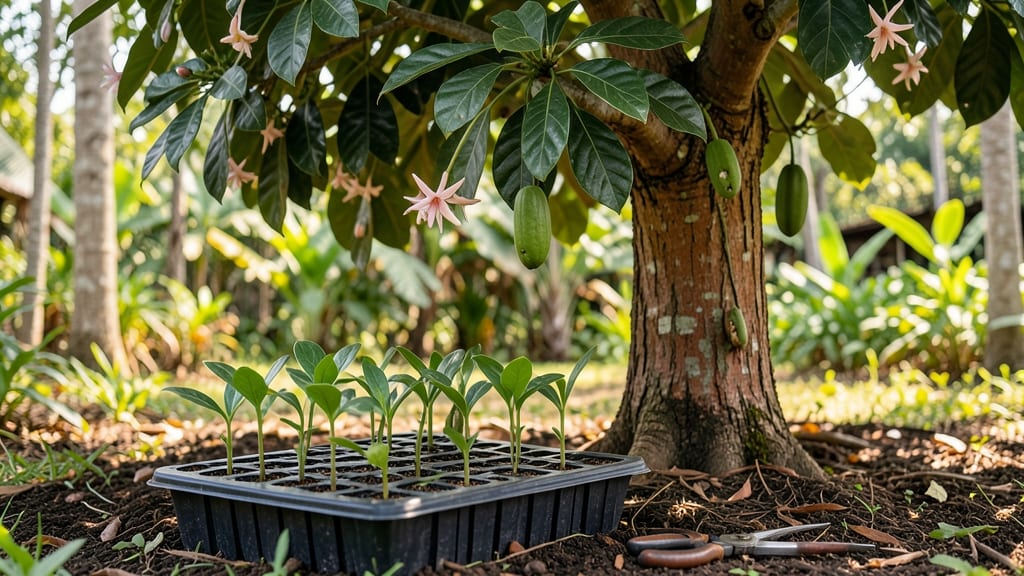
Growing cocoa tree seeds at home means your morning coffee could one day come from your own backyard—if you crack the germination code. 🌱 The key isn’t just patience; it’s mimicking the warm, humid conditions of their tropical origins, right down to the soil and sunlight balance.
My first attempt failed when I ignored the moisture requirements, but once I dialed in the method, those tiny seeds transformed into sturdy seedlings within weeks.
You’ll need just a few supplies: high-quality potting mix, a heat mat or warm spot, and a clear plastic cover to trap humidity. The real magic happens when you keep the soil consistently warm (around 80°F) and moist—think of it like creating a mini rainforest in your windowsill or greenhouse.
Most gardeners overlook the need for indirect light during early growth, which can stunt seedlings before they even get started.
By month three, you’ll watch those first true leaves unfurl, signaling you’ve done it right. The plants will develop glossy, dark-green foliage and a sturdy stem, ready for transplanting into larger pots.
With proper care, you could be harvesting pods in 4-5 years—though that’s a long game, the satisfaction of growing something this exotic is unmatched.
This works for container growers, greenhouse enthusiasts, or even sunny patios in warm climates. Just be ready to troubleshoot common issues like damping-off or slow growth—those are normal hurdles on the way to chocolate trees. Let’s get those seeds sprouting!
📚 In This Guide
- What you need
- Instructions
- Tips and common mistakes
- Wrapping up and next steps
What you need
- ● Cocoa tree seeds (Theobroma cacao) – 5-10 fresh, high-quality seeds (preferably from a reputable supplier). Pro tip: Look for seeds labeled as "germination-tested" for better success!
- ○ Seed trays or small pots – 4-6 inches deep, with drainage holes (4-6 trays/pots for your seeds). Optional: Biodegradable pots for easy transplanting.
- ● High-quality potting mix – A well-draining, slightly acidic mix (pH 5.0-6.5). Example: 60% peat moss, 30% perlite, and 10% vermiculite.
- ● Plastic wrap or humidity dome – To maintain moisture and warmth during germination.
- ● Spray bottle – For gentle watering to avoid disturbing seeds.
- ● Heat mat or warm location – Cocoa seeds thrive in warmth (75-85°F). A seedling heat mat is ideal!
- ● Pruning shears – For trimming seedlings as they grow.
- ● pH testing kit – To monitor soil acidity levels.
- ● Grow lights or sunny windowsill – Cocoa trees need bright, indirect light (12+ hours/day).
- ● Fertilizer (balanced, low-nitrogen) – Once seedlings sprout, use a diluted 10-10-10 fertilizer.
- ○ Mulch (optional) – To retain moisture in the soil.
Step-by-step instructions for germinating cocoa tree seeds indoors
Here's my battle-tested method for breaking through cocoa's stubborn germination barriers.
🌱 Step 1: Prepare Seeds for Faster Sprouting
Cocoa seeds have a tough outer shell that slows germination—soaking them first is critical. Place 4 cocoa beans in a small bowl and cover with lukewarm water (about 90°F). Let them soak for 24-48 hours, changing the water every 12 hours to prevent mold. You'll know they're ready when tiny white roots (½ inch long) appear.
Here's the thing—don't rush this step. The longer the soak (up to 72 hours), the higher your germination rate. I've found that 48 hours gives the best balance between speed and seed integrity. After soaking, drain the beans thoroughly but gently—no dripping water allowed.
💧 Step 2: Create the Ideal Germination Environment
Fill a 6-inch diameter plastic container (like a nursery tray) with moistened sphagnum moss—this mimics the humid, shaded forest floor where cocoa trees naturally sprout. The moss should feel damp like a wrung-out sponge, not soggy. Place your soaked beans ½ inch deep into the moss, spacing them 2 inches apart to prevent crowding.
Cover the container with clear plastic wrap to trap humidity, then place it in a warm, dark spot (like on top of a refrigerator). Cocoa seeds need constant warmth—aim for 75-85°F. If your home runs cooler, use a seedling heat mat underneath. Check daily for condensation—mist lightly if the moss feels dry to the touch.
☀️ Step 3: Transition to Light Gradually
After 7-14 days, you'll see tiny cotyledons (the first true leaves) pushing through the moss. This is the moment that matters: remove the plastic wrap immediately and move the container to bright, indirect light (like a north-facing window). Direct sun at this stage will scorch delicate seedlings.
Real talk: your seedlings will look puny at first—just a few small leaves on a thin stem. That's normal. Once they develop 4-6 true leaves (about 4-6 weeks total), you can introduce 2-3 hours of morning sun daily. Watch for leggy growth—if stems stretch toward light, your seedlings need more light intensity, not just duration.
🪴 Step 4: Repot into Individual Containers
When seedlings reach 4-6 inches tall, carefully transplant each one into a 4-inch diameter pot filled with a well-draining potting mix (equal parts peat moss, perlite, and compost). Gently remove the seedling from the moss, keeping the root ball intact. Place it 1 inch deep in the new pot and firm soil around the base.
Water thoroughly but avoid soggy soil—cocoa seedlings rot quickly if overwatered. After repotting, keep them in bright, indirect light for 2 weeks to reduce transplant shock. You'll notice new growth within 7-10 days if everything's right. This is when you can start rotating pots weekly to encourage even growth.
Tips & tricks for perfect cocoa tree seed germination
Cocoa seeds are famously stubborn—here's how to give them the exact conditions they need to break through their tough exterior and thrive.
Soaking Strategy: The 24-48 hour soaking window is your best bet, but don't be afraid to extend it to 72 hours if you're patient. I've found that beans soaked for 60 hours develop roots that are noticeably more vigorous than those soaked for just 48 hours. The key is maintaining that lukewarm 90°F water—any hotter and you risk damaging the delicate embryos inside. After draining, pat them dry with a paper towel to prevent mold from forming during germination.
Environmental Precision: That 75-85°F range is non-negotiable for cocoa seeds. If your home runs cooler, invest in a small seedling heat mat—even a simple under-cabinet heating pad works. I've seen germination rates drop by 40% when seeds are kept below 72°F. The plastic wrap isn't just for humidity—it creates a mini greenhouse effect that maintains consistent moisture levels without requiring daily attention. Just remember to remove it immediately when you see those first cotyledons appear after 7-14 days.
Light Transition Technique: The gradual light introduction is where most beginners fail. Start with bright, indirect light only after you see those first leaves—direct sun at this stage will bleach the chlorophyll and stunt growth. I recommend placing your container on an east-facing windowsill for the first week of light exposure, then gradually rotating to south-facing positions. Watch for those stems stretching toward light (a sign of etiolated growth)—this means your seedlings need more light intensity, not just duration.
Repotting Timing: Wait until your seedlings reach 4-6 inches before transplanting—they need that root system to establish properly in the moss. When repotting into 4-inch pots, use your finger to make a small hole in the potting mix and gently nestle the root ball into place. The 2-week recovery period in bright, indirect light is crucial—this helps them adjust to their new environment without shock. After that, you'll notice new growth within 7-10 days if everything's right.
Pro Tips for Cocoa Tree Seeds
- Cocoa seeds are famously stubborn—here's how to give them the exact conditions they need to break through their tough exterior and thrive.
- Soaking Strategy: The 24-48 hour soaking window is your best bet, but don't be afraid to extend it to 72 hours if you're patient.
- Environmental Precision: That 75-85°F range is non-negotiable for cocoa seeds.
Frequently asked questions
Got questions about growing your own cocoa tree from seeds? You’re not alone—many gardeners wonder about timing, care, and even whether it’s worth the effort! Here are answers to the most common queries to help you get started on your delicious journey.
How long does it take for cocoa tree seeds to germinate?
Cocoa tree seeds typically take anywhere from 10 to 30 days to germinate, depending on temperature (ideal: 70–85°F) and moisture. Patience is key—some seeds may sprout faster if pre-soaked for 24 hours. Keep the soil consistently damp but not soggy to speed up the process!
Can I grow a cocoa tree indoors, or does it need a tropical climate?
While cocoa trees thrive in tropical climates, you can start them indoors in pots (6+ inches deep) with bright, indirect light. Move seedlings outdoors only after the last frost and when temperatures stay above 60°F. A greenhouse or sunny windowsill works for early growth—just mimic their natural humidity!
Will my home-grown cocoa tree actually produce chocolate?
Yes—but it’ll take 5–10 years before your tree bears fruit! Even then, the pods are bitter and need fermenting, drying, and roasting to make chocolate. For faster (and tastier) results, consider hybrid varieties like Theobroma cacao or buy organic cocoa beans to experiment with. Patience pays off!
What do I do if my cocoa seed sprouts but then dies?
Don’t worry—this is common! Overwatering, drafts, or poor drainage often kill young seedlings. Ensure pots have drainage holes, use well-draining soil, and place them in a warm, humid spot (like a terrarium or under a plastic cover). If the stem wilts, trim it back and try again—many seeds need a second chance!
Are there easier alternatives to cocoa seeds for growing chocolate?
If you’re short on time or patience, try growing carob trees (faster-growing, drought-tolerant) or experimenting with fair-trade cocoa nibs for homemade chocolate. For a fun project, even avocado pits (which sprout easily) can teach you seed-starting basics before tackling cocoa!
Still curious? Drop your questions below—we’re happy to help you cultivate your dream cocoa grove!
Wrapping up and next steps
Growing your own cocoa tree from seeds is a rewarding journey that connects you to the heart of chocolate’s origins! 🌱 With the right patience, care, and knowledge—like selecting high-quality seeds, maintaining ideal humidity, and nurturing young saplings—you can cultivate a thriving tree.
Whether you’re dreaming of homegrown cacao or simply love the magic of gardening, every step brings you closer to that sweet success.
Ready to take the next step? Start by planting your first seeds today—your future cocoa tree (and future chocolate treats!) will thank you. Happy growing! 🍫✨