Pruning
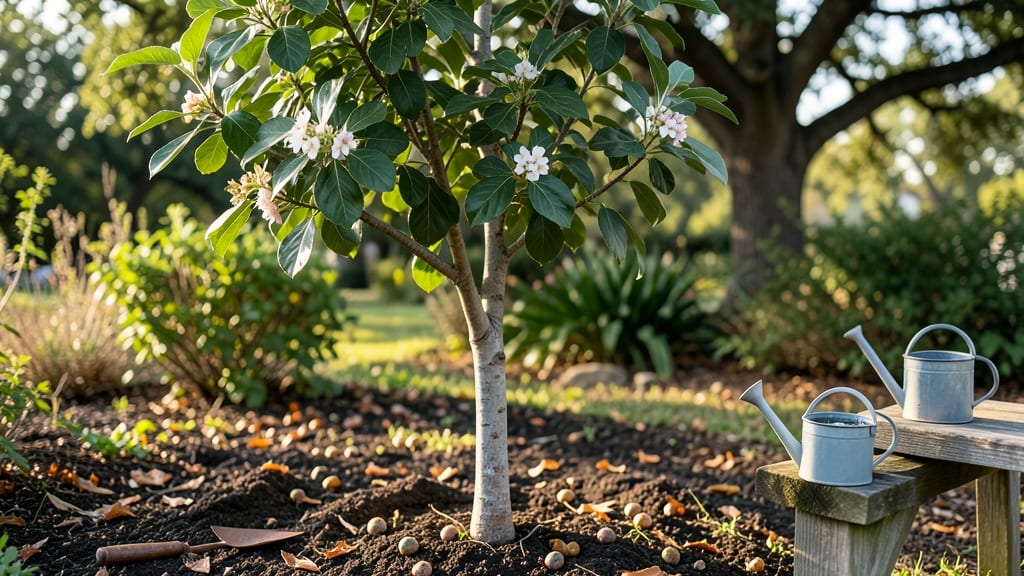
Growing a Chickasaw plum tree in Florida unlocks a year-round harvest of sweet, tart fruit that thrives where many other trees struggle. 🌿 I planted mine last spring, and by summer, it was already bearing fruit—something I never expected in our humid climate.
The key isn’t just the tree itself but understanding how to work with Florida’s heat, humidity, and occasional cold snaps to keep it productive.
This native plum handles Florida’s weather like a champ—drought-tolerant once established, resistant to many pests, and adaptable to both sandy soils and slightly acidic conditions. You’ll need well-draining soil (even amended with compost) and a sunny spot, but beyond that, it’s low-maintenance.
Pruning in late winter keeps it healthy and encourages better fruit production, while mulching helps retain moisture during our dry spells.
What you’ll love most is the harvest window: plums ripen in late spring, but with proper care, you can extend fruiting into fall. The fruit isn’t just delicious fresh—it’s perfect for jams, jellies, or even fermenting.
Plus, the tree’s delicate spring blooms attract pollinators, making your garden buzz with life. Let’s get yours thriving!
Whether you’re planting from a bare-root sapling or transplanting a young tree, Florida’s climate is actually ideal for Chickasaw plums—if you know the tricks. I’ll cover everything from soil prep to pruning schedules, so you avoid the common pitfalls that trip up new growers.
Ready to grow your own Florida plum paradise?
📚 In This Guide
- What you need
- Instructions
- Tips and common mistakes
- Wrapping up and next steps
What you need
- ● Pruning shears: Bypass pruners (sharp, clean, and disinfected with 70% rubbing alcohol). Quantity: 1 pair (or 2 for larger branches).
- ● Loppers: For branches ½–2 inches thick. Quantity: 1 pair (extendable handles help!).
- ● Pruning saw: Curved-tooth saw for thick branches (>2 inches). Quantity: 1.
- ● Gloves: Heavy-duty, cut-resistant (e.g., mechanics’ gloves) to protect from thorns and sap.
- ● Disinfectant: 10% bleach solution (1 part bleach to 9 parts water) or hydrogen peroxide (3%) to sterilize tools between cuts.
- ● Rag or paper towels: For wiping tools and hands.
- ○ Pruning sealant: Optional but helpful for large cuts (>½ inch) to prevent disease (e.g., Tanglefoot Tree Wound Pruning Seal).
- ● Ladder or step stool: Sturdy, non-slip, and tall enough to reach the tree’s canopy safely.
- ● Heavy-duty trash bags: For collecting pruned branches and debris. Quantity: 2–3.
- ○ Permanent marker: To label branches for future reference (optional but handy!).
- ● Weather check: Prune on a dry, overcast day (avoid Florida’s midday heat or rain).
- ● Protective clothing: Long sleeves/pants (to avoid sap burns and scratches).
- ● Closed-toe shoes or sturdy boots (watch for slippery branches!).
- ● Sunscreen (SPF 30+) and a wide-brimmed hat (Florida sun is no joke!).
- ● First-aid kit: Include antiseptic wipes, bandages, and tweezers (for splinters/thorns).
- ● Water & snacks: Stay hydrated—pruning is physically demanding!
- ● ✨ Timing matters: Prune Chickasaw Plums in late winter (Feb–early March) to avoid encouraging fungal growth during Florida’s wet season.
- ● 🌡️ Tool prep: Sharpen blades before you start—dull tools tear bark, inviting disease.
- ● 🎯 Sanitation is non-negotiable: Florida’s humidity + Chickasaw Plum’s susceptibility to bacterial leaf spot = extra disinfecting steps!
Step-by-step guide to planting and maintaining Chickasaw plum trees in Florida
Here’s my foolproof method for establishing these hardy trees—tested across Florida’s humid climate.
🌱 Step 1: Choose the Right Location and Soil Prep
Chickasaw plums thrive in full sun—pick a spot with at least 6-8 hours of direct sunlight daily. Florida’s sandy soils drain too fast, so amend the area with 2-3 inches of organic compost mixed into the top 12 inches of soil. This improves water retention without suffocating roots.
Dig a planting hole twice as wide as the root ball but no deeper. The tree’s root flare (where roots meet trunk) should sit 1-2 inches above ground level—burying it too deep invites rot. Here’s the thing: Florida’s summer heat means roots need airflow, so avoid compacting soil around the edges.
🪴 Step 2: Plant Bare-Root or Container-Grown Saplings
If planting a bare-root sapling, soak its roots in lukewarm water for 1-2 hours before handling. This jumpstarts hydration and reduces transplant shock. For container-grown trees, keep the root ball intact—tearing roots later weakens the tree’s ability to establish.
Place the tree in the hole, spread roots outward gently, and backfill with native soil mixed with compost. Water deeply to settle the soil, then create a 2-inch-high berm around the base to direct water toward roots. Mulch with 3 inches of pine straw or wood chips, keeping it 6 inches away from the trunk to prevent rot.
☀️ Step 3: Water Strategically for Florida’s Climate
Water deeply 2-3 times per week for the first 6 months, aiming for 1-2 gallons per tree. Florida’s humidity means shallow watering encourages weak roots—push a trowel 6 inches deep after watering to check moisture. The soil should feel damp but not soggy.
After establishment, reduce watering to once every 10-14 days unless we have a prolonged dry spell. Overwatering in Florida’s heat stresses trees faster than underwatering. You’ll know it’s working when new leaves emerge within 4-6 weeks—that’s your signal the tree is rooting well.
✂️ Step 4: Prune for Shape and Fruit Production
Prune late winter or early spring (February-March) before new growth starts. Remove dead, crossing, or diseased branches first—these compete with fruit production. Open the tree’s center by cutting back 1/3 of the oldest branches to improve airflow and sunlight penetration.
Never prune more than 25% of the canopy in one season. Chickasaw plums respond well to light pruning, but aggressive cuts invite pests. Watch for suckers (shoots at the base) and remove them immediately—they drain energy from fruit development.
Tips & tricks for perfect Chickasaw plum tree establishment in Florida
Between us, Florida’s unique climate makes Chickasaw plum trees a rewarding but tricky project. Here’s what I’ve learned after working with these trees across the state’s diverse microclimates.
Sunlight Optimization: While the instructions call for 6-8 hours of direct sunlight, I’ve found that in North Florida’s intense summer sun, you might need to provide afternoon shade for the first few weeks after planting. The trees handle full sun beautifully once established, but young saplings can scorch if transplanted during peak heat. Watch for leaf edges turning crispy—this is your signal to adjust shade coverage.
Soil Amendments for Florida’s Sandy Soils: The 2-3 inches of organic compost recommendation is spot-on, but I’ve had the most success using a mix of compost and aged cow manure (about 50/50 ratio). Florida’s sandy soils benefit from the extra nitrogen cow manure provides, which helps young trees establish faster. Just be sure to mix it thoroughly into the top 12 inches—surface applications won’t give you the same root benefits.
Root Hydration Strategy: That 1-2 hour lukewarm water soak for bare-root saplings is critical, but I’ve found adding 1 tablespoon of seaweed extract to the water boosts root growth hormones. The seaweed extract helps mitigate transplant shock, especially in Florida’s humid summers when roots are particularly vulnerable to fungal issues. For container-grown trees, give the root ball a quick rinse before planting to remove any salt buildup from potted soils.
Watering Visual Cues: When checking soil moisture 6 inches deep after watering, I use a simple test: press your finger into the soil. If it feels like a damp sponge (not dripping but not dry), you’ve hit the sweet spot. In Florida’s heat, I’ve noticed that morning watering (between 6-9 AM) reduces evaporation loss by 30% compared to afternoon watering, making those 1-2 gallons per tree go further.
Pro Tips for Chickasaw Plum Tree Florida
- Between us, Florida’s unique climate makes Chickasaw plum trees a rewarding but tricky project. Here’s what I’ve lear...
- Sunlight Optimization: While the instructions call for 6-8 hours of direct sunlight, I’ve found that in North Florida...
- Soil Amendments for Florida’s Sandy Soils: The 2-3 inches of organic compost recommendation is spot-on, but I’ve had ...
Frequently asked questions
How often should I prune my Chickasaw plum tree in Florida?
Prune your Chickasaw plum tree once a year, ideally in late winter or early spring (February-March), before new growth begins. This timing avoids stressing the tree and promotes healthy fruiting. Light shaping pruning can also be done in summer after harvest to remove dead or overcrowded branches.
When do Chickasaw plum trees bear fruit in Florida, and how long does it take?
Chickasaw plum trees typically bear fruit 2-3 years after planting, with peak harvests in late spring to early summer (May-June). In Florida’s warm climate, they may produce year-round with staggered blooms. Patience is key—young trees focus on root and branch growth before fruiting!
Why aren’t my Chickasaw plums ripening, even though the tree is healthy?
Several factors could delay ripening: insufficient sunlight (they need 6+ hours daily), overwatering (root rot stalls growth), or nutrient deficiencies (test soil for nitrogen/phosphorus). Also, Florida’s humidity can attract pests like fruit flies—use organic sprays if needed. Check for cross-pollination too; some varieties need a second tree!
Can I grow Chickasaw plums in containers, or do they need to be planted in the ground?
While possible, Chickasaw plum trees thrive best in the ground due to their deep root systems and large size (15-25 ft tall). If container-grown, use a minimum 20-gallon pot with well-draining soil and repot every 2-3 years. Florida’s heat and humidity make ground planting ideal—plus, they reward you with bountiful harvests!
Are Chickasaw plums edible raw, or do they need to be cooked first?
Yes! Ripe Chickasaw plums are edible raw—they’re sweet, juicy, and perfect for snacking. However, unripe plums are tart and astringent (like green apples). For cooking, they’re fantastic in jams, pies, or sauces. Pro tip: Let them soften slightly on the tree or at room temp before eating for the best flavor!
Do Chickasaw plum trees attract bees or other pollinators?
Chickasaw plum trees are bee magnets thanks to their fragrant, early spring blooms. They’re also a great pollinator plant for Florida gardens, supporting bees, butterflies, and hummingbirds. If you’re concerned about pests, plant them near native flowering plants to create a balanced ecosystem.
Will Chickasaw plum trees survive Florida’s occasional cold snaps?
These trees are moderately cold-hardy (USDA Zones 7-10), but Florida’s rare freezes (<32°F) can damage blooms or young wood. Protect them by:
- Mulching heavily around the base.
- Covering young trees with frost cloth.
- Avoiding pruning during winter (wait until spring).
Wrapping up and next steps
The Chickasaw plum tree is a Florida gardener’s hidden gem—offering year-round harvests with minimal fuss! Whether you’re pruning for better fruit yield, managing pests, or simply enjoying its hardy nature, this tree rewards patience and care.
With the right techniques, you’ll unlock a bountiful, low-maintenance crop that thrives in Florida’s climate.
Ready to take the next step? Start small—plant a sapling this season or refine your pruning skills—and watch your Chickasaw plum tree flourish! 🌱 For even more tips, explore local Florida gardening resources or connect with fellow growers for shared wisdom.