
Landscaping
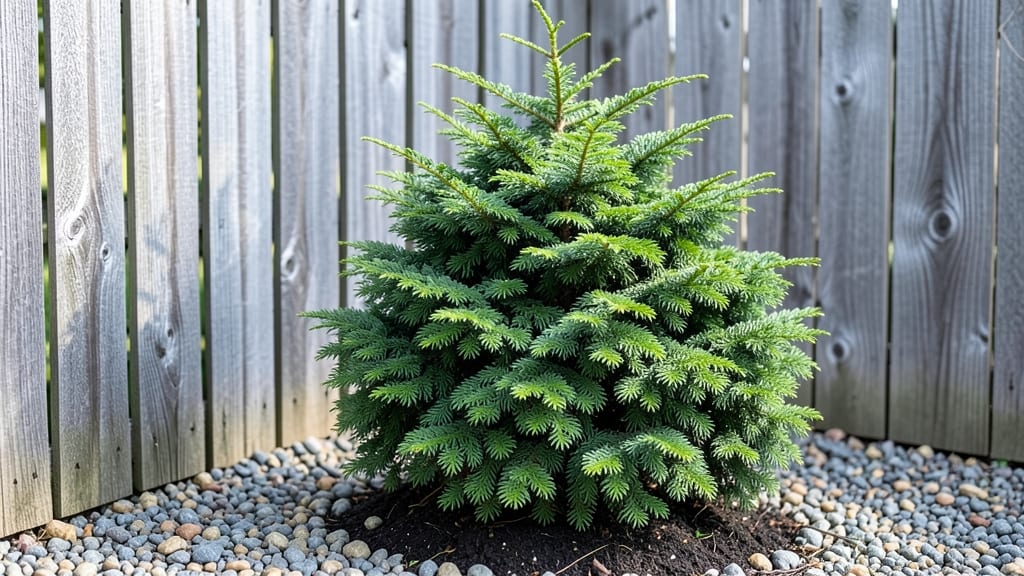
A cedar tree privacy fence transforms your yard from a public space into a serene retreat—nature’s answer to noisy neighbors and prying eyes. I planted mine five years ago, and now they form a lush, wind-resistant wall that never needs repainting or staining.
The key is choosing the right species: Western Red Cedar grows slowly but resists rot and insects, while Thuja (Arborvitae) offers faster height gains for quick privacy.
The real magic happens in the spacing—plant trees 3-6 feet apart for a dense screen in 5-10 years, or 6-8 feet apart if you want mature spacing from day one. A single row works for light screening, but two staggered rows create an impenetrable barrier.
Just avoid planting too close to sidewalks or driveways; cedars spread their roots wider than their trunks.
By year three, you’ll have a fragrant, evergreen wall that blocks noise, filters wind, and adds value to your home. Maintenance is minimal: a quick pruning every few years keeps them shaped, and mulch keeps roots happy.
The best part? Unlike wood fences, cedar trees never fade, warp, or require sealing—just steady growth and natural beauty.
Perfect for large yards, rural properties, or even urban backyards with enough space. If you’re tired of chain-link eyesores or flimsy lattice screens, this is the long-term solution that pays off in privacy and curb appeal. Let’s get your screen growing!
📚 In This Guide
- What you need
- Instructions
- Tips and common mistakes
- Wrapping up and next steps
What you need
- ● Cedar fence panels: Pre-cut or custom-sized (measure your fence length first!). For a standard 6-foot privacy fence, you’ll need roughly 10–12 panels per 100 linear feet (adjust for height/width). Opt for Western Red Cedar or Alaskan Yellow Cedar for durability.
- ● Pressure-treated lumber: 4x4 posts (8-foot length) – 1 post per 8 feet (e.g., 12–15 posts for 100 linear feet).
- ● 2x4 or 2x6 boards (for braces and framing) – ~50 linear feet total.
- ● Concrete: Quick-setting mix (e.g., 60 lbs per post; ~800–1,000 lbs for 100 linear feet).
- ● Galvanized hardware: 3-inch exterior screws or nails (stainless steel or galvanized).
- ● Heavy-duty hinges or latch hardware (if adding gates).
- ● Landscape fabric: 3–4 feet wide (to block weeds under panels).
- ● Post hole digger or auger (for 12-inch diameter, 24–30-inch deep holes).
- ● Circular saw or miter saw (for cutting cedar panels/lumber to size).
- ● Level (4-foot) and measuring tape.
- ● Drill/driver (with decking screws for cedar).
- ● Shovel, wheelbarrow, and rubber mallet.
- ● Safety gear: Gloves, goggles, and ear protection.
- ● Cedar sealant (apply every 2–3 years to extend life).
- ● Corner braces or metal fence clips (for extra stability).
- ● Gate hardware (latches, hinges, or self-closing mechanisms).
- ● Decorative cap rail (to match your cedar panels).
- ● Stakes and string line (for marking layout before digging).
How to plant a cedar tree privacy screen that stands the test of time
This evergreen solution transforms bare space into a lush, wind-resistant barrier that stays vibrant for decades.
Plan Your Layout for Maximum Density
Measure your space and mark planting locations 4-6 feet apart in staggered rows—this creates a natural, dense screen faster than single rows. I recommend using a garden hose to outline the area first; you'll see how the trees will fill in over time. For a 10-foot-wide screen, plan two rows with 5-foot spacing between them to ensure full coverage within 5-7 years.
Check your property lines before digging—cedars grow 3-4 feet wide at maturity, so plant them 3 feet back from edges to avoid root conflicts with sidewalks or driveways. A simple string line between stakes keeps your spacing consistent.
Prepare the Soil and Planting Holes
Cedars thrive in well-draining soil but tolerate poor conditions better than most evergreens. Loosen the soil to 12 inches deep and mix in 2 inches of compost per hole—this improves root establishment without smothering them. Dig holes twice as wide as the root ball but no deeper; planting too deep suffocates roots and causes stress.
I always water the hole thoroughly before planting to settle the soil and remove air pockets. For a 4-foot-tall tree, the hole should be 18 inches wide—this gives roots room to spread without circling, which weakens the tree long-term.
Plant and Stake for Stability
Place the tree so the top of the root ball sits 1-2 inches above ground level—this prevents rot while allowing roots to expand downward. Backfill with native soil (not amended mix) to avoid disrupting root growth. Press gently around the edges to eliminate air pockets, then water deeply until moisture reaches 6 inches down.
Stake only if your area gets high winds. Use two 2-foot stakes on opposite sides, tied loosely with 1-inch-wide fabric strips—metal or wire can girdle the trunk as it grows. Remove stakes after 12 months to avoid dependency.
Water and Mulch for Long-Term Health
Water newly planted cedars twice weekly for the first month, then taper to once weekly once established. You'll know they're getting enough when the soil feels moist 4 inches down—probe with your finger to check. Overwatering is the fastest way to kill cedars; they prefer dry conditions once established.
Apply 3 inches of mulch in a ring around the base, keeping it 6 inches away from the trunk to prevent rot. I use pine bark mulch because it mimics the forest floor cedars naturally grow in. Replenish mulch annually to maintain moisture and suppress weeds.
Prune and Maintain for a Perfect Screen
Skip pruning the first 3 years—cedars establish roots faster when left alone. After that, trim only to remove dead or crossing branches using clean, sharp shears. The goal is to encourage a tapered shape that naturally thickens toward the bottom.
Fertilize only if growth stalls after 2 years. Use a slow-release, balanced fertilizer (10-10-10) in early spring—cedars rarely need feeding and over-fertilizing causes weak, floppy growth. A healthy screen needs no extra care beyond occasional pruning and mulch top-ups.
Tips & tricks for perfect cedar tree privacy fence
Creating a lush, evergreen privacy screen takes thoughtful planning—here’s how to avoid common pitfalls and ensure your cedar fence thrives for decades.
Spacing Strategy: The staggered 4-6 foot spacing in Step 1 isn’t just about aesthetics—it creates a natural windbreak effect. For a 10-foot-wide screen, the 5-foot spacing between rows ensures branches from both rows will eventually intertwine, filling gaps faster than single-row planting. I’ve seen screens planted too tightly struggle with root competition after just 2 years, while properly spaced ones fill in beautifully within 5-7 years.
Soil Preparation Insight: In Step 2, the 12-inch deep loosening and 2-inch compost mix might seem excessive, but it’s critical for root establishment. Cedar roots spread horizontally, so they need that depth to establish before vertical growth kicks in. If your soil is particularly dense, consider adding a handful of coarse sand to improve drainage—cedars hate soggy roots.
Planting Depth Matters: That 1-2 inch elevation above ground level in Step 3 prevents rot while allowing roots to expand downward. I’ve seen too many cedars planted too deep where the trunk rots at the soil line. After backfilling, press firmly around the edges to eliminate air pockets—this helps roots make immediate contact with soil for faster establishment.
Watering Wisdom: The twice-weekly watering for the first month in Step 4 might seem like overkill, but cedars are surprisingly drought-tolerant once established. The key is getting them through that critical first year. Water deeply until moisture reaches 6 inches down—this encourages deep root growth rather than shallow, weak roots that dry out quickly.
Pro Tips for Cedar Tree Privacy Fence
- Creating a lush, evergreen privacy screen takes thoughtful planning—here’s how to avoid common pitfalls and ensure your cedar fence thrives for decades.
- Spacing Strategy: The staggered 4-6 foot spacing in Step 1 isn’t just about aesthetics—it creates a natural windbreak effect.
- Soil Preparation Insight: In Step 2, the 12-inch deep loosening and 2-inch compost mix might seem excessive, but it’s critical for root establishment.
Frequently asked questions
Got questions about installing a cedar tree privacy fence? You’re not alone! Here are answers to the most common concerns to help you plan with confidence.
How long does it take for a cedar tree fence to grow to full height?
A cedar tree fence typically reaches full privacy (8–12 feet tall) in 5–10 years, depending on the variety (e.g., Thuja occidentalis or Thuja plicata). Dwarf cultivars like Thuja standishii may take 3–5 years to hit 3–4 feet. Patience pays off—cedars grow slowly but stay lush and green year-round!
Can I plant cedar trees for a fence in winter?
Yes! Winter (late fall to early spring) is actually the best time to plant cedars because the dormant soil retains moisture, and cooler temps reduce stress. Avoid extreme cold snaps or frozen ground. If planting in winter, mulch heavily to protect roots from freezing. Spring planting works too, but water consistently until roots establish.
Are cedar trees cheaper than a wood or vinyl privacy fence?
Upfront, cedar trees cost less per linear foot ($3–$10 per plant vs. $15–$50 for pre-built fences). However, long-term savings win: No maintenance costs (like painting or replacing panels), and cedars outlast many fences by decades. Factor in spacing (3–5 feet apart) and soil prep for accurate cost comparisons.
Do cedar trees attract pests like termites or deer?
Cedars are naturally resistant to termites and most pests, but deer may browse young saplings. Use deer repellent sprays or plant thorny varieties like Thuja occidentalis ‘Rheingold’ for extra protection. Avoid over-fertilizing, which can attract insects. Healthy cedars rarely suffer major pest issues!
What’s a good alternative if I need privacy faster?
For instant privacy, combine cedar trees with:
- Bamboo screens (grows 2–3 feet/year, but invasive—contain roots!).
- Fast-growing shrubs like arborvitae (Thuja spp.) or Leyland cypress (1–2 feet/year).
- Vinyl or wood panels (install in 1–2 days, but requires maintenance).
For a low-maintenance hybrid, plant cedars in front of a short lattice or trellis to speed up coverage.
Wrapping up and next steps
A cedar tree privacy fence isn’t just a fence—it’s an investment in beauty, durability, and peace of mind. 🌲 With its natural resistance to decay, pests, and fading, cedar delivers timeless privacy while blending seamlessly into your landscape.
Whether you’re shielding your backyard from nosy neighbors or creating a serene retreat, this evergreen solution will stand the test of time with minimal upkeep.
Ready to transform your outdoor space? Start by sketching your design, gathering supplies, and rolling up your sleeves! With the right tools and a little patience, you’ll soon enjoy a lush, fragrant privacy screen that feels like a million bucks. Your future self will thank you!