
Pruning
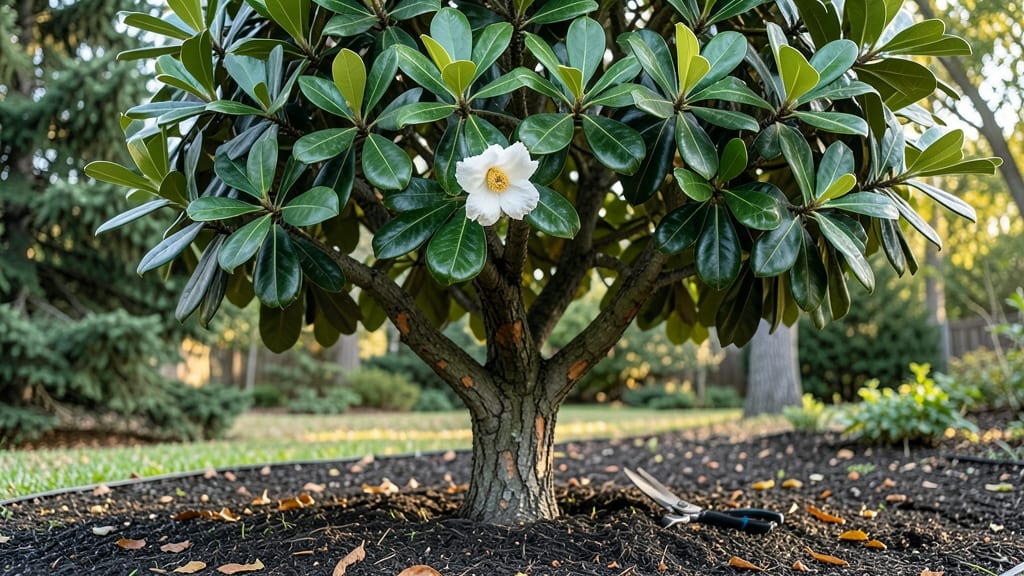
Caring for a magnolia tree means waking up those glossy, leathery leaves and showstopper blooms every year—starting with the right late-winter pruning timing. 🌸 I’ve watched my own magnolia go from a sad, bare skeleton to a fragrant, flower-laden giant by mastering just a few key steps.
The secret isn’t complicated, but timing matters more than most gardeners realize.
Most people prune too early or too late, and that’s how you end up with fewer blooms or even dead branches. Late winter—right after the last frost but before new growth starts—is your golden window.
You’ll need basic pruning tools, a clean workspace, and about 30 minutes to shape the tree without stressing it. The goal? Open up the center for airflow and sunlight while keeping the natural shape intact.
By spring, you’ll see fresh, vibrant growth where old wood once stood. The blooms arrive earlier, last longer, and the tree stays healthier year after year. No more guessing—just a foolproof method that works for both young saplings and mature giants.
Let’s get those branches looking like they belong in a botanical garden.
Works for both southern magnolias (like 'Little Gem') and northern varieties (like 'Ann'), though timing shifts slightly by zone. The same principles apply—just adjust for your climate. Ready to transform that tree into a neighborhood showstopper?
📚 In This Guide
- What you need
- Instructions
- Tips and common mistakes
- Wrapping up and next steps
What you need
- ● Pruning shears: Bypass pruners (sharp, clean, and sterilized with rubbing alcohol to prevent disease). Spec: 6–8" blade length, ergonomic grip.
- ● Loppers: For thicker branches (1–2" diameter). Spec: 18–24" long, bypass or anvil type (bypass preferred for clean cuts).
- ● Hand saw: For branches >2" thick. Spec: Pruning saw with a curved blade (avoid bow saws—they tear wood).
- ○ Disinfectant: 70% isopropyl alcohol or a pruning sealant (optional but recommended for open wounds).
- ● Garden gloves: Heavy-duty, cut-resistant (to protect from thorns and sap).
- ● Ladder or step stool: Sturdy and tall enough to reach branches safely (extendable ladders work for mature trees).
- ● Trash bags: For collecting pruned debris (1–2 heavy-duty bags).
- ○ Marking twine or flags: To tag branches for removal (optional but helpful for complex pruning).
- ● Pruning sealant: For large cuts (>½" diameter) to reduce sap loss (use sparingly—only on non-magnolia species if needed).
- ● Tree wound dressing: Avoid for magnolias—they don’t need it! (Contrary to old myths, these can trap moisture and cause rot.)
- ● Garden hose or spray bottle: To rinse tools between cuts and clean sap off branches.
- ● Safety gear: Goggles (to shield from debris) and long sleeves (for protection against thorns).
- ● Camera or sketchpad: To document your tree’s structure before pruning (great for reference!).
Step-by-step guide to late-winter magnolia pruning for stronger blooms
This is the moment that matters for your magnolia's future flowers.
⏰ Step 1: Time Your Pruning Precisely
Wait until late winter—after the worst cold snaps but before buds begin to swell. In most climates, this falls between mid-February and early March, when daytime temperatures consistently reach 50-60°F. Pruning too early risks exposing tender wood to frost damage, while waiting too long encourages premature bud break that can be killed by late frosts.
Check your local frost dates and observe your tree. If you see buds beginning to fatten (they'll look plump and ready to burst), it's time to prune. I always mark my calendar with the last frost date and schedule pruning 2-3 weeks before that date to stay ahead of new growth.
✂️ Step 2: Remove Dead and Problematic Branches
Start by eliminating any branches that are dead, diseased, or crossing—these compete with healthy growth and reduce flowering potential. Use clean, sharp pruning shears to make cuts just outside the branch collar (the swollen area where the branch meets the trunk). Never leave stubs, as they invite rot and pests.
Look for branches growing straight upward—these are called "water sprouts" and rarely produce flowers. Cut these back to a lateral branch or bud that's growing outward. I like to step back every few cuts to visualize the tree's natural shape, ensuring I'm not removing more than 25% of the canopy in one session.
🌿 Step 3: Thin the Canopy for Better Airflow
Magnolias need good airflow to prevent fungal diseases like powdery mildew, which can defoliate the tree and reduce next year's blooms. Focus on thinning the inner canopy first—remove branches that are growing inward or rubbing against others. These cuts should be made at the branch collar to avoid tearing the bark.
Thinning opens the tree up to sunlight, which encourages stronger, healthier growth. You'll see more light reaching the inner branches immediately after pruning. Aim to reduce density by 10-15% overall, but prioritize removing branches that are thinner than a pencil—these rarely contribute to flower production.
☀️ Step 4: Shape for Optimal Sun Exposure
Magnolias bloom on old wood, so avoid heavy pruning that removes large sections of mature branches. Instead, focus on light shaping—remove only the smallest branches that detract from the tree's natural form. Cut back to a lateral bud or branch that's growing in the direction you want the tree to fill.
Step back frequently to assess the tree's silhouette. You want a balanced, open shape that allows sunlight to reach as many branches as possible. Avoid creating a "bottlebrush" effect with too many branches at the top—this can lead to overcrowding and fewer blooms. Prune to encourage a pyramidal or rounded form, depending on your tree's natural growth habit.
🪴 Step 5: Clean Up and Protect the Tree
After pruning, sterilize your tools with rubbing alcohol to prevent spreading disease. Collect and dispose of all pruned branches—never leave them on the ground, as they can harbor pests and pathogens. Seal larger cuts (over ½ inch in diameter) with pruning sealant to protect the tree from borers and rot.
Give your magnolia a deep watering after pruning to help it recover. Mulch the base with 2-3 inches of organic mulch, keeping it 6 inches away from the trunk to prevent rot. This protects the roots from temperature swings and retains moisture. You'll notice new growth emerging from the pruned areas within 4-6 weeks, signaling that the tree is healing well.
Tips & tricks for perfect late-winter magnolia pruning
Late-winter pruning transforms your magnolia into a flowering powerhouse—here's how to avoid common pitfalls and maximize results.
Timing is Everything: The mid-February to early March window is critical because it balances frost risk with bud development. If you're unsure about your local frost dates, use a simple trick: observe your tree's buds. When they begin to fatten (look plump and ready to burst), that's your cue. I always check the National Weather Service's frost prediction map and add a buffer of 2-3 weeks before the last frost date—this ensures you're ahead of new growth while avoiding late-season cold snaps.
Tool Prep Makes All the Difference: Clean, sharp pruning shears aren't just recommended—they're essential. Dull tools crush branches instead of making clean cuts, which stresses the tree. I sterilize my shears with rubbing alcohol between cuts to prevent spreading disease, especially when removing dead or diseased branches. For larger branches, use loppers or a pruning saw, but always cut just outside the branch collar—this promotes faster healing and prevents rot. Never leave stubs, as they create entry points for pests and pathogens.
Visualize the Canopy: Step back every 5-10 cuts to assess the tree's shape. You're aiming for a balanced silhouette that allows sunlight to reach all branches—this is key for strong blooms. Focus on removing branches that are thinner than a pencil (they rarely produce flowers) and prioritize thinning the inner canopy first. This improves airflow and reduces fungal risks like powdery mildew. I like to imagine sunlight streaming through the tree—if you can see light reaching the center, you're on the right track.
Post-Pruning Care is Non-Negotiable: After pruning, seal any cuts over ½ inch in diameter with pruning sealant to protect against borers and rot. Give your tree a deep watering to help it recover, then apply 2-3 inches of organic mulch, keeping it 6 inches away from the trunk. This protects roots from temperature swings while retaining moisture. You'll notice new growth emerging within 4-6 weeks—this is a clear sign your tree is healing well and preparing for next year's blooms.
Pro Tips for Caring For A Magnolia Tree
- Late-winter pruning transforms your magnolia into a flowering powerhouse—here's how to avoid common pitfalls and maximize results.
- Timing is Everything: The mid-February to early March window is critical because it balances frost risk with bud development.
- Tool Prep Makes All the Difference: Clean, sharp pruning shears aren't just recommended—they're essential.
Frequently asked questions
Got questions about keeping your magnolia tree thriving? Here are some of the most common ones—and their answers—to help you care for your blooming beauty with confidence!
When is the best time to prune a magnolia tree?
Late winter (just before buds swell) is ideal—typically February to early March in most regions. This timing ensures you don’t remove next year’s flowers while still promoting healthy growth. Avoid pruning after blooms appear, or you’ll cut off potential spring flowers!
Can I prune a magnolia tree in winter if it’s still snowing?
Hold off until the ground thaws and temperatures rise above freezing (32°F/0°C). Pruning in freezing temps can stress the tree, and frozen soil makes cleanup harder. Wait for a mild, dry day to minimize sap loss and risk of disease.
How do I know if I’m pruning too much?
Never remove more than 25% of the tree’s canopy in one season—magnolias are sensitive to heavy pruning. Look for thinning branches (cut back to the branch collar) rather than topping the tree. Over-pruning can reduce blooms or weaken the tree’s structure.
Why are my magnolia leaves turning yellow or dropping?
Yellowing leaves often signal overwatering, root rot, or nutrient deficiencies. Check soil moisture (it should be damp, not soggy) and amend with compost if needed. Fungal issues? Prune affected branches and apply fungicide. Pro tip: Magnolias hate "wet feet"—ensure proper drainage!
Will pruning my magnolia tree reduce next year’s flowers?
If done correctly, no! Prune after flowering (for spring-blooming varieties) or in late winter (for summer-bloomers) to avoid cutting off flower buds. Focus on removing dead, crossing, or weak branches—this actually encourages bigger, healthier blooms over time.
Are there alternatives to pruning if my magnolia isn’t blooming?
Try these non-pruning fixes first:
- Fertilize in early spring with acid-loving plant food (magnolias prefer pH 5.0–6.0).
- Ensure it gets 6+ hours of sunlight—shady spots reduce blooms.
- Check for pests (scale, spider mites) or disease (anthracnose).
Wrapping up and next steps
Caring for a magnolia tree is all about patience, precision, and a little late-winter love! 🌸 By pruning at the right time, you’ll encourage stunning blooms and keep your tree thriving for years. Remember: timing, sharp tools, and gentle hands are your best friends.
Now that you’re armed with the know-how, take that first step—grab your pruners and give your magnolia the care it deserves. Watch it bloom with gratitude, and enjoy the beauty you’ve nurtured! 🌿✨