
Pruning
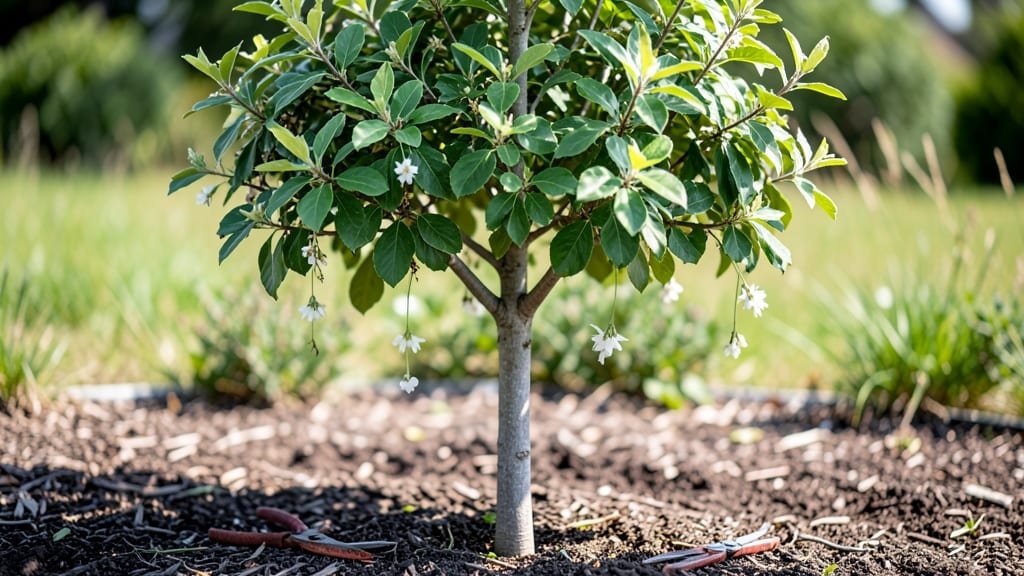
Planting a Bradford pear tree sapling in the Pacific Northwest means preparing for winters that test even the hardiest trees—but with the right pruning, yours will thrive year after year.
I’ve watched mine survive subfreezing nights by keeping its structure strong and its branches flexible, and the secret lies in timing and technique. The first cut you make could determine whether your tree grows into a sturdy shade provider or a weak, wind-tossed mess.
Most gardeners focus on spring pruning, but Bradford pears need attention in every season. Start by removing dead or crossing branches in late winter before buds swell, then do a light shaping in early summer to encourage new growth.
The key is to prune 10-15% of the tree’s canopy each year—never more—to avoid stressing the sapling. I’ve learned that aggressive cuts trigger weak regrowth, while gentle pruning builds resilience against frost and wind.
By summer’s end, your tree will reward you with glossy leaves and a sturdy framework. The real magic happens in late fall when you prune again to remove any water sprouts or damaged limbs—this prevents ice buildup on branches during winter storms.
A well-pruned Bradford pear in the PNW can handle 20°F temperatures without flinching, and its spring blooms become the envy of the neighborhood.
This approach works for both urban yards and rural properties, though urban trees may need extra care to handle salt spray from nearby roads. The goal is a tree that looks effortless but is actually the result of thoughtful, seasonal maintenance.
Let’s get those pruners ready—your Bradford pear’s future starts with the first cut.
📚 In This Guide
- What you need
- Instructions
- Tips and common mistakes
- Wrapping up and next steps
What you need
- ● Pruning shears: Bypass pruners (sharp, clean, and disinfected with rubbing alcohol or bleach solution). Size: 6-8 inches for small branches.
- ● Loppers: For thicker branches (up to 2 inches in diameter). Look for: Bypass blades and comfortable grips.
- ● Pruning saw: For branches larger than 2 inches. Type: Curved-tooth saw for clean cuts.
- ● Gloves: Heavy-duty gardening gloves (cut-resistant for safety).
- ○ Tree wound dressing: Pruning sealant (optional but helpful for larger cuts in wet climates).
- ● Disinfectant: 1 part bleach to 9 parts water (to sterilize tools between cuts).
- ● Bucket or bag: For collecting pruned branches (5-gallon size works well).
- ● Ladder (if needed): Sturdy, extendable ladder for taller saplings (ensure it’s rated for your weight).
- ● Hand saw: For precision cuts on stubborn branches.
- ● Rubbing alcohol wipes: For quick tool disinfection on the go.
- ● Notebook & pencil: To sketch pruning plans or track growth.
- ● Mulch: Organic mulch (2-3 inches) to protect roots post-pruning.
- ● Tree tie or zip ties: For supporting weak branches temporarily.
Instructions for pruning a Bradford pear sapling to thrive in the Pacific Northwest
This method keeps your young tree strong through wet winters and heavy frosts.
Assess the Tree’s Structure in Early Spring
Wait until after the last hard frost when buds begin to swell—usually late March to early April in the Pacific Northwest. Look for branches that cross, grow inward, or rub against each other. These weak points will split under winter ice or snow load.
Check for any dead or diseased branches by scraping the bark with your fingernail. If it’s dark and crumbly underneath, it’s dead and needs removal. I always carry a small notepad to sketch the tree’s shape before cutting—it helps visualize the final structure.
Remove Problem Branches with Clean Cuts
Start with the lowest branches first, working your way up. Use sharp pruning shears to make clean cuts just outside the branch collar—the swollen area where the branch meets the trunk. Never leave stubs, as they invite rot and disease.
For branches thicker than ½ inch, use a pruning saw. Cut on the underside of the branch at a slight angle to prevent water from pooling. I like to make a small notch on the underside first, then complete the cut from the top—this prevents bark from tearing.
Thin the Canopy for Airflow and Light
Remove about 20% of the tree’s total branches to improve airflow and reduce frost pockets. Focus on branches growing straight upward—they’re prone to heavy snow accumulation. Cut these back to a side branch or lateral bud.
Leave some lower branches if they’re healthy, but avoid over-thinning. A Bradford pear needs a balanced structure to support its fruit load. Step back every few cuts to check the tree’s shape—you want an open vase-like form that lets sunlight reach all branches.
Summer Pruning to Encourage Strong Growth
In July, inspect the tree for any suckers growing from the base or water sprouts shooting straight up. These compete with the main structure for nutrients. Remove them immediately with clean cuts at the base.
If any branches look weak or diseased, prune them out now before fungal spores spread. I always sterilize my tools with rubbing alcohol between cuts to prevent contamination. This is also the time to shape the tree if it’s growing too wide—cut back the longest branches by about ⅓ to encourage bushier growth.
Winter Preparation for Frost Resistance
After the first hard frost but before heavy snowfall, do a final check for any dead or broken branches. These are weak points where ice can cause further damage. Wrap the trunk with tree wrap if you’re in a particularly windy area—it protects against bark splitting.
Rake up any fallen leaves or debris from around the base to prevent fungal growth. Bradford pears are prone to silver leaf disease, so keeping the area clean is critical. I also add a 2-inch layer of mulch around the base, but keep it 6 inches away from the trunk to avoid moisture buildup.
Tips & tricks for pruning a Bradford pear sapling
Here's what I've learned after years of shaping Bradford pears in our wet Pacific Northwest climate—these tricks will help you avoid common mistakes and keep your tree thriving.
Timing is Everything: The late March to early April window for Step 1 is critical because you want to catch the tree when buds are swelling but before new growth hardens. I've seen too many gardeners rush this step and accidentally damage tender new shoots. If you miss the window, wait until buds show color again—never prune when the tree is actively flowering.
The Branch Collar Technique: In Step 2, when making cuts just outside the branch collar, resist the urge to cut flush with the trunk. That swollen area is where healing tissues form, and cutting into it creates wounds that take years to seal. I've seen Bradford pears develop cankers from improper cuts—these can kill the tree over time. For branches thicker than ½ inch, make that small underside notch first to prevent tearing when you complete the cut from the top.
Canopy Thinning Strategy: When removing about 20% of branches in Step 3, focus on creating an open vase shape. I like to visualize sunlight streaming through the center—this prevents frost pockets where ice can build up. For upward-growing branches, cut back to a lateral bud that faces outward. This encourages new growth that will naturally form a stronger structure for fruit-bearing.
Tool Maintenance Matters: The sterilization step in Step 4 isn't just about fungal prevention—it's about protecting your entire orchard. I keep a small bottle of rubbing alcohol in my tool belt and wipe between every cut, especially when dealing with diseased branches. Unsterilized tools can spread silver leaf disease, which is particularly devastating to Bradford pears. A few seconds of cleaning now saves hours of cleanup later.
Pro Tips for Bradford Pear Tree Sapling
- Here's what I've learned after years of shaping Bradford pears in our wet Pacific Northwest climate—these tricks will help you avoid common mistakes and keep your tree thriving.
- Timing is Everything: The late March to early April window for Step 1 is critical because you want to catch the tree when buds are swelling but before new growth hardens.
- The Branch Collar Technique: In Step 2, when making cuts just outside the branch collar, resist the urge to cut flush with the trunk.
Frequently asked questions
Got questions about your Bradford pear tree sapling? You’re not alone! Whether you’re a first-time gardener or just looking to refine your pruning skills, these answers will help you keep your tree thriving—especially in the Pacific Northwest’s frosty climate.
When is the best time to prune a Bradford pear sapling for frost resistance?
Prune your Bradford pear sapling late winter or early spring (February–March) before new growth begins. This timing helps the tree harden off before frost and reduces stress. Avoid heavy pruning in fall—it can stimulate tender growth that’s vulnerable to winter cold. For the PNW, wait until after hard frosts to avoid shocking the tree.
How do I protect a young Bradford pear from frost damage?
Start by pruning dead or diseased branches in late winter to improve airflow. Wrap the trunk with tree guard or burlap to shield it from freezing winds. Mulch the base with 3–4 inches of organic mulch (like wood chips) to insulate roots. If extreme cold is forecast, drape a lightweight frost cloth over the tree—just remove it during the day to prevent overheating.
Can I prune a Bradford pear sapling in summer?
Yes, but lightly! Summer pruning (June–August) should focus on removing only water sprouts or crossing branches to avoid stressing the tree. Heavy summer cuts can encourage succulent growth that’s prone to frost damage in fall. If you must prune, do it on a cool, overcast day to minimize shock.
Are there better frost-resistant alternatives to Bradford pears?
If you’re concerned about Bradford pear’s susceptibility to fire blight and frost sensitivity, consider these PNW-friendly alternatives:
- Callery Pear (Pyrus calleryana): More disease-resistant and equally hardy.
- Serviceberry (Amelanchier): Native, drought-tolerant, and handles frost well.
- Hawthorn (Crataegus): Thrives in cold climates and supports wildlife.
My Bradford pear sapling’s leaves are blackening—what’s wrong?
Blackened leaves could signal fire blight (a bacterial infection common in Bradford pears) or frost damage. If it’s fire blight, prune 6 inches below infected areas with sterilized tools and dispose of clippings. For frost damage, wait until new growth appears in spring—healthy buds will emerge, while dead branches stay brown. If in doubt, test a small branch: if it snaps cleanly, it’s dead; if it bends, it’s still alive!
Wrapping up and next steps
Planting a Bradford pear tree sapling in the Pacific Northwest is a rewarding choice—especially when you prioritize year-round pruning to boost frost resilience and long-term health. 🌲 By mastering the right techniques (from winter thinning to summer shaping), you’ll create a sturdy, beautiful tree that thrives despite the region’s chilly climate.
Now that you’re armed with the know-how, roll up your sleeves and give your sapling the care it deserves—your future tree (and neighborhood!) will thank you.
Next step: Mark your calendar for your first pruning session—spring is the perfect time to start! 📅