
Lawn
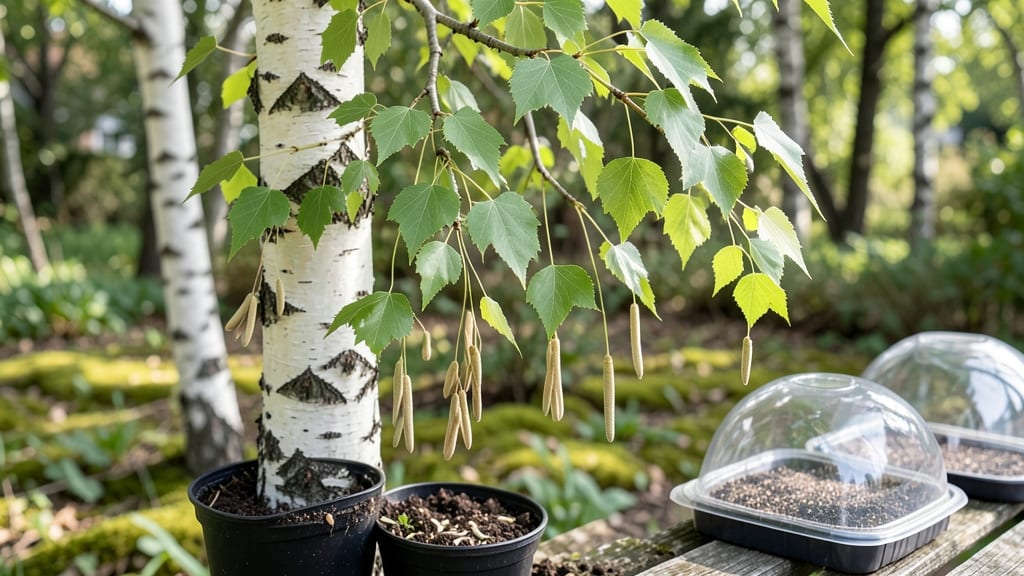
Growing birch trees from seed unlocks a cold-hardy sapling that thrives where store-bought seedlings struggle. 🌱 The secret lies in mimicking nature's slow germination process—no fancy equipment needed, just patience and a little science.
My first batch of paper birch seedlings emerged after three months of cold stratification, proving this method works even for beginners.
The process starts with fresh seeds collected in fall, stored in damp sand, and kept cold for 8-12 weeks. You'll need basic supplies: a plastic bag, sand, and a freezer or cold basement.
Once seeds sprout, they'll need bright light and consistent moisture—think of them as tiny, delicate forest guardians waiting to grow.
By spring, you'll have 3-6 inch seedlings ready for transplanting, their delicate leaves already hinting at the graceful canopy they'll become. The payoff? Trees that survive harsh winters, attract wildlife, and add that signature birch beauty to your landscape for decades.
Works best in USDA zones 2-6, but adaptable with extra cold treatment for warmer climates. The key is timing—start seeds in fall or winter, and you'll have sturdy saplings by planting season. Ready to grow your own forest starter?
📚 In This Guide
- What you need
- Instructions
- Tips and common mistakes
- Wrapping up and next steps
What you need
- ● Birch tree seeds: 10–20 seeds (fresh or stored properly—see pro tips below).
- ● Seed-starting mix: 1–2 gallons of sterile, well-draining potting soil (look for a blend labeled for seedlings).
- ● Containers: 4–6 small pots (3–4 inches deep) or a seed tray with individual cells. Option: Repurpose yogurt cups or egg cartons if sterilized.
- ● Spray bottle: For gentle watering (avoid over-saturating seeds!).
- ● Plastic wrap or humidity dome: To maintain moisture during germination.
- ○ Grow lights or sunny windowsill: A south-facing window or a 12–16 hour LED grow light (optional but helpful for weak light conditions).
- ○ Thermometer (optional but useful): To monitor soil temps (ideal: 60–70°F / 15–21°C for germination).
- ● Seed stratification: If seeds aren’t fresh, soak them in water for 24 hours or cold-stratify (place in a damp paper towel in the fridge for 4–6 weeks) to mimic winter conditions. 🌡️
- ● Labeling: Use toothpicks + masking tape to mark pots—birch seedlings look similar to other trees at first! ✨
- ● Fertilizer: Skip it for the first 4–6 weeks; birch seeds are sensitive to nutrients too soon.
- ● Direct sunlight before germination (use shade cloth if temps rise above 80°F / 27°C).
- ● Overwatering—birch seeds rot easily in soggy soil.
- ● Transplanting too soon—wait until seedlings have 2–3 true leaves (not just the initial seed leaves).
Step-by-Step instructions for germinating birch tree seeds
Here's how I transform tiny birch seeds into sturdy saplings ready for transplanting.
🌱 Step 1: Stratify Seeds for Germination
Birch seeds require cold stratification to break dormancy—mimic winter's chill. Place the seeds in a sealed container with a damp paper towel (not dripping wet). Store them in your refrigerator's crisper drawer for 8-12 weeks. Check weekly and mist with water if the towel dries out.
This cold period tricks the seed into thinking winter has passed. Without it, seeds may sit dormant for years. I label the container with the date—8 weeks minimum is non-negotiable for reliable germination. If your fridge runs cooler (around 35°F), extend to 12 weeks—birch seeds are picky about timing.
💧 Step 2: Prepare Containers and Planting Medium
Fill 4-inch deep containers with a mix of 50% peat moss and 50% perlite—this lightweight blend prevents rot while allowing roots to breathe. Moisten the mix until it holds together when squeezed but doesn't clump. I use biodegradable pots to avoid root disturbance later.
Birch seeds are tiny, so I scatter them ¼ inch deep across the surface. Press lightly but don't bury them—too much depth delays germination. For 4 saplings, I sow about 20 seeds per container—germination rates are low, and not all will sprout. Label each pot with the date and variety if using named seeds.
☀️ Step 3: Provide Warmth and Light for Sprouting
Move containers to a warm spot (65-75°F)—a seedling heat mat set to 70°F speeds germination significantly. Place them under grow lights for 12-14 hours daily, keeping lights 3-4 inches above the soil. Birch seedlings need consistent warmth to break dormancy and light to prevent leggy growth.
Keep the soil evenly moist—not soggy, not dry. I use a spray bottle to mist daily, checking moisture by pressing a finger into the soil. First true leaves should appear in 4-8 weeks. If you see mold, reduce watering—birch seeds rot faster than they sprout. Patience here pays off; rushed germination leads to weak seedlings.
🌿 Step 4: Transplant and Harden Off Saplings
Once seedlings have 3-4 leaves (usually 10-12 weeks after sowing), transplant them into individual 6-inch pots with the same peat-perlite mix. Handle gently—birch roots are delicate. Water thoroughly after transplanting to settle the soil around the roots.
Begin hardening off 2 weeks before outdoor planting. Place saplings outside in partial shade for 1-2 hours daily, gradually increasing time. Watch for wilting or yellowing—signs they're not ready. Birch trees thrive in full sun, but young saplings need time to adjust. After 10-14 days of full outdoor exposure, they're ready for the ground.
Tips & tricks for perfect birch tree seed germination
Birch seeds are stubborn little things—here's how to give them the best shot at life without losing your patience.
Cold Stratification Precision: The 8-12 week refrigeration period in Step 1 is non-negotiable, but fridge temperatures vary wildly. If your crisper drawer runs cooler than 35°F, extend to 12 weeks—birch seeds need consistent cold, not extreme cold. I mark my calendar with the start date and set a reminder to check moisture weekly. Too much moisture causes rot; too little prevents germination. The damp paper towel should feel like a wrung-out sponge—squeeze it gently to test.
Medium Mix Mastery: That 50/50 peat moss and perlite blend in Step 2 is your secret weapon against root rot. Peat moss holds moisture while perlite provides aeration—together they create the perfect balance. When mixing, think "fluffy cloud" rather than compacted soil. Press the mix lightly into your biodegradable pots, leaving just enough room at the top for watering without overflow. Pro tip: Add a thin layer of perlite on top after sowing to reduce moisture loss during the warm-up phase.
Lighting Strategy: The 12-14 hours of grow light in Step 3 isn't just about duration—it's about distance. Keep those lights 3-4 inches above the soil, and adjust as seedlings grow. I use a simple ruler to measure and mark the height on my pots. Too close, and you'll scorch tender leaves; too far, and seedlings stretch toward the light like they're reaching for heaven. Rotate containers daily to ensure even growth—birch seedlings grow toward the light source, creating lopsided plants if left stationary.
Pro Tips for Birch Tree Seed
- Birch seeds are stubborn little things—here's how to give them the best shot at life without losing your patience.
- Cold Stratification Precision: The 8-12 week refrigeration period in Step 1 is non-negotiable, but fridge temperatures vary wildly.
- Medium Mix Mastery: That 50/50 peat moss and perlite blend in Step 2 is your secret weapon against root rot.
Frequently asked questions
Got questions about growing birch tree seeds? You’re not alone! Here are answers to the most common concerns—from timing to troubleshooting—so you can grow cold-hardy saplings with confidence.
How long does it take for birch tree seeds to germinate?
Birch seeds typically germinate in 4–8 weeks under ideal conditions (moist, cool soil, and indirect light). Some varieties, like paper birch, may take longer—patience is key! Keep the soil consistently damp and avoid direct sunlight until sprouts appear.
When is the best time to plant birch tree seeds outdoors?
For fastest results, sow seeds in early spring or late fall (after the first frost). Birch seeds thrive in cold stratification, so planting in autumn lets nature handle the chilling process. If starting indoors, sow 6–8 weeks before the last frost for transplant-ready seedlings.
Can I grow birch trees from store-bought birch syrup or sap?
No—birch syrup and sap come from the tree’s bark or sapwood, not seeds. For growing trees, you’ll need genuine seeds (often found in seed packets or harvested from female catkins). If you’re set on birch syrup, enjoy it as-is, but skip the gardening shortcut!
Why aren’t my birch seeds sprouting? Troubleshooting tips.
Common issues include:
- Dry soil: Birch seeds need constant moisture—mist daily or use a humidity dome.
- Poor stratification: If seeds aren’t chilled (or planted in winter), they may stay dormant. Try a refrigerator trick (wrap seeds in damp paper towels for 4–6 weeks).
- Low light: Seedlings need bright, indirect light (a sunny windowsill or grow light works).
- Old seeds: Birch seeds lose viability quickly—use fresh seeds (<1 year old) for best results.
What’s the fastest way to grow a birch tree from seed?
For 3-month saplings (as in this guide), combine these steps:
- Start seeds indoors in early spring (use a heating mat for warmth).
- Transplant to outdoor pots or beds after frost (harden off seedlings first!).
- Use well-draining soil with compost—birches hate soggy roots.
- Thin seedlings to 6–12 inches apart once true leaves appear.
Wrapping up and next steps
Growing birch tree seeds into cold-hardy saplings in just three months is a rewarding challenge that connects you to nature’s resilience! 🌱 With the right preparation—whether you’re using fresh seeds, a warm stratification trick, or a simple indoor setup—you’ve got everything you need to nurture these delicate sprouts. Don’t let a few setbacks discourage you: even the toughest gardeners face hiccups, but persistence pays off with stunning, fast-growing birch trees.
Ready to plant your first seed? Start by gathering your supplies, then dive in—your future shade tree (or forest!) is waiting. Review the checklist one last time, then take that first step toward greener skies. Happy growing! 🌿