
Pruning
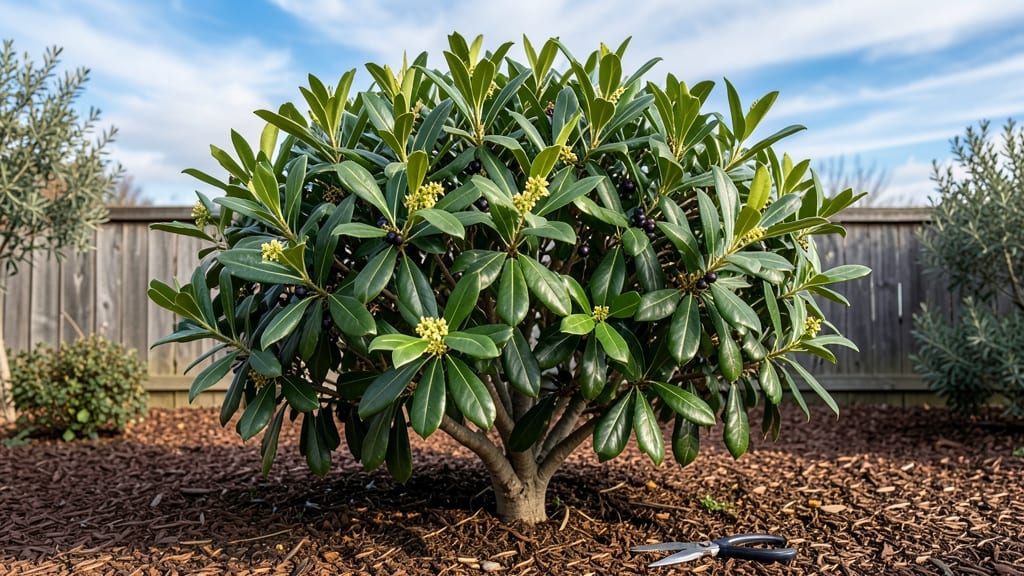
Bay tree care starts with one simple truth: pruning it right keeps it thriving for decades. 🌿 I’ve had mine since 2015, and the secret isn’t complicated—it’s about timing, sharp tools, and knowing where to cut.
Most people overlook the seasonal shifts that make all the difference between a scraggly bush and a lush, fragrant evergreen.
Your bay tree needs full sun to partial shade, well-draining soil, and consistent moisture without soggy roots. Indoor trees crave bright light near a window, while outdoor ones handle cooler nights better once established.
The real game-changer? Pruning in late winter or early spring—just as new growth begins—when the tree’s energy shifts from survival to expansion.
You’ll end up with a tree that stays compact, produces more aromatic leaves, and resists pests better. The key is cutting back by about a third each year, always just above a leaf node, and avoiding heavy pruning in fall.
That’s when the tree struggles to heal before winter sets in.
Whether you’re shaping a potted tree for your kitchen or a yard specimen, the same principles apply. The difference between a struggling bay and a showstopper often comes down to these small adjustments—ones that pay off in years of lush, fragrant foliage.
📚 In This Guide
- What you need
- Instructions
- Tips and common mistakes
- Wrapping up and next steps
What you need
- ● Pruning shears: Bypass pruners (sharp, clean, and sterilized with rubbing alcohol) to make precise cuts without damaging branches.
- ○ Gloves: Heavy-duty gardening gloves (optional but recommended to protect from thorns and sap).
- ● Disinfectant: 70% isopropyl alcohol or a pruning sealant to prevent disease spread between cuts.
- ● Bucket or bag: For collecting pruned branches (a 5-gallon bucket or mesh bag works great!).
- ● Watering can or hose: With a gentle spray nozzle for post-pruning hydration.
- ● Fertilizer: Balanced organic fertilizer (10-10-10 or compost) to replenish nutrients after pruning.
- ● Loppers: For thicker branches (1.5" diameter or larger).
- ● Hand saw: If your bay tree has very thick growth (rare but possible!).
- ● Mulch: Organic mulch (e.g., shredded bark) to retain moisture and regulate soil temperature.
- ● Plant food: Slow-release granules for a nutrient boost (especially after heavy pruning).
- ● Notebook or app: To log pruning dates, weather conditions, and growth observations.
Step-by-step guide to pruning bay trees for year-round health
Here’s how I keep my bay trees thriving—no matter the season.
✂️ Step 1: Identify the Right Time for Pruning
Bay trees respond best to pruning after their growth flushes, which typically happens in early spring (March–April) or late summer (August–September). Avoid heavy pruning in winter, as the plant’s energy is focused on survival rather than regrowth. Look for new growth at the tips of branches—this is your cue that the tree is ready for shaping.
If you’re pruning for harvest, focus on the outer branches where the largest, most flavorful leaves grow. These leaves are also the most vulnerable to damage, so pruning them back encourages new, vigorous growth. I like to prune after harvesting leaves, as the tree will redirect energy into replacing what was taken.
✂️ Step 2: Use the Right Tools and Technique
Sharp, clean pruning shears are a must—dull blades crush stems and invite disease. Sterilize your tools with rubbing alcohol between cuts to prevent spreading pathogens. For larger branches, use bypass pruners or a small handsaw, making cuts just above a leaf node (the bump where leaves attach) at a 45-degree angle. This encourages upward growth and prevents water from pooling.
Never leave stubs—cut flush with the branch to avoid rot or pest entry. If you’re shaping the tree, step back and visualize the final form. Bay trees tolerate hard pruning, but I avoid removing more than one-third of the foliage in a single session. This keeps the tree strong and prevents shock.
✂️ Step 3: Shape for Airflow and Light Penetration
Bay trees grow dense, so prune to create an open center—this improves airflow and reduces humidity, which can lead to fungal issues. Focus on removing crossing branches, dead wood, and inward-growing shoots. These are the first culprits for disease and weak growth. I also thin out crowded areas to let light reach the inner branches, which encourages even growth.
For a bushier tree, cut back the tips of the strongest branches by about one-third. This triggers branching at the nodes below, giving you a fuller shape. Avoid "lion’s tailing" (cutting all the way back to a bare stem)—this can leave the tree vulnerable and slow to recover.
💧 Step 4: Post-Pruning Care for Recovery
After pruning, water deeply to help the tree recover. Bay trees are drought-tolerant once established, but fresh cuts need moisture to heal properly. I water at the base of the plant, avoiding the foliage to prevent fungal spores from splashing onto wounds. Mulch lightly with 2–3 inches of organic mulch (like shredded bark) to retain moisture and regulate soil temperature.
Fertilize lightly with a balanced, slow-release fertilizer (like 10-10-10) in early spring to support new growth. Avoid heavy feeding right after pruning—this can stress the tree as it adjusts. Instead, wait until you see new shoots emerging, usually within 4–6 weeks. At this point, you can apply a second, smaller dose of fertilizer to encourage robust regrowth.
⏰ Step 5: Monitor and Adjust Year-Round
Bay trees grow slowly, so pruning once or twice a year is usually enough. However, keep an eye out for sparse areas, dead branches, or signs of disease (like yellowing leaves or black spots). These are your signals to prune again. I check my trees every 2–3 months—especially after harvests—to ensure they’re staying healthy and shaped the way I want.
In winter, avoid heavy pruning, but you can remove any dead or damaged branches as they appear. Bay trees are evergreen, so they don’t go dormant, but their growth slows in cooler months. This is the perfect time to plan your next pruning session—sketch out your desired shape and note which branches need attention.
Tips & tricks for perfect bay tree pruning
Real talk: Pruning bay trees seems intimidating, but these tricks will help you avoid common mistakes and keep your plant thriving.
Timing is Everything: The instructions mention pruning in early spring or late summer, but here's what nobody tells you—morning sessions work best. The cooler temperatures reduce stress on the tree, and dew-free branches make it easier to see exactly where you're cutting. If you must prune in summer, do it on a cloudy day to prevent sunburn on fresh cuts.
Tool Sharpness Matters: I learned this the hard way after ruining three branches with dull shears. Always test your tools on a scrap piece of wood first—if they don't slice cleanly, sharpen them. For larger branches, I keep a small handsaw nearby, but I've found that bypass pruners work perfectly for 90% of bay tree pruning needs. Just remember to sterilize between cuts to prevent spreading any potential diseases.
Visualize Before You Cut: Step back and look at your tree from all angles before making any cuts. I sketch a rough outline of my desired shape on paper first—this helps me see the big picture. Pay special attention to the center of the tree; you want to create an open vase shape that allows light and air to circulate. The goal is to remove no more than one-third of the foliage in any single session, so plan accordingly.
Post-Pruning Recovery: After you've finished pruning, don't just walk away! Water deeply right after pruning to help the tree recover. I've found that adding a layer of organic mulch (about 2-3 inches) helps retain moisture and regulates soil temperature. This is especially important if you're pruning in hot weather—your tree will thank you for the extra care during its recovery period.
Pro Tips for Bay Tree Care
- Real talk: Pruning bay trees seems intimidating, but these tricks will help you avoid common mistakes and keep your plant thriving.
- Timing is Everything: The instructions mention pruning in early spring or late summer, but here's what nobody tells you—morning sessions work best.
- Tool Sharpness Matters: I learned this the hard way after ruining three branches with dull shears.
Frequently asked questions
Got questions about keeping your bay tree thriving? Here are some of the most common concerns—and expert answers to help you grow a lush, healthy plant year-round.
How often should I prune my bay tree?
Prune your bay tree twice a year: once in late winter (before new growth starts) and again after flowering in early summer. Light trimming between prunings can encourage bushier growth. Avoid heavy pruning in fall—it stresses the plant before winter dormancy.
Can I prune my bay tree at any time of year?
While bay trees are resilient, avoid pruning in late fall or winter (Dec–Feb) unless absolutely necessary. This is when the plant is dormant, and cuts may not heal properly. If you must trim in winter, do so sparingly and use clean, sharp tools to minimize damage.
What should I do if my bay tree looks leggy or sparse?
Leggy growth usually means your bay tree needs more light or pruning. Move it to a sunnier spot (6+ hours of light daily) and prune back overgrown branches by 1/3 to encourage new, bushier growth. Pinch back tips in spring to promote branching.
Why are my bay tree leaves turning yellow or brown?
Yellowing leaves often signal overwatering or poor drainage, while brown edges can mean underwatering or low humidity. Check soil moisture (top inch should be dry) and adjust watering. Mist leaves occasionally or place a tray of water nearby to boost humidity.
Can I grow a bay tree indoors year-round?
Yes! Bay trees thrive indoors with bright, indirect light (south- or west-facing windows are ideal). Rotate the pot monthly for even growth, and prune regularly to control size. In winter, reduce watering slightly—overwatering is a common indoor killer.
How do I propagate bay tree cuttings?
Take 4–6 inch cuttings from healthy, non-flowering stems in spring or summer. Dip the cut end in rooting hormone, plant in moist potting mix, and cover with a plastic bag to retain humidity. Keep in bright, indirect light until roots form (4–8 weeks).
Wrapping up and next steps
Caring for your bay tree is all about timing, technique, and a little patience—and you’ve got the know-how now! 🌿 Whether you’re shaping it for aesthetics, encouraging healthy growth, or harvesting fragrant leaves, consistent pruning keeps your tree thriving year-round.
With the right tools, seasonal adjustments, and a watchful eye, your bay tree will reward you with lush foliage and that signature aromatic charm.
Ready to put your new skills to work? Start small: pick a sunny day, grab your pruners, and give your bay tree the love it deserves. Happy pruning—and enjoy the rewards of your green thumb! 🌱✨