Pruning
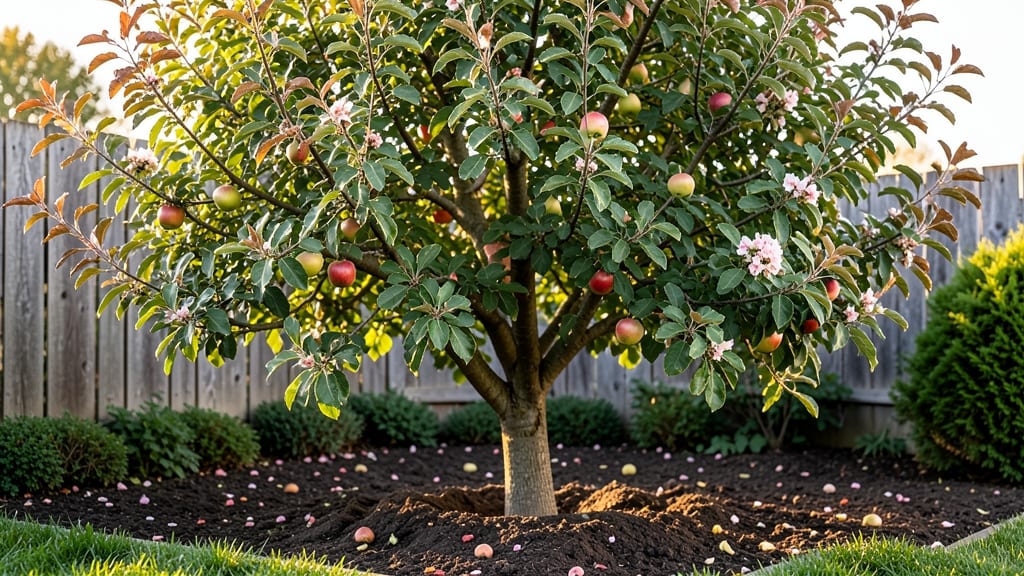
Three strategic cuts now mean apples so plentiful your neighbors will ask for seconds. 🌱 Apple tree maintenance isn’t about complicated schedules—it’s about understanding when to shape, thin, and protect your tree throughout the year.
My first apple tree nearly died because I pruned at the wrong time, but I learned the simple rules that keep trees healthy and productive for decades.
The secret lies in three key cuts: dormant-season shaping to open the canopy, summer thinning to improve fruit size, and winter cleanup to remove dead wood. You’ll need basic tools—a pruning saw for thick branches, loppers for medium ones, and sharp bypass pruners for precision cuts.
Most mistakes come from cutting too late in the season or leaving too many branches, but these three cuts simplify everything.
By summer’s end, you’ll harvest apples that are larger, sweeter, and easier to pick—no more wrestling with overloaded branches. The tree stays strong, resists disease better, and produces consistently for years. Plus, the open shape means sunlight reaches every fruit, so none stay small or misshapen.
Works for young trees, mature orchards, or even that one apple tree in your backyard. The same principles apply whether you’re growing Honeycrisp or Granny Smith. Let’s get those branches trimmed right—your future harvest depends on it.
📚 In This Guide
- What you need
- Instructions
- Tips and common mistakes
- Wrapping up and next steps
What you need
- ● Pruning shears: Bypass pruners (sharp, 6–8" blades) for small branches.
- ● Loppers: 18–24" bypass loppers for medium branches (2–4" diameter).
- ● Pruning saw: 12–14" curved-tooth saw for thick branches (4"+ diameter).
- ● Disinfectant: 70% isopropyl alcohol or 10% bleach solution (1 part bleach to 9 parts water) to sterilize tools between cuts.
- ● Gloves: Heavy-duty work gloves (cut-resistant for safety).
- ● Ladder: Sturdy, extendable ladder (20–30 ft, if needed) with non-slip feet.
- ● Tarp or drop cloth: 10x12 ft to collect debris.
- ○ Pruning sealant: Optional but helpful for large cuts (e.g., Tanglefoot Tree Wound Pruning Seal).
- ● Fertilizer: Balanced 10-10-10 or organic options like composted manure (apply in early spring).
- ● Mulch: 2–4" layer of wood chips or straw (keep 6" away from trunk).
- ● Pest control: Horticultural oil, neem oil, or insecticidal soap (for aphids/mites).
- ● Tree ties: ¼" wide, stretchy fabric ties (for supporting young branches).
- ● Watering system: Drip irrigation or hose with a spray nozzle (1–2 gallons per tree, 2–3x/week in dry spells).
Step-by-Step guide to pruning for year-round apple tree health
Here’s how I keep my apple trees thriving through every season—no guesswork, just proven cuts.
✂️ Step 1: Winter Dormancy Pruning (Late February)
This is the most critical cut of the year. When the tree is fully dormant but buds are swelling (around late February), remove dead, diseased, or crossing branches first. Use clean, sharp pruners to make cuts just outside the branch collar—the swollen area where the branch meets the trunk. This prevents unsightly stubs and promotes faster healing.
Next, open the tree’s center by removing upward-growing branches that crowd the interior. Light should penetrate to the inner third of the canopy—this prevents fungal diseases and improves fruit production. I aim for an open vase shape, with branches spaced 8-12 inches apart along the main scaffold. If a branch is too large to cut cleanly, make a 3-cut notch to avoid tearing the bark.
Here’s the thing—never remove more than 25% of the tree’s canopy in one session. You’ll see vigorous new growth in spring, but over-pruning stresses the tree and reduces next year’s harvest. After cutting, sanitize your tools with 70% rubbing alcohol to prevent spreading disease between branches.
✂️ Step 2: Summer Thinning Cut (June-July)
This isn’t about removing branches—it’s about selective thinning of fruit. When apples are pea-sized (around June), remove excess fruit clusters to leave 6-8 inches between remaining apples. Thin to 1 apple per spur (the small side shoots) to ensure each fruit gets proper nutrients and sunlight. Use sharp pruning shears to snip the stem just above a leaf or bud.
Why wait until summer? Early thinning encourages larger, higher-quality fruit, and it reduces the risk of apple scab by improving airflow. I focus on overcrowded branches first—these are the spots where disease spreads fastest. You’ll notice the remaining apples plump up noticeably within 2-3 weeks of thinning. If you’re unsure which fruit to keep, prioritize apples on outward-facing spurs—they’ll ripen first and get the most sun.
Real talk: This step takes patience. I often spend 20-30 minutes per tree, but it’s worth it for bigger, sweeter apples come harvest. Avoid thinning when rain is forecast—wet conditions can spread fungal spores through open wounds.
✂️ Step 3: Post-Harvest Light Pruning (October-November)
After harvest, inspect the tree for watersprouts—those fast-growing, vertical shoots with no fruit potential. These compete with productive branches for energy, so cut them back to the nearest lateral branch (a side branch growing outward). Use hand pruners for shoots under ½ inch thick and loppers for thicker growth. Make cuts at a 45-degree angle, sloping away from the branch collar.
Next, remove any suckers (shoots growing from the base of the tree) and rubber branches (thin, flexible growth with no fruit). These drain energy that could go toward next year’s bloom. I also shorten last year’s fruiting spurs by about ⅓—this encourages new fruiting wood to form for next season. For example, if a spur grew 8 inches this year, cut it back to 5-6 inches.
This final cut signals the tree to shift energy into root growth over winter. It’s a lighter session than winter pruning, but it sets the stage for stronger blooms in spring. After finishing, rake up and dispose of all pruned material—don’t leave it under the tree, as it can harbor pests and diseases.
⏰ Step 4: Seasonal Check-Ins (Year-Round)
Pruning isn’t just about the big cuts—monthly inspections keep your tree healthy. In spring, watch for new suckers and remove them immediately. In early summer, check for pest damage (like sawfly larvae) and treat with neem oil if needed. In fall, apply a 2-inch layer of mulch (but keep it 6 inches away from the trunk) to retain moisture and regulate soil temperature.
Here’s what I watch for year-round: epinasty (downward leaf curling, often from overwatering), yellowing leaves (could mean nutrient deficiency or fungal issues), and cankers (sunken, dead areas on branches). If you spot a canker, sterilize your tools and make a clean cut 6 inches below the affected area to remove it entirely. Cankers won’t heal on their own—they’ll just spread.
You’ll see the difference in next year’s harvest—fewer culls, better-sized fruit, and a tree that looks open and vigorous. The key is consistency. Even 10 minutes a month prevents major issues down the road.
Tips & tricks for perfect apple tree maintenance
Here's what I've learned after years of trial and error with my own orchard—these details make all the difference in keeping your apple trees thriving.
Timing is Everything: The late February window for winter pruning is critical because it's when trees are fully dormant but buds are just beginning to swell. If you prune too early, you risk exposing fresh cuts to harsh winter winds. If you wait too late, you'll encourage new growth that can't survive spring frosts. I mark my calendar and set a reminder for the first week of February each year—this ensures I'm ready to act as soon as conditions are right. The 20-30 minutes per tree you'll spend during summer thinning might seem like a lot, but this is when you're directly influencing next year's fruit quality.
Tool Sanitation Strategy: Between each cut, especially when removing diseased branches in Step 1, I wipe my pruners with 70% rubbing alcohol. This isn't just about preventing disease spread—it's about protecting your entire orchard. I keep a small spray bottle of the alcohol in my pruning kit and apply it after every 3-4 cuts. For larger operations, consider using a dedicated sanitizing station with a brush and soapy water between trees. The key is consistency: never skip this step, even when you're in a hurry.
Visual Pruning Cues: When thinning fruit in Step 2, look for apples that are noticeably larger than their neighbors—these are the ones competing for resources. I also check for fruit positioned too close to the trunk or hidden in dense clusters, as these will struggle to ripen properly. The 6-8 inch spacing guideline might seem arbitrary, but it's based on how much sunlight each apple needs for proper coloring and sugar development. You'll know you're doing it right when you see the remaining apples visibly plump up within 2-3 weeks, as mentioned in the instructions.
Seasonal Maintenance Calendar: Create a simple checklist for your monthly inspections mentioned in Step 4. I use a small whiteboard by my tool shed with columns for each season. In spring, I mark "check for suckers" and "apply neem oil if needed." Summer gets "thin fruit clusters" and "watch for pest damage." Fall reminds me to "mulch properly" and "remove all pruned material." This visual system helps me stay consistent with the 10 minutes of monthly maintenance that prevents major issues down the road.
Pro Tips for Apple Tree Maintenance
- Here's what I've learned after years of trial and error with my own orchard—these details make all the difference in keeping your apple trees thriving.
- Timing is Everything: The late February window for winter pruning is critical because it's when trees are fully dormant but buds are just beginning to swell.
- Tool Sanitation Strategy: Between each cut, especially when removing diseased branches in Step 1, I wipe my pruners with 70% rubbing alcohol.
Frequently asked questions
Got questions about keeping your apple tree thriving?
Here are answers to the most common concerns—from pruning timing to pest troubleshooting—so you can maintain a healthy tree all year long.
When is the best time to prune an apple tree?
The ideal time depends on your goal: dormant season (late winter/early spring) is best for shaping and disease prevention. Summer pruning (after harvest) controls growth and improves airflow. Avoid pruning in fall—it invites pests and diseases. Pro tip: If you must prune in summer, do it early to avoid stressing the tree.
How do I know if my apple tree has pests or diseases?
Watch for chewed leaves, sticky sap (aphids), or fungal spots on branches. Common culprits include apple maggots, codling moths, and powdery mildew. Act fast: Remove infested branches, use organic sprays (neem oil), or consult a local extension service for severe cases. Early detection saves your harvest!
Should I prune apple trees in winter?
Yes, but only when the tree is dormant (before buds swell, typically January–February in most climates). Winter pruning reduces disease risk and makes cuts heal faster. Skip it if: Your area gets heavy snow—wait until late winter.
Can I prune an apple tree too much?
Over-pruning stresses the tree, weakens growth, and reduces fruit production. Rule of thumb: Never remove more than 25% of the canopy in one season. Focus on open-center shaping and thinning crowded branches.
How do I encourage more fruit on my apple tree?
Balance is key! Thin out dense branches to improve sunlight exposure, and prune water sprouts (vertical shoots). Fertilize lightly in early spring with balanced 10-10-10 or compost. Bonus: Cross-pollinate with another variety if your tree isn’t bearing well.
Wrapping up and next steps
Mastering apple tree maintenance is all about timing, technique, and a little patience—just like nurturing any beloved plant! 🌳 By focusing on three strategic cuts (dormant, summer, and post-harvest pruning), you’ll keep your tree thriving, productive, and resilient for years.
Remember, every snip is an investment in future harvests, so don’t hesitate to roll up your sleeves and get hands-on.
Ready to take the next step? Start small: inspect your tree now and note any overgrown branches or signs of disease. Then, grab your pruners and review the tools you’ll need—your apple tree’s (and your) future self will thank you! 🍏✨