Pruning
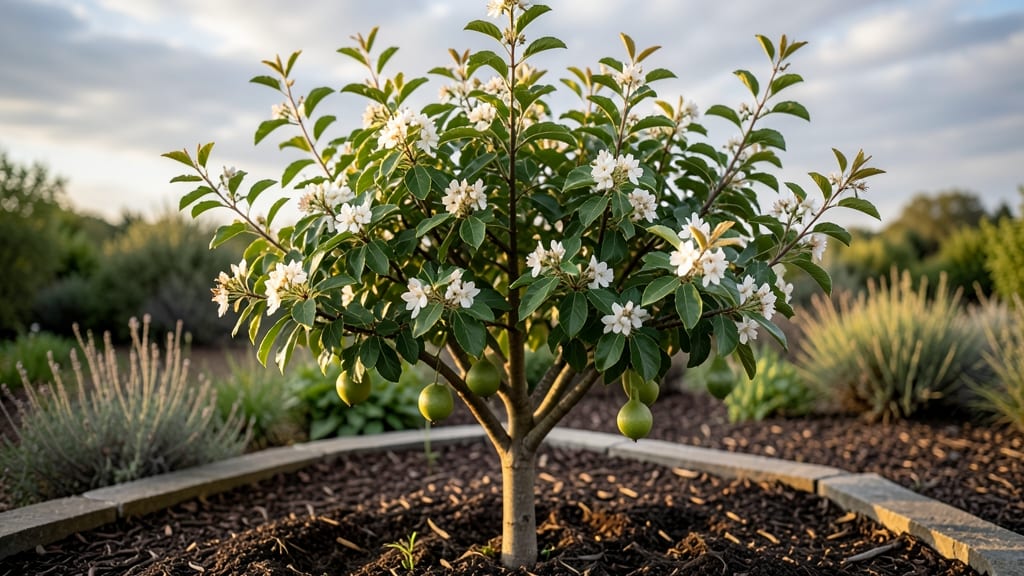
Growing a small pear tree that fits your backyard and keeps producing fruit year after year starts with the right pruning approach. 🌱 I learned the hard way that letting these trees grow wild leads to crowded branches, fewer fruits, and harder-to-reach harvests—until I discovered how to shape them into manageable, productive canopies.
The key is pruning in late winter or early spring when the tree is still dormant but about to wake up. You’ll need sharp pruning shears, a ladder (for taller varieties), and a clear plan to open the center of the tree while keeping the outer branches strong.
Most small pear trees thrive with 6-8 main scaffold branches, spaced evenly around the trunk, which makes harvesting a breeze even from a chair.
With consistent pruning, you’ll end up with a tree that’s easier to care for, produces more fruit, and stays compact enough for small spaces. The first year is all about establishing that framework—subsequent years just mean light maintenance to keep the shape and encourage new growth.
Imagine reaching out your hand to pluck ripe pears without climbing a ladder!
This method works for dwarf varieties like ‘Hooded’ or ‘Moonglow’ just as well as semi-dwarf types, and it’s beginner-friendly once you get the hang of the basic cuts. The payoff? A tree that’s not only beautiful but also productive for decades. Let’s get those branches in shape!
📚 In This Guide
- What you need
- Instructions
- Tips and common mistakes
- Wrapping up and next steps
What you need
- ● Pruning shears: Sharp, bypass-style shears (for clean cuts on small branches). Size: 6–8 inches.
- ● Loppers: For thicker branches (up to 2 inches in diameter). Quantity: 1 pair.
- ○ Hand saw: Pruning saw with a fine-tooth blade (for stubborn, larger limbs). Optional: Replaceable blades.
- ● Disinfectant: 70% isopropyl alcohol or a pruning sealant (to prevent disease spread).
- ● Gloves: Heavy-duty, cut-resistant gardening gloves (protects from thorns and sap).
- ○ Pruning sealant: Optional but recommended for larger cuts (e.g., tree wound dressing or beeswax-based sealant).
- ● Ladder or step stool: Height: Adjustable or tall enough to reach the tree’s canopy safely.
- ● Trash bags: For collecting pruned branches and debris. Size: 13-gallon or larger.
- ● Notebook & pencil: To sketch a pruning plan or mark cuts.
- ● Extension pole pruners: For high branches without a ladder.
- ● Sharpener: A file or whetstone to keep shears/loppers razor-sharp.
- ● Tree ties or zip ties: To secure branches if needed post-pruning.
- ● Fungicide spray: Copper-based (prevents fungal infections in cuts).
- ● Camera: Snap photos of your pruning plan for reference later!
How to prune a compact pear tree for healthy, productive growth
Here’s my go-to method for keeping small pear trees lush and fruitful without overpowering your yard.
✂️ Step 1: Prune in Late Winter Before Bud Break
Wait until late winter—after the worst cold snaps but before buds swell—when the tree is still dormant. This timing prevents stressing the tree and reduces disease risk. I always prune on a dry, sunny day to let wounds dry faster and heal better.
Start by removing dead, diseased, or crossing branches first. These are easy to spot—they’re brown, brittle, or rubbing against other limbs. Cut them back to a healthy outward-facing bud or branch collar. Use clean, sharp pruners to make smooth cuts at a 45-degree angle just outside the branch collar.
Here’s the thing—if you’re unsure about a cut, err on the side of caution. Better to leave a branch than remove too much. You can always prune more later, but you can’t undo over-pruning.
☀️ Step 2: Thin the Canopy for Light and Airflow
Next, focus on thinning the canopy to let sunlight reach the center of the tree. Remove suckers (vigorous shoots growing from the base or trunk) and water sprouts (fast-growing vertical shoots). These steal energy from fruit production.
Look for branches that are too close together—aim to space them 8-12 inches apart on the main scaffold. This prevents congestion and reduces pest/disease pressure. If a branch is growing inward, cut it back to a lateral bud or remove it entirely if it’s weak.
I like to step back every few cuts to visualize the tree’s shape. The goal is an open, vase-like structure that lets light filter through. Pears need good airflow to ripen fruit evenly and avoid fungal issues.
✂️ Step 3: Shape for Compact Growth and Fruit Production
Now, refine the tree’s shape by heading back (shortening) some of the remaining branches. Cut just above a bud that faces outward to encourage new growth in the right direction. For a small pear tree, keep the height manageable—6-8 feet tall—so it stays easy to harvest.
Pay special attention to fruit-bearing branches. These are often thicker and have a more horizontal growth habit. Prune lightly here—just enough to open the center and improve fruit exposure to sunlight. Over-pruning can reduce next year’s crop.
Real talk: If you see multiple shoots growing from the same spot, thin them to the strongest one. Weak, competing growth leads to small, poor-quality fruit. Use your fingers to gently bend branches—if they snap easily, they’re too weak and should be removed.
🌿 Step 4: Clean Up and Monitor for Recovery
After pruning, sterilize your tools with rubbing alcohol to prevent spreading disease. Collect and dispose of all clippings—don’t leave them under the tree, as they can harbor pests and fungi.
Water the tree deeply after pruning to help it recover. You’ll notice new growth buds swelling within 2-3 weeks—that’s your sign the tree is responding well. Keep an eye out for sap oozing from cuts; this is normal and will seal over in a few days.
Don’t overdo it in the first year. Small pear trees are resilient, but too much pruning stresses them. Stick to no more than 25% of the canopy in a single session. Over time, you’ll develop a feel for how much to remove while keeping the tree productive.
Tips & tricks for perfect compact pear tree pruning
Here's what nobody tells you about pruning pears—these tricks will keep your small tree thriving for years to come.
Timing is Everything: That late winter window is critical because it's when the tree is fully dormant but before sap starts flowing. If you prune too early, you risk exposing the tree to late frosts, and if you wait too long, you'll stress the tree by encouraging new growth before it's ready. I've seen trees that were pruned too late struggle with weak spring growth—don't make that mistake. Mark your calendar for the first dry, sunny day after the last hard frost in your area.
The 45-Degree Angle Secret: When making your cuts in Step 1, that 45-degree angle isn't just for looks—it's about proper healing. The angled cut prevents water from pooling in the wound, which can lead to rot. I like to visualize a small smile on the underside of the branch as I make the cut. This technique also helps the branch collar (that swollen area where the branch meets the trunk) do its job of protecting the tree from disease.
Branch Spacing Matters: The 8-12 inch spacing recommendation in Step 2 isn't arbitrary—it's based on how much space each branch needs to develop properly. Too close, and branches compete for sunlight and nutrients, leading to weak growth and poor fruit quality. I've learned this the hard way after seeing trees with branches growing so close they rubbed together, creating wounds that became entry points for disease. Take your time spacing branches evenly from the trunk outward.
Recovery Signs to Watch For: After pruning, keep an eye out for those new growth buds swelling within 2-3 weeks—that's your tree's way of saying "thank you" for the pruning. The sap oozing from cuts is completely normal and will seal over naturally. But if you notice yellowing leaves or wilting after pruning, you might have removed too much. Remember, the goal is to maintain that 25% canopy reduction guideline—any more than that, and you're risking stress on your tree.
Pro Tips for Small Pear Tree
- Here's what nobody tells you about pruning pears—these tricks will keep your small tree thriving for years to come.
- Timing is Everything: That late winter window is critical because it's when the tree is fully dormant but before sap ...
- The 45-Degree Angle Secret: When making your cuts in Step 1, that 45-degree angle isn't just for looks—it's about pro...
Frequently asked questions
Got questions about keeping your small pear tree healthy and productive? Here are some common ones—plus quick answers to help you prune like a pro!
How often should I prune a small pear tree?
Prune your small pear tree twice a year: once in late winter or early spring (before buds swell) to shape the tree and remove dead wood, and again after harvest (summer) to encourage new growth. Light trimming between seasons keeps it tidy!
Can I prune a pear tree in fall?
Pruning in fall is risky—it can stimulate new growth that won’t harden off before winter, making your tree vulnerable to frost damage. If you must prune, do so lightly in early fall (just remove dead/diseased branches) and avoid heavy cuts. Spring is always safer!
What’s the best way to keep a pear tree small?
Use open-center or espalier training to control size. Prune to 3-5 main scaffold branches, removing competing shoots and suckers. For dwarf varieties, annual hard pruning (cutting back by 1/3) keeps it compact. Mulch and fertilize lightly to support growth without encouraging sprawl.
Why are my pear tree’s leaves turning yellow?
Yellow leaves often signal overwatering, nutrient deficiency, or pests. Check soil moisture—pears hate soggy roots. Test for iron or nitrogen deficiency (common in alkaline soils) and amend with compost or chelated iron. Inspect for aphids or mites; treat with neem oil if needed.
Can I grow a pear tree in a container?
Yes! Choose a dwarf or columnar variety (like ‘Hooded’ or ‘Seckel’) and a 15-20 gallon pot with drainage. Use well-draining potting mix and repot every 2-3 years. Place in full sun and water deeply when the top inch of soil dries. Expect smaller fruit but abundant harvests!
Wrapping up and next steps
Growing a small pear tree with a compact canopy isn’t just about pruning—it’s about crafting a thriving, year-round fruit producer that fits your space perfectly! 🌱 With the right tools, techniques, and timing, you’ll enjoy bountiful harvests while keeping your tree healthy and manageable.
Whether you’re a beginner or a seasoned gardener, the key is patience and consistency.
Ready to take the next step? Start by scheduling your first pruning session this fall or early winter—then watch your tiny pear powerhouse flourish! 🍐💚 Grab your pruners and get growing!