Pruning
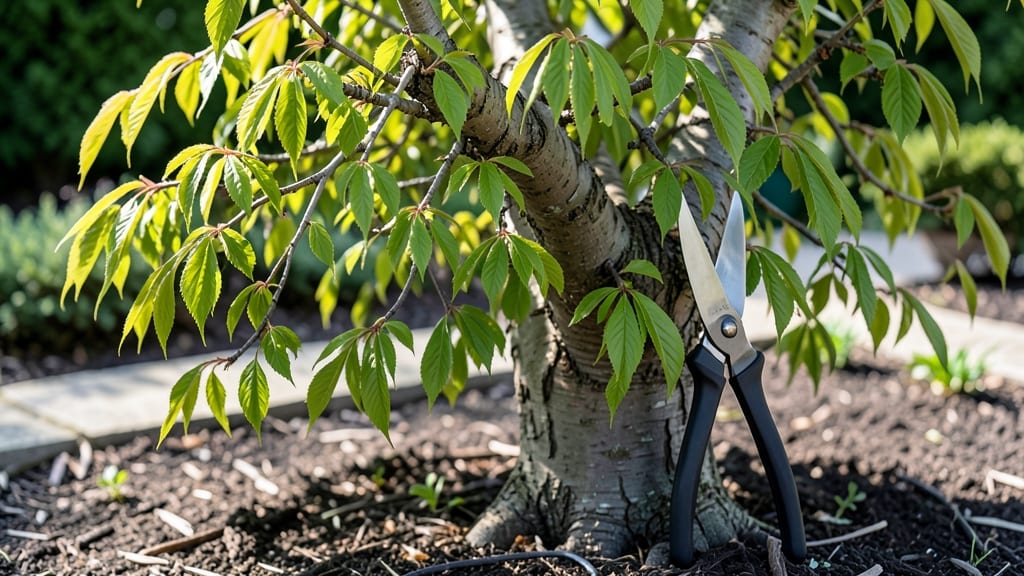
Trimming a weeping cherry tree isn’t just about shaping its graceful branches—it’s about keeping it healthy for decades to come. I’ve learned the hard way that skipping pruning turns those elegant cascades into a tangled mess, and the wrong cuts can even invite disease.
The key is three strategic moves: cleaning up dead wood, thinning crowded branches, and shaping the silhouette to maintain that classic weeping form.
You’ll need just a few tools: sharp bypass pruners for smaller branches, a pruning saw for thicker stems, and rubbing alcohol to sterilize cuts between trees. Timing matters too—late winter or early spring, when the tree is dormant but about to burst into new growth, is your best window.
And here’s the secret: always cut just outside the branch collar, where the branch meets the trunk, to heal cleanly and avoid unsightly stubs.
After you’re done, your tree will reward you with fresh, vibrant foliage and a shape that makes neighbors stop and stare. The branches will cascade beautifully, and you’ll avoid the heartbreak of silver leaf disease creeping in through sloppy cuts.
Just remember: less is more with weeping cherries—their natural elegance comes from their delicate structure, not aggressive pruning.
This method works year-round for maintenance, but those three key cuts in late winter set the stage for the most stunning display come spring. Whether your tree is young or mature, these steps will keep it thriving for seasons to come. Let’s get those pruners ready!
📚 In This Guide
- What you need
- Instructions
- Tips and common mistakes
- Wrapping up and next steps
What you need
- ● Pruning shears (bypass pruners) – Sharp, high-quality shears (8–10 inches) for small branches (up to ½ inch thick).
- ● Loppers – For medium branches (½–1½ inches thick). Look for bypass loppers with a 10–14-inch handle for leverage.
- ● Pruning saw – For thick branches (1½+ inches). A curved-tooth saw prevents tear-out and keeps cuts clean.
- ○ Extension pole pruners – Optional but helpful for high branches (10–15 feet reach).
- ● Rubbing alcohol (70% or higher) – 1 small bottle to sterilize tools between cuts and prevent disease spread.
- ○ Pruning sealant (optional but recommended) – For cuts larger than ½ inch to protect against pests and disease.
- ● Work gloves – Heavy-duty, cut-resistant gloves to protect your hands from thorns and sharp tools.
- ● Safety glasses – To shield your eyes from debris, especially when using a saw.
- ● Ladder or stump – Sturdy and tall enough to reach the highest branches safely. A 3-step ladder or extension ladder works best.
- ● Heavy-duty trash bags – For collecting pruned branches and debris.
- ● String or measuring tape – To mark cuts and maintain shape.
- ● Pole saw – For branches too high for a ladder.
- ● Tree pruning rope – To secure branches while cutting.
- ● Disposable pruning saw blade – For quick, one-time use on thick branches.
- ● Tree wound dressing (alternative to sealant) – Some gardeners swear by bee’s wax or horticultural putty for larger cuts.
Step-by-Step guide to trimming a weeping cherry tree
Here’s how I keep these graceful trees thriving—with sharp cuts and seasonal timing.
Assess the Tree’s Structure and Seasonal Needs
Start by examining your weeping cherry tree for dead, diseased, or crossing branches. Weeping cherries have a natural, cascading shape, so avoid over-pruning—you’re sculpting, not hacking. Look for branches rubbing against each other (they’ll create wounds) and any that grow upward (they disrupt the tree’s elegant form).
The best time to trim depends on the goal: late winter or early spring (just before buds swell) is ideal for shaping, while summer pruning can be done to control growth. Never prune in fall—it invites disease before dormancy. I always carry a small notebook to sketch problem areas before making cuts.
Remove Dead, Diseased, or Problematic Branches First
Use clean, sharp bypass pruners to cut out any dead wood (branches that snap easily or have no green underneath the bark). For diseased branches, sterilize your tools with rubbing alcohol between cuts to prevent spreading pathogens. Look for signs like oozing sap, fungal growth, or unusual leaf spots—these need immediate removal.
If a branch is too thick for pruners, use a handsaw, but make the cut just outside the branch collar (the swollen area where the branch meets the trunk). Avoid leaving stubs—these invite rot. For crossing branches, remove the weaker one (the smaller diameter or less vigorous branch) at its base. This keeps the tree’s energy flowing where it’s needed.
Shape the Tree for Balance and Airflow
Weeping cherries thrive when their branches spread evenly. Step back and visualize the tree’s natural form—you’re guiding growth, not forcing it. Start by thinning out the interior to improve airflow (this prevents fungal issues). Remove about 20% of the smallest branches first, cutting them back to a healthy bud or side branch.
For the outer branches, aim to maintain the tree’s graceful arc. Shorten overly long branches by one-third or less to avoid shocking the tree. Always cut just above an outward-facing bud (this encourages new growth in the right direction). Avoid cutting into the branch collar—it’s the tree’s natural healing point. If you’re unsure, make a small notch above the bud first to test the cut.
Clean Up and Monitor for Recovery
After pruning, rake up and dispose of all debris (especially diseased branches) to reduce pests and disease in your yard. Sterilize your tools again with rubbing alcohol or a bleach solution. Water the tree deeply at the base to help it recover, but avoid wetting the cuts—this can lead to rot.
Watch the tree over the next few weeks for signs of stress (yellowing leaves, oozing sap, or wilting). If you see any, it might be over-pruned—next time, take smaller cuts. Healthy growth should appear within 4-6 weeks, with new buds forming at the pruning sites. I like to mark the pruning date on my calendar to track progress and plan next year’s cuts.
Tips & tricks for perfect weeping cherry tree pruning
Real talk: Pruning a weeping cherry tree well is all about patience and precision—not brute force. Here’s how I’ve learned to keep these delicate trees looking their best without stressing them out.
Seasonal Timing is Everything: The instructions mention late winter/early spring and summer pruning, but here’s the thing: If you’re dealing with a tree that’s already showing signs of disease (like fungal spots or oozing sap), don’t wait for the ideal season—remove those branches immediately. Diseased wood spreads fast, and waiting could turn a minor issue into a major one. Just focus on removing the problem branches cleanly and sterilizing your tools between cuts.
Branch Collar Respect: In Step 2 and Step 3, the instructions emphasize cutting just outside the branch collar, and I can’t stress this enough. That swollen area isn’t just for show—it’s the tree’s natural healing shield. If you cut into it, you’re inviting rot and disease right at the wound site. Think of it like this: You wouldn’t cut into your own skin and expect it to heal perfectly. Give that collar room to do its job.
The 20% Rule for Thinning: When you’re thinning out the interior in Step 3, those 20% of smallest branches might seem insignificant, but they’re actually critical. These branches compete for sunlight and nutrients with the larger ones. Removing them opens up the canopy, letting light and air reach the inner branches. It’s like decluttering a closet—you might think you’re getting rid of little things, but it makes all the difference for what’s left.
Recovery Signs to Watch For: After pruning, the instructions mention watching for stress signs like yellowing leaves or oozing sap. Here’s what I’ve learned: If you see sap oozing from a cut, it’s not necessarily bad—it’s the tree’s way of sealing the wound. But if the sap is dark, sticky, and smells bad, that’s a red flag. It could mean the cut is too deep or the branch was diseased. In that case, you might need to make another cut just outside the oozing area to stop the flow and prevent further damage.
Pro Tips for Trim Weeping Cherry Tree
- Real talk: Pruning a weeping cherry tree well is all about patience and precision—not brute force. Here’s how I’ve le...
- Seasonal Timing is Everything: The instructions mention late winter/early spring and summer pruning, but here’s the t...
- Branch Collar Respect: In Step 2 and Step 3, the instructions emphasize cutting just outside the branch collar, and I...
Frequently asked questions
Got questions about keeping your weeping cherry tree looking its best? Here are answers to the most common concerns—so you can prune with confidence!
When is the best time to trim a weeping cherry tree?
For Prunus serrulata, late winter or early spring (just before buds swell) is ideal. Avoid heavy pruning in summer or fall, as it can stress the tree and invite disease. Light shaping cuts can happen anytime, but major work should wait for dormancy!
How much can I trim off without hurting the tree?
Never remove more than 25% of the tree’s canopy in one season. Weeping cherries are delicate—over-pruning weakens structure and reduces flowering. Focus on dead wood, crossing branches, and shaping, not drastic cuts. Patience pays off!
Why are my weeping cherry tree’s leaves yellowing after pruning?
Yellow leaves post-pruning often signal stress from over-cutting or powdery mildew (common in humid climates). Ensure cuts are clean (sterilize tools!) and avoid wetting foliage. If yellowing persists, test soil pH—cherries prefer 6.0–6.5.
Can I shape a weeping cherry tree into a standard form?
While possible, it’s not recommended—weeping cherries thrive with their cascading habit! Prune to maintain shape, not transform it. If you’re set on a standard form, consider grafting a different cultivar (like ‘Amanogawa’) onto a upright rootstock instead.
What should I do if my weeping cherry tree has pests after trimming?
Pests like borers or aphids often exploit fresh cuts. Seal pruning wounds with pruning sealant (for cuts > ½ inch). For infestations, use neem oil or insecticidal soap. Monitor for Japanese beetles—they love weeping cherries!
Wrapping up and next steps
Trimming your weeping cherry tree doesn’t have to be intimidating—just follow the three key cuts (dormant, post-bloom, and light summer shaping) to keep it thriving year-round! 🌿 With the right tools, timing, and technique, you’ll encourage lush growth, vibrant blooms, and a stunning silhouette.
Now that you’re equipped with the know-how, grab those pruners and get pruning!
Ready for more? Explore seasonal care tips or plan your next landscaping project—your tree (and garden!) will thank you. Happy pruning! ✂️🌸