Propagation
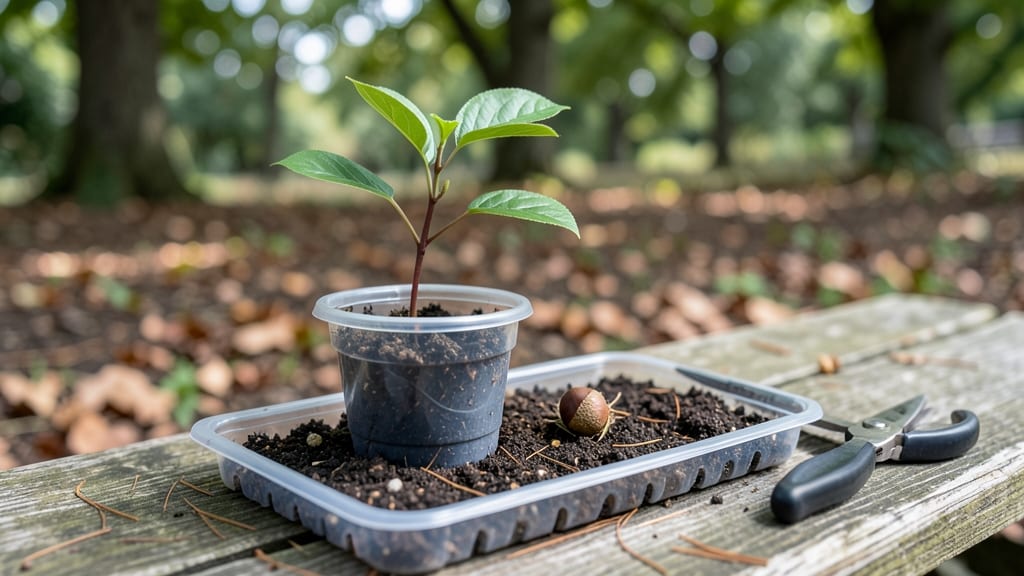
Growing a chestnut tree from a single nut is one of those rewarding projects that turns a simple fall walk into a decade-long investment. 🌱 The key starts with selecting the right nut—fresh, plump chestnuts with intact caps are your best bet, and they need a little winter chill to break dormancy first.
I’ve tried this with store-bought nuts, but the ones from your own yard (or a trusted supplier) germinate far more reliably.
The trickiest part is the stratification process—mimicking winter’s cold to wake up the seed. You’ll need a moist paper towel, a sealed plastic bag, and a fridge for about 3 months. Once sprouted, plant it 2 inches deep in well-draining soil, keeping it moist but not soggy.
Chestnuts are patient plants; don’t expect much above-ground growth the first year, but those roots will be busy establishing themselves.
By year 5, you’ll start seeing 3-4 foot saplings with compound leaves, and by 10 years, that little nut could be a 50-foot shade giant.
The payoff isn’t just the tree—it’s the satisfaction of nurturing something that’ll outlive you. Just watch for rot (from overwatering) and squirrels (they love fresh chestnuts too).
This method works best in zones 4-8, but with extra care (like winter protection in colder climates), you can grow them farther north. The real magic happens in the waiting—every spring, you’ll check for new shoots, dreaming of the day that tree provides shade, nuts, and stories for generations.
Let’s get those nuts sprouting!
📚 In This Guide
- What you need
- Instructions
- Tips and common mistakes
- Wrapping up and next steps
What you need
- ● Fresh chestnuts: 3–5 high-quality chestnuts (avoid store-bought roasted nuts—use fresh, unplanted ones from a tree).
- ● Water: Room-temperature water for soaking.
- ● Small pots or containers: 4–6" deep with drainage holes (1 per chestnut). Plastic nursery pots or yogurt cups work great!
- ● Well-draining potting mix: A blend of 50% peat or coco coir, 30% perlite or sand, and 20% compost.
- ● Plastic wrap or humidity dome: To keep soil moist while sprouting.
- ● Spray bottle: For gentle watering.
- ● Permanent outdoor location: Full sun to partial shade, with well-draining soil (pH 6.0–7.5). Test soil if possible!
- ● Seedling heat mat (if germinating indoors in cold climates).
- ● Fertilizer: Balanced 10-10-10 or organic compost tea (wait until spring).
- ● Mulch: Wood chips or straw to retain moisture and suppress weeds.
- ● Trellis or stakes: For young trees if wind is a concern.
- ● Soil pH test kit: Ensures optimal growing conditions.
Step-by-step guide to growing a chestnut tree from a nut
Here's how to transform a single chestnut into a sturdy, shade-providing tree with minimal fuss.
🌱 Step 1: Stratify the Chestnut for Successful Germination
Chestnuts need a cold period to break dormancy. Place your fresh chestnut in a plastic bag with a damp paper towel. Seal it loosely and refrigerate for 3-4 months—this mimics winter conditions. Check weekly to ensure the towel stays moist but not soggy; mold will kill your nut before germination begins.
Here's the thing—don't use roasted or store-bought chestnuts. Only fresh, uncooked nuts from a tree will sprout reliably. After stratification, you'll see a tiny root emerge first, followed by a shoot within 2-4 weeks once moved to warmth. This root growth signals the nut is ready to plant.
🪴 Step 2: Plant the Germinated Nut in a Deep Container
Use a 6-inch deep pot with drainage holes and fill it with a mix of 50% potting soil and 50% perlite. Plant the chestnut 2 inches deep, with the root pointing downward. Press the soil gently around it—you want firm contact but no compaction that could stunt root growth.
Place the pot in a sunny window or under a grow light for 12-14 hours daily. Chestnut seedlings are slow to establish but thrive in bright conditions. Keep the soil consistently moist, but never waterlogged—chestnuts hate soggy roots. You'll notice the first true leaves (not the initial seed leaves) emerge in 4-6 weeks, signaling robust growth.
☀️ Step 3: Transplant to the Ground After Root Development
Once the seedling reaches 12 inches tall with a sturdy stem, it's ready for outdoor planting. Choose a location with full sun and well-draining soil—chestnut trees despise waterlogged conditions. Dig a hole twice as wide as the root ball but no deeper than the container.
Here's where it gets fun—watch the seedling's growth spurt after transplanting. Water deeply immediately after planting, then mulch with 2-3 inches of organic mulch to retain moisture and protect roots. The first year focuses on root establishment, so avoid fertilizing—young chestnuts need time to adjust to their new home.
✂️ Step 4: Prune for Structure and Sunlight Access
In its second year, prune the tree to remove any crossing branches or weak growth. Chestnut trees develop a strong central leader, so focus on opening the canopy to allow sunlight to reach lower branches. Use clean, sharp pruners to make cuts just above a bud or branch collar—never leave stubs.
Real talk: Over-pruning will set your tree back. Aim to remove no more than 20% of the foliage in any given year. You'll see thicker, more vigorous growth in the following spring as the tree allocates energy to stronger branches rather than weak, shaded limbs.
🌿 Step 5: Maintain Through Maturity for Nut Production
By year 5, your chestnut tree will need consistent care. Water deeply once weekly during dry spells, and fertilize in early spring with a balanced 10-10-10 fertilizer. Chestnut trees produce nuts reliably after 10-15 years, but patience pays off—each tree can yield 50-100 pounds of nuts annually once mature.
Watch for signs of pests like chestnut weevils or blight. Early intervention with neem oil or proper sanitation prevents long-term damage. With proper care, your tree will grow into a majestic shade provider, producing nuts for decades.
Tips & tricks for perfect chestnut tree growth
Common pitfalls—and how to sidestep every one—when growing a chestnut tree from a nut.
Stratification Timing: Start your 3-4 month cold stratification in early fall to ensure the nut completes its dormancy cycle naturally. If you begin later, you might miss the optimal germination window in spring. I recommend marking your calendar when you refrigerate the chestnut so you can move it to warmth at the right time—this is when you'll see that first root emerge within 2-4 weeks. The key is consistency: check weekly to maintain that damp (not soggy) paper towel environment.
Lighting Strategy: Chestnut seedlings thrive on 12-14 hours of light daily, but natural sunlight varies by season. If your window light isn't sufficient, supplement with a grow light positioned 6 inches above the pot. Rotate the pot daily so the seedling grows straight rather than leaning toward the light. I've seen seedlings grow lopsided when left in one spot—it's an easy fix that makes all the difference for a sturdy tree.
Transplanting Readiness: Wait until your seedling reaches 12 inches tall with a sturdy stem before transplanting outdoors—this ensures the root system is developed enough to handle the shock of moving. Look for new growth and a healthy green color as signs of readiness. When you do transplant, water deeply immediately after planting to help the roots establish in their new home. The first year is all about root growth, so resist the urge to fertilize—young trees need time to adjust.
Pruning Precision: In its second year, focus on removing only 20% of the foliage during pruning to avoid stressing the tree. Use clean, sharp pruners to make cuts just above a bud or branch collar—never leave stubs. This technique promotes thicker, more vigorous growth in the following spring. I always prune in late winter or early spring before new growth begins, which gives the tree time to recover before the growing season.
Pro Tips for Grow A Chestnut Tree From A Chestnut
- Common pitfalls—and how to sidestep every one—when growing a chestnut tree from a nut.
- Stratification Timing: Start your 3-4 month cold stratification in early fall to ensure the nut completes its dormanc...
- Lighting Strategy: Chestnut seedlings thrive on 12-14 hours of light daily, but natural sunlight varies by season. If...
Frequently asked questions
Got questions about growing a chestnut tree from a nut? You’re not alone! Here are some of the most common queries—and their straightforward answers—to help you succeed.
Can I grow a chestnut tree from any chestnut I find?
Not all chestnuts are created equal! Only sweet chestnuts (genus Castanea) will grow true-to-type trees. Avoid horse chestnuts (conkers) or water chestnuts—they won’t produce edible nuts or viable trees. Look for plump, unblemished nuts with a smooth cap.
How long does it take for a chestnut tree to bear nuts?
Patience is key! Sweet chestnut trees typically take 10–15 years to produce their first nuts, though some dwarf varieties may fruit earlier (around 5–7 years). Factors like climate, soil, and care speed up the process—but don’t rush it!
Do I need to plant more than one chestnut tree for pollination?
Yes! Chestnut trees are not self-pollinating. Plant at least two compatible varieties (e.g., ‘Paragon’ and ‘Marigoule’) within 50–100 feet of each other for successful nut production. Check local nurseries for pollination pairs.
What’s the best way to protect my young chestnut tree from pests?
Watch for chestnut weevils and leaf miners, which love tender saplings. Use row covers in early spring, apply neem oil as a natural deterrent, and keep the base mulched (but not piled against the trunk) to deter rodents.
How big will my chestnut tree grow, and do I need to prune it?
Sweet chestnuts can reach 60–80 feet tall with a sprawling canopy—ideal for shade but not small yards! Prune in late winter to remove deadwood and shape the tree. Avoid heavy pruning when young, as it stresses the root system.
Wrapping up and next steps
Growing a chestnut tree from a nut is a rewarding journey that blends patience with nature’s magic. 🌱 With the right care—from selecting fresh nuts to nurturing seedlings—you’ll soon enjoy the sweet scent of blossoms and the promise of future harvests. Your next step? Plant that first nut this fall and watch as your backyard transforms into a thriving chestnut grove!
Remember: Every tree starts with a single seed. Your adventure begins now!